

Monitoring Points
💡 Monitoring Points
Monitoring Points Tool helps you manage all your monitoring points. Let's see how it works."
Access
1. Monitoring Points Types
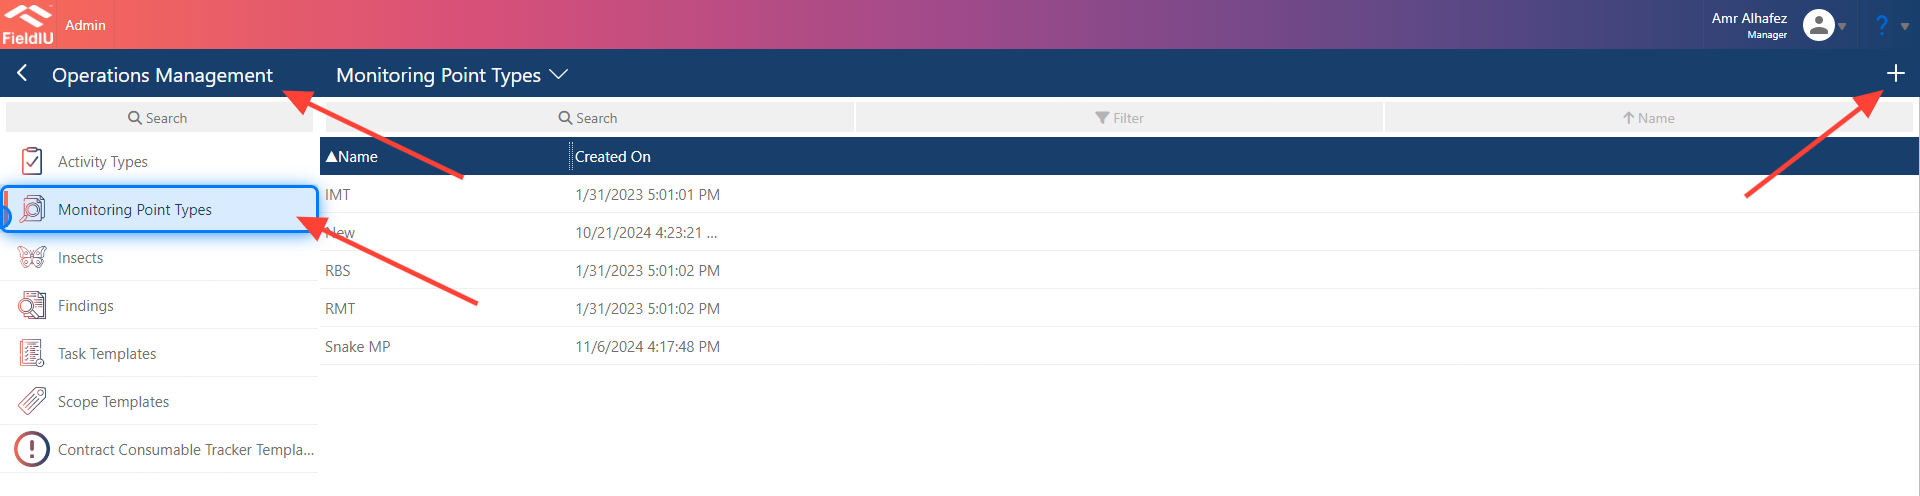
To access the Monitoring Points, click on the 'Operation Management' button in the side menu, then select the 'Monitoring Points Types' button.
This will display a list of monitoring points, and from here, you can add a new one by clicking the '+' button in the top right corner.
2. Main Information
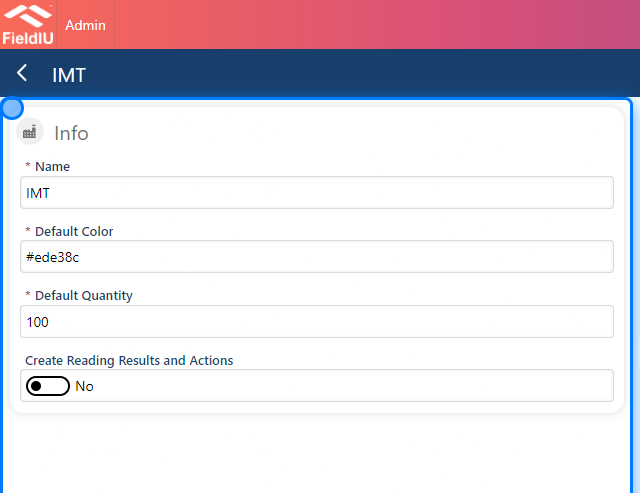
To create a new Monitoring Point, you need to fill in the main information:
-
Name : Enter a name for the monitoring point.
-
Default Color : Insert the hex code to set the color of the point on the floor map.
-
Default Quantity : Specify the default quantity.
-
Create Reading Results and Actions : You can check 'Yes' if you want to use the default reading results and actions, or check 'No' if you'd like to enter them manually. " we will cover these details in the next steps"
3. Monitoring Points Details
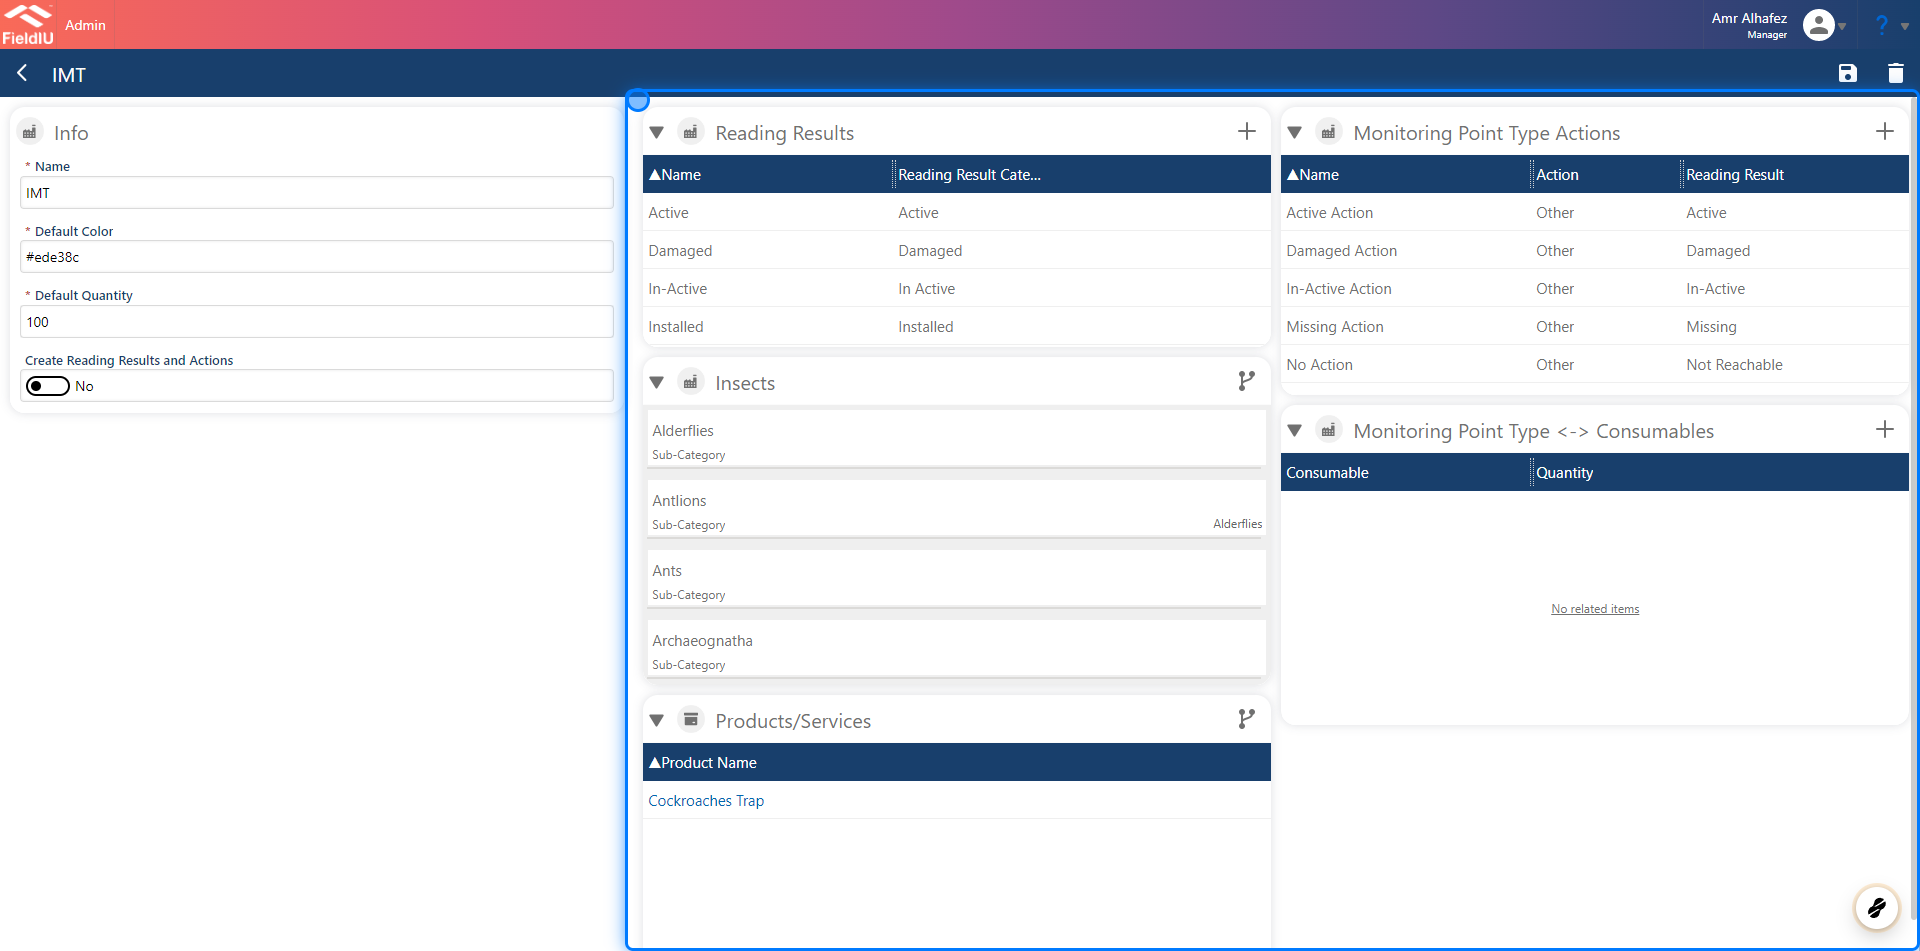
Once you save, new sections will appear:
-
Reading Results
-
Monitoring Points Type Actions
-
Insects
-
Monitoring Points Type ↔ Consumable
-
Product / Service
4. Reading Results
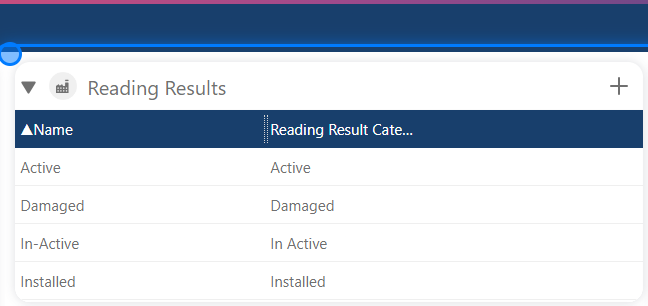
Reading Results will help you assign a reading status to the monitoring point when you check it at the location.
By default, we use the following statuses:
-
Active : There is something in the trap.
-
Damaged : The monitoring point is broken or malfunctioning.
-
Inactive : The monitoring point is empty or normal.
-
Installed : The monitoring point is newly installed."
5. Monitoring Point Type Action
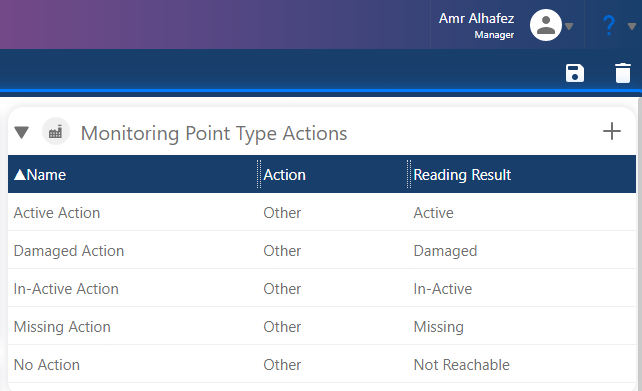
In the Monitoring Point Type Action , you need to specify the action that should be taken based on the reading result.
For example, if the status is Damaged , the action might be to replace the monitoring point.
In this section, you define the actions that will be triggered for each reading result.
6. New Monitoring Point Type Action
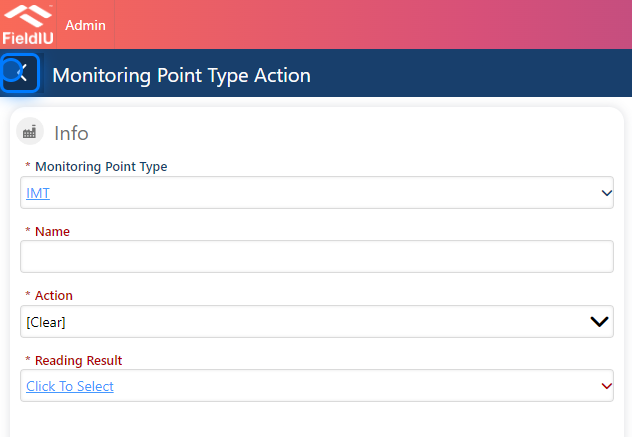
To create a new Monitoring Point Type Action , you need to enter certain details, such as:
-
Name : The name of the action.
-
Action : A description of the action to be taken.
-
Selecting Reading Result : Choose the corresponding reading result for which the action will be triggered.
7. Actions
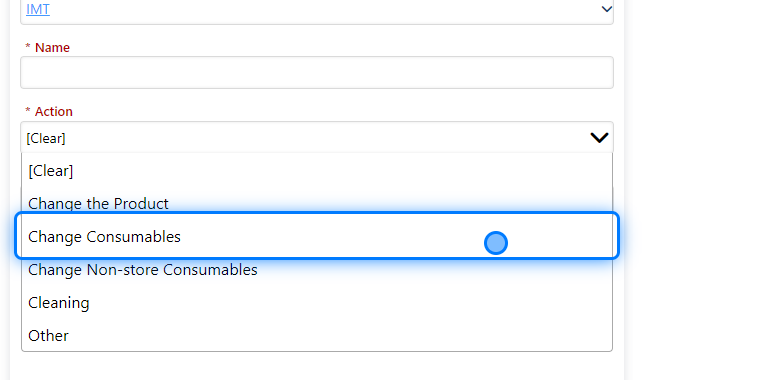
Here, you need to select the action that the staff will take.
For example, if the action is Change Consumable , it will be linked to the inventory, which will decrease the item quantity from the inventory.
8. Reading Result
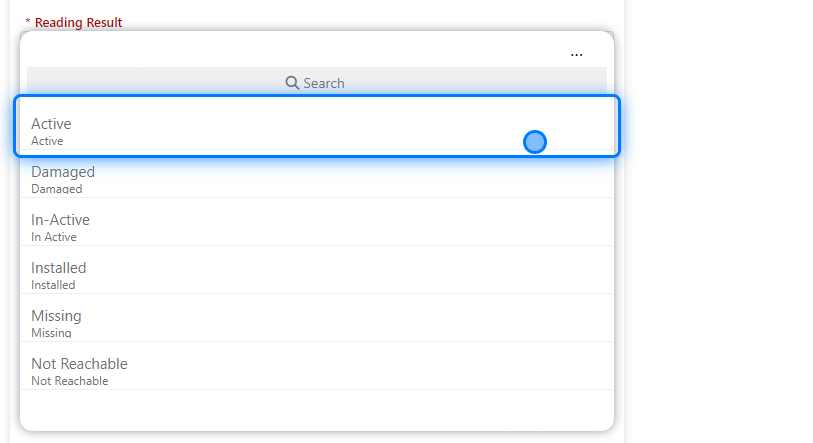
Here, you choose the reading result to which you want to apply this action.
⚠️ Save & Back
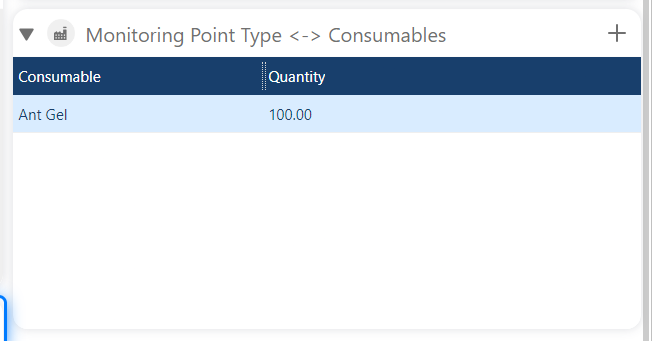
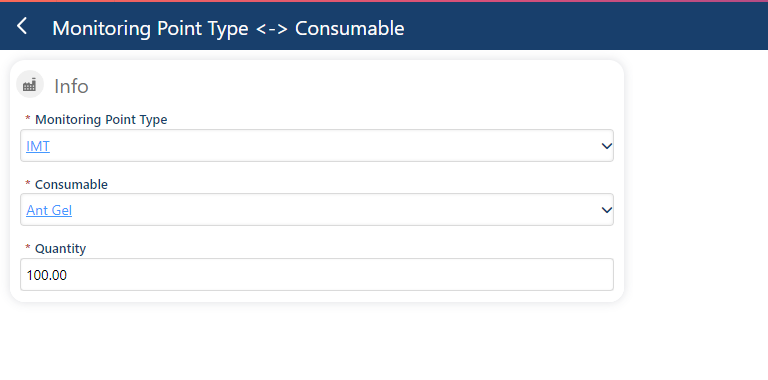
9. Monitoring Point Type ↔ Consumables
If you want to add a related consumable to the monitoring point, you can do so in this section. This will help reduce the quantity from the inventory when the monitoring point is used in a work order.
10.
11. Product / Services
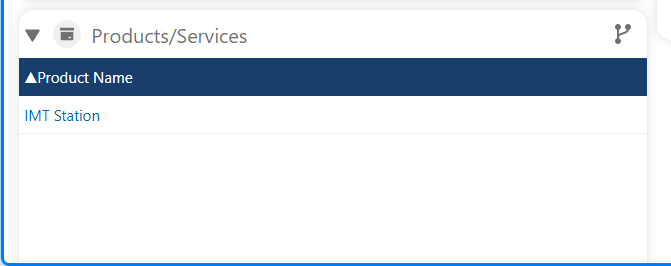
In this section, you need to select the point as a Product from the product list.
To do this, simply click on the link icon in the top-right corner and select the product.
⚠️ Save !!
Please remember to save your changes.
12. Insects
You can associate with type of Insects you want the field staff to count in case an active reading was recorded
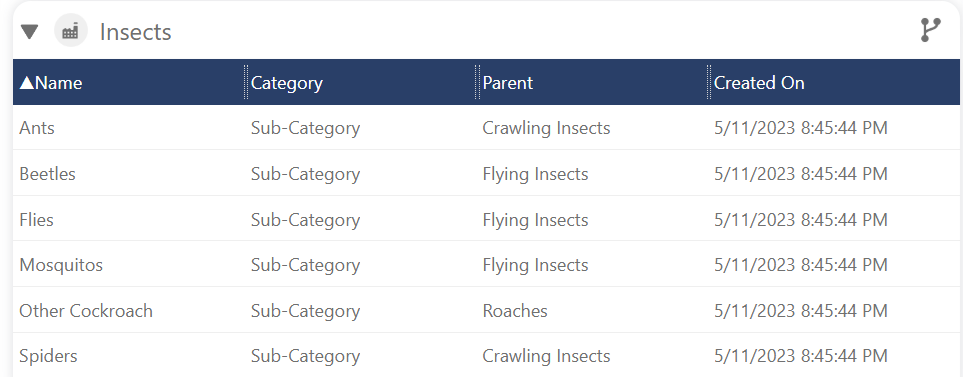
💡 You can link an Insect Group, or Insect�����������������������