

Approval " Example "
Trigger
💡 What Is Trigger ?
The trigger determines when the approval message will be shown and when it will stop, asking for approval. For example, you can set it to trigger when the status changes or when a specific value is selected in an entity
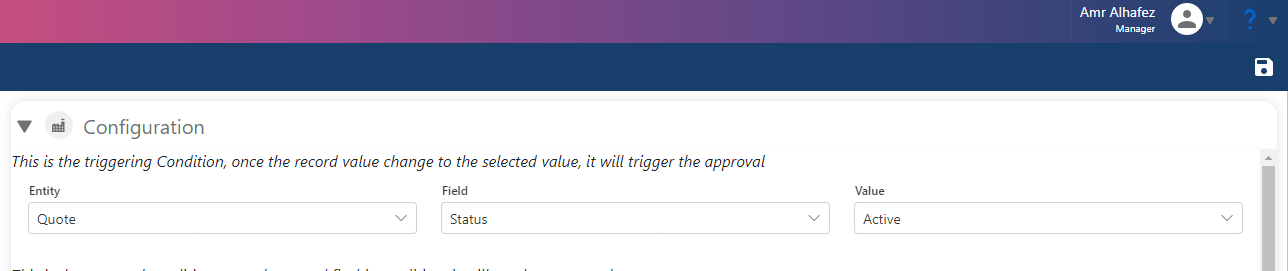
1. Selecting Trigger Entity
-
Select the entity on which we want to trigger the approval. In our case, it's the 'Quote' entity.
-
Next, choose the field that will trigger the approval.
-
Finally, select the value that will activate the trigger."
2. Single Approval Condition (Interior Entity Field)
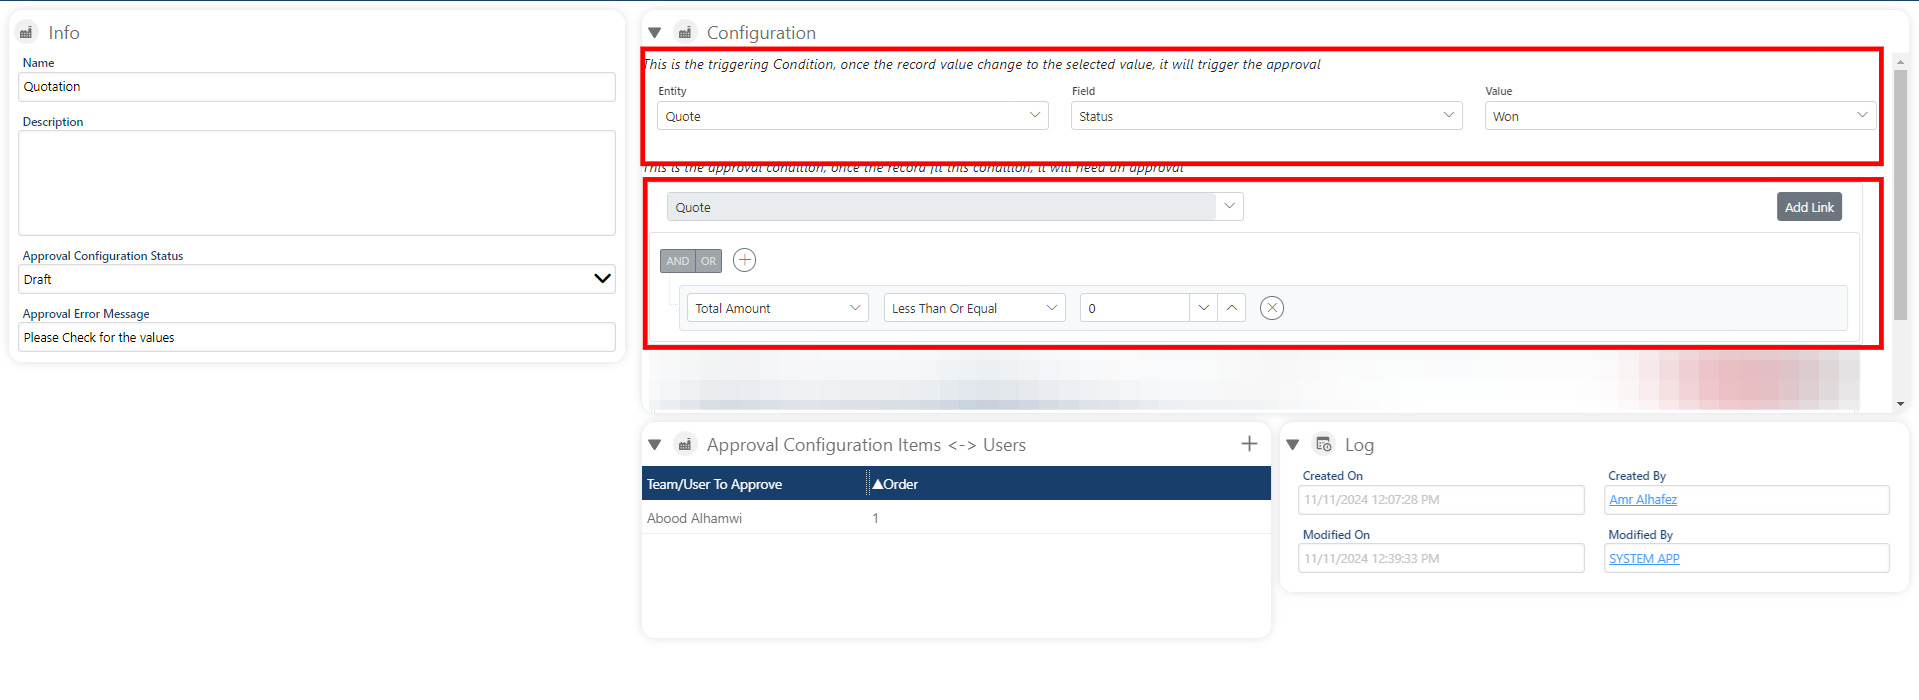
In this case, we set the trigger on the Quote entity. When the quote status changes to 'WON,' the system will check the condition we defined:
'If the total amount in the Quote entity is equal to or less than 0, an error message will appear, and approval will be required.'
⚠️ Related Entity Condition
What if we want to trigger based on one entity and set a condition from another entity?
For example, we want the trigger to activate when the quote status is 'WON,' but the condition should be based on the 'Service' related to the quote, specifically when the service is 'Snake Service.'
3. Related Entity Condition
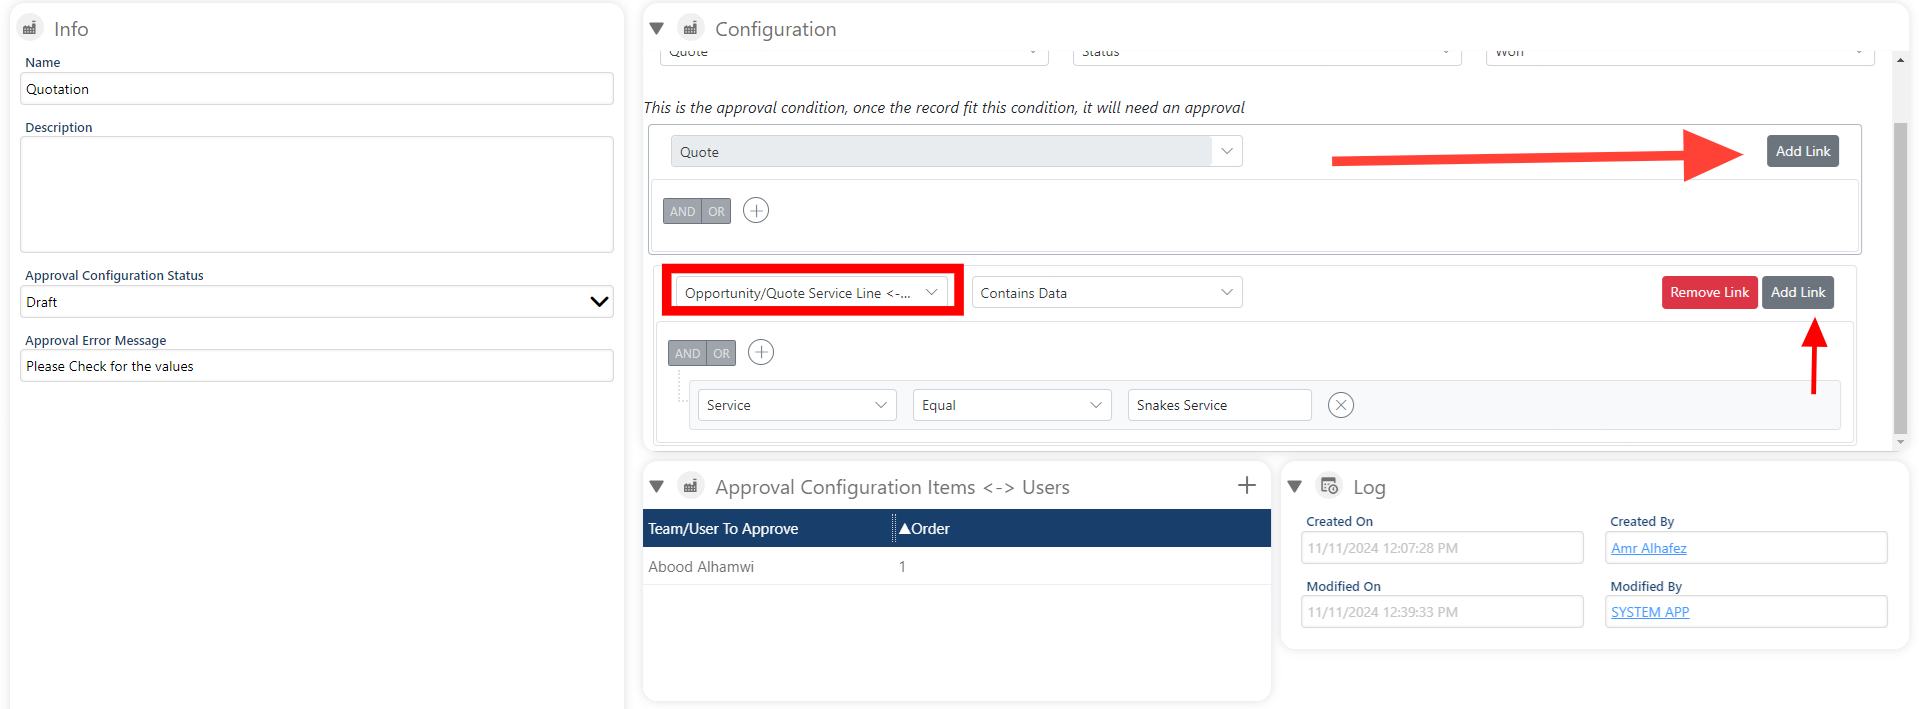
To set the condition based on a related entity, click on the 'Add Link' button to add the linked entity you want to use for the condition.
Note: Only related entities can be linked. You cannot link an entity unless it is related to the targeted entity.
Once the linked entity is added, a new condition section will appear. From there, simply select the linked entity and choose the appropriate operator for the condition.
💡 Example
Let's create an approval process that will request approval when the quote status is 'Active,' the total amount is greater than 5000 AED, and the service associated with the quote is 'Snake Service.'
Conditions
4. First Condition
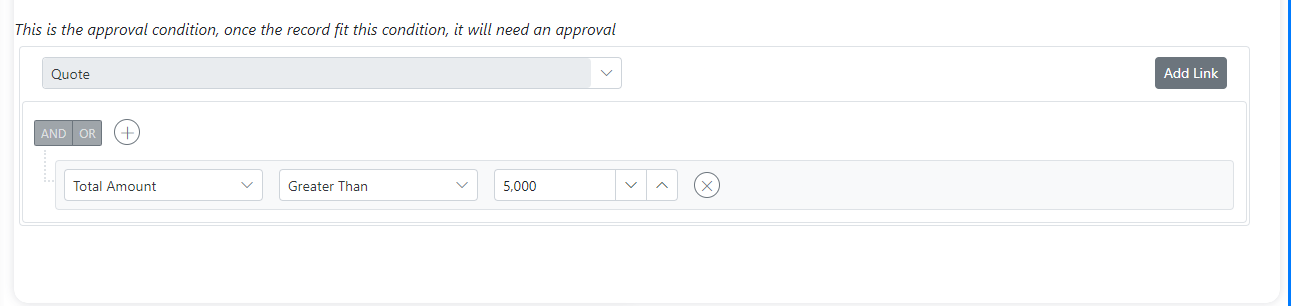
Our first condition is: 'The total amount should be greater than 5000 AED.
-
By default, the quote fields are available in the first condition. We need to select the 'Total Amount' field.
-
Select the operator 'Greater than.'
-
Enter the amount '5000' in the value field.
⚠️ Link Entity
Now, if we search for the 'Quote ↔ Service' field to select 'Snake Service' in our second condition, we won't find it directly in the Quote entity.
This is because the 'Service' field is related to the Quote entity, not part of it. To resolve this, we need to click on the 'Add Link' button and select the related entity we want to use.
Let's go through this step by step.
5. Add Link
By clicking the 'Add Link' button, a second condition field will be created automatically.
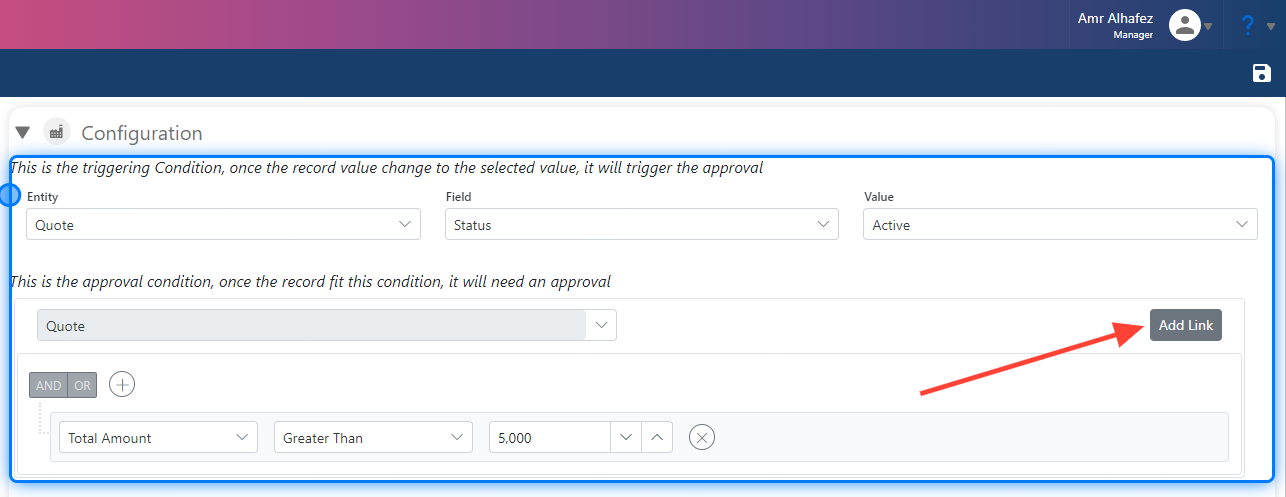
6.
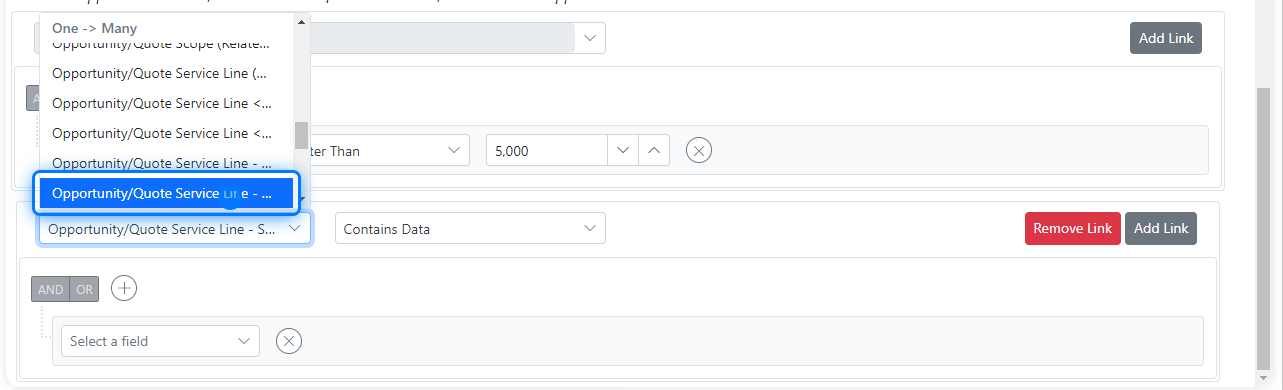
As you can see, we can select the entity we want to use. These entities are related to the Quote entity.

7.
Select : Opportunity/Quote Service Line ↔ Service (Opportunity/Quote)
💡 Setup 2nd Condition
Let's set up our second condition. We want to select the 'Service' field and set it to equal 'Snake Service.'
8. Selecting Field & Operator
As in our example, we need to select the 'Service' field, choose the 'Equal' operator, and finally select 'Snake Service'.
You can remove the link by clicking on the 'Remove Link' button.

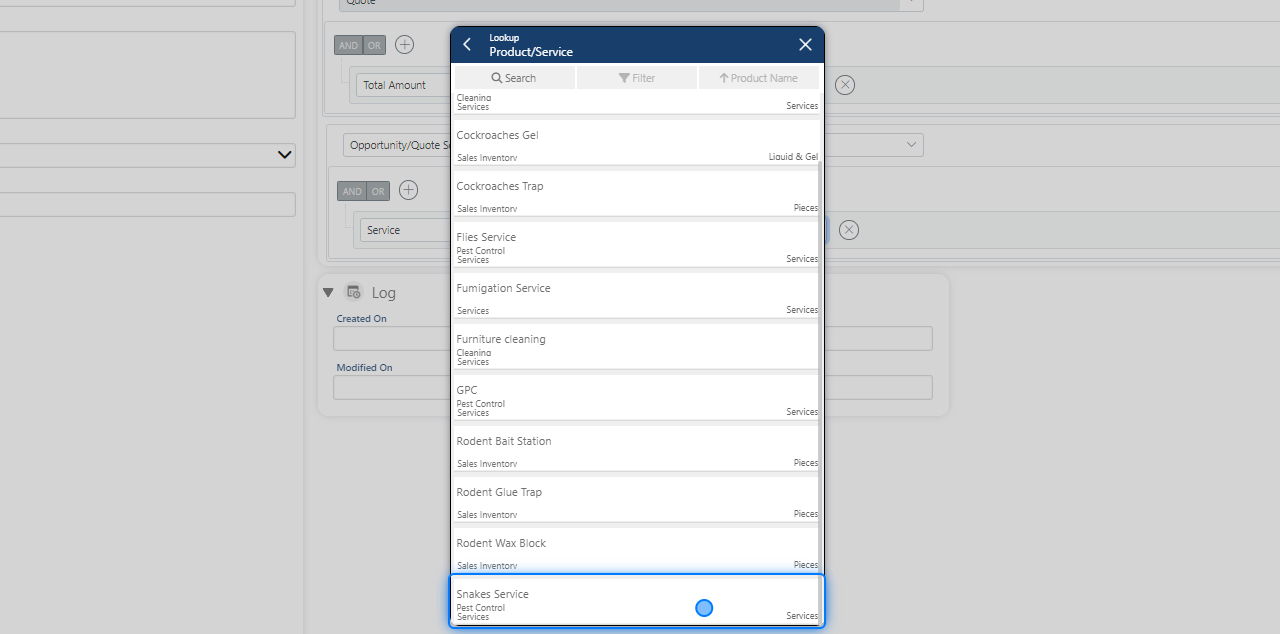
9. Select the service
By clicking on the value field to select our service, a new popup will open, displaying all the services in that field. We need to select 'Snake Service' from the list.
10. All Set
Now, let's double-check our link condition to ensure everything is set correctly.
Service equals 'Snake Service,' and that's exactly what we want.

Select The Approver
💡 Save to get all the sections
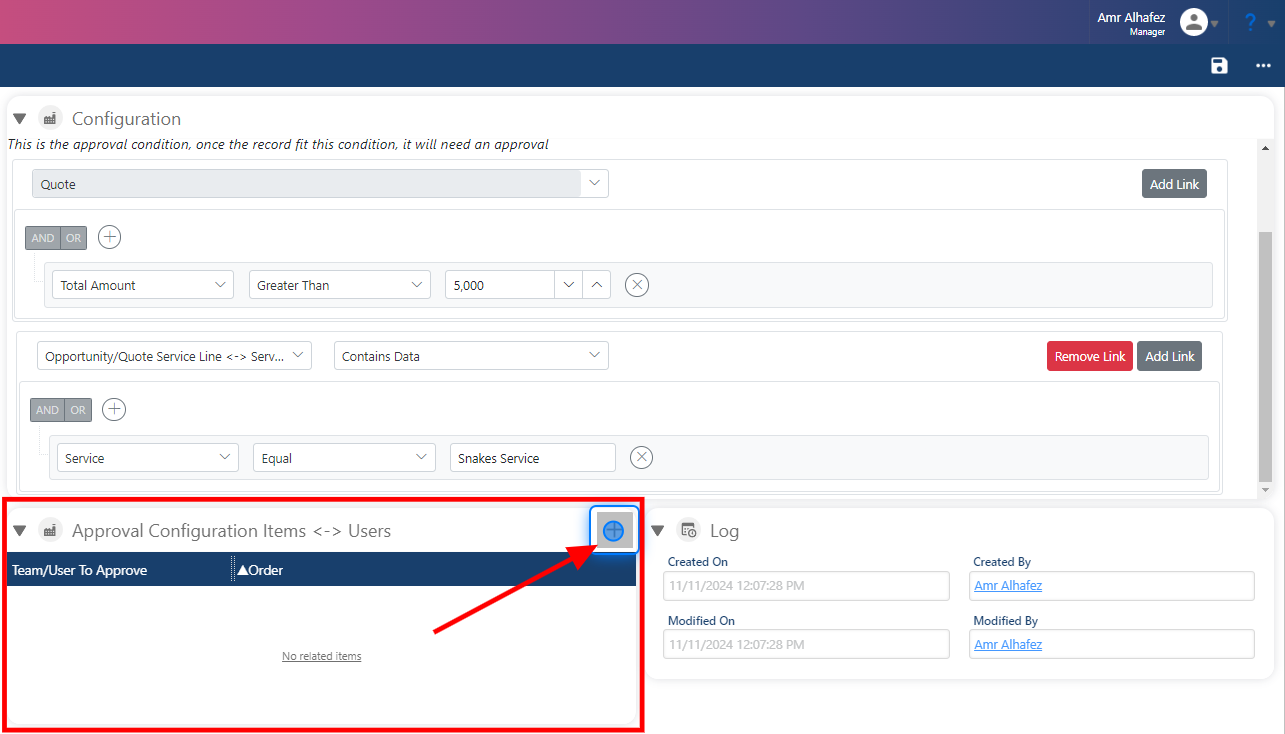
To set the approver, you first need to save the approval. Once saved, the 'Approver' section will appear for you.
11. Save
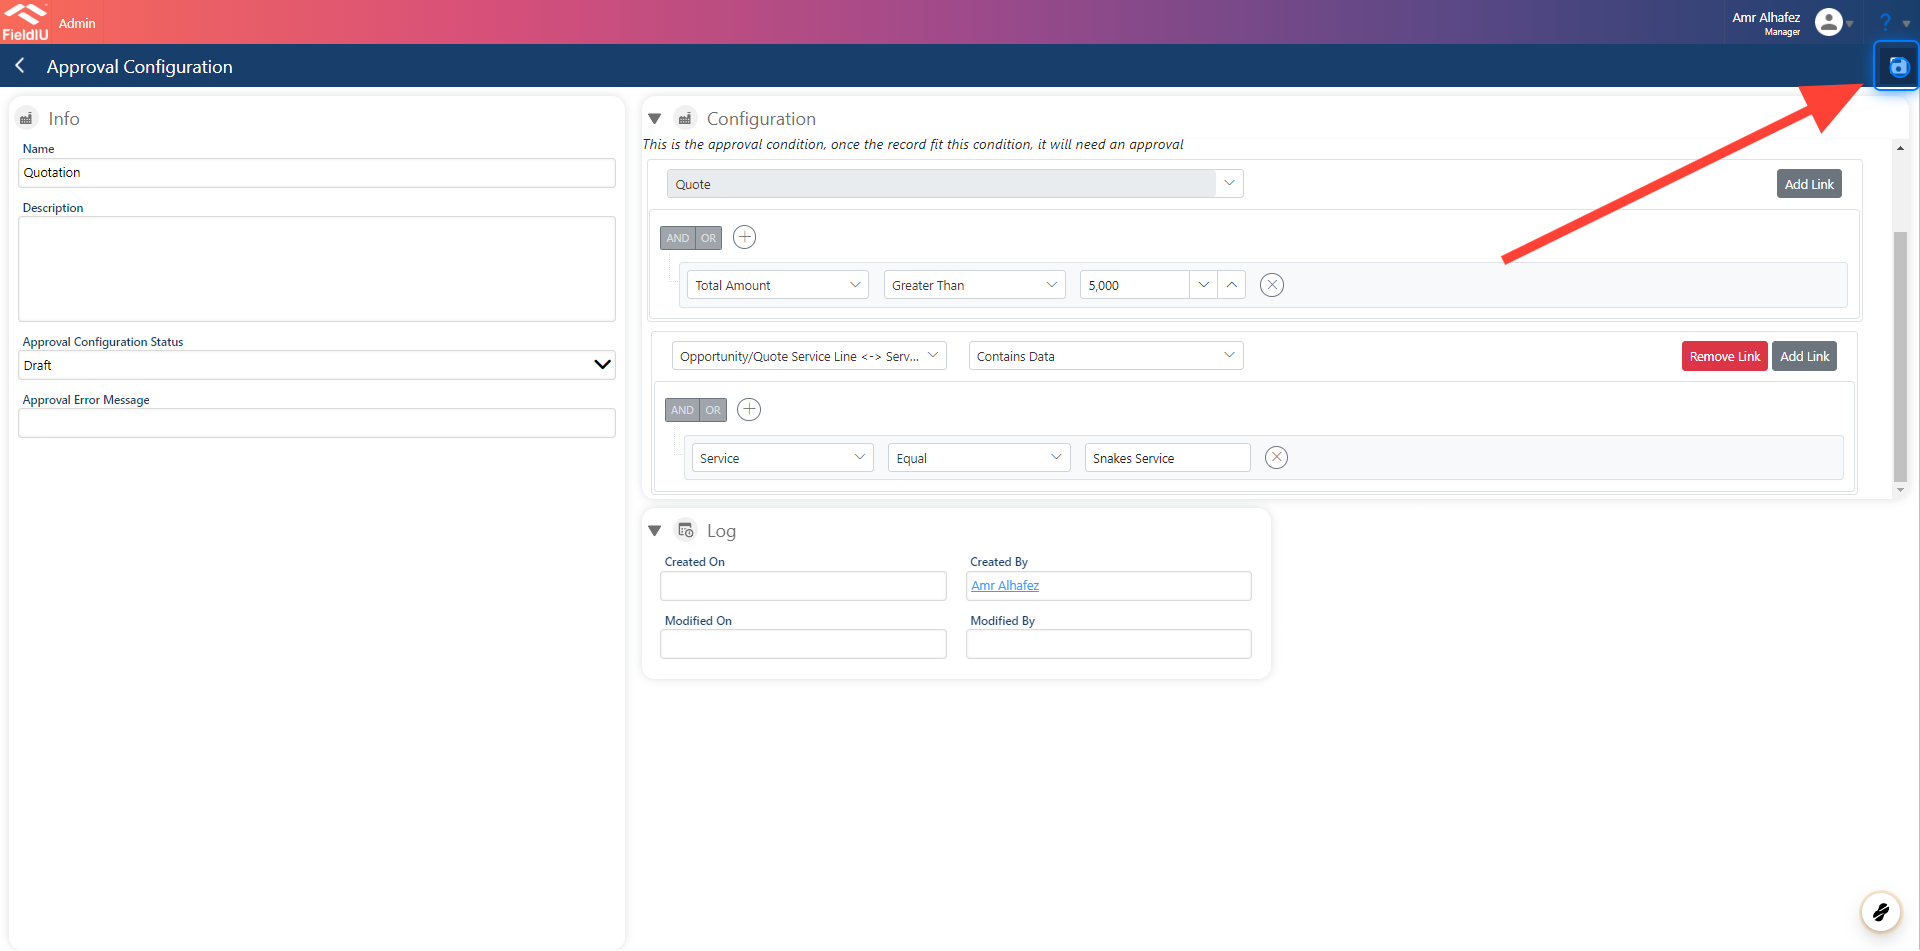
12. Select User
As you can see, a new section appears once we save the approval. Here, you can select the approver.
For more details on this section, please refer to the Approval Documentation.
13. Save & Publish
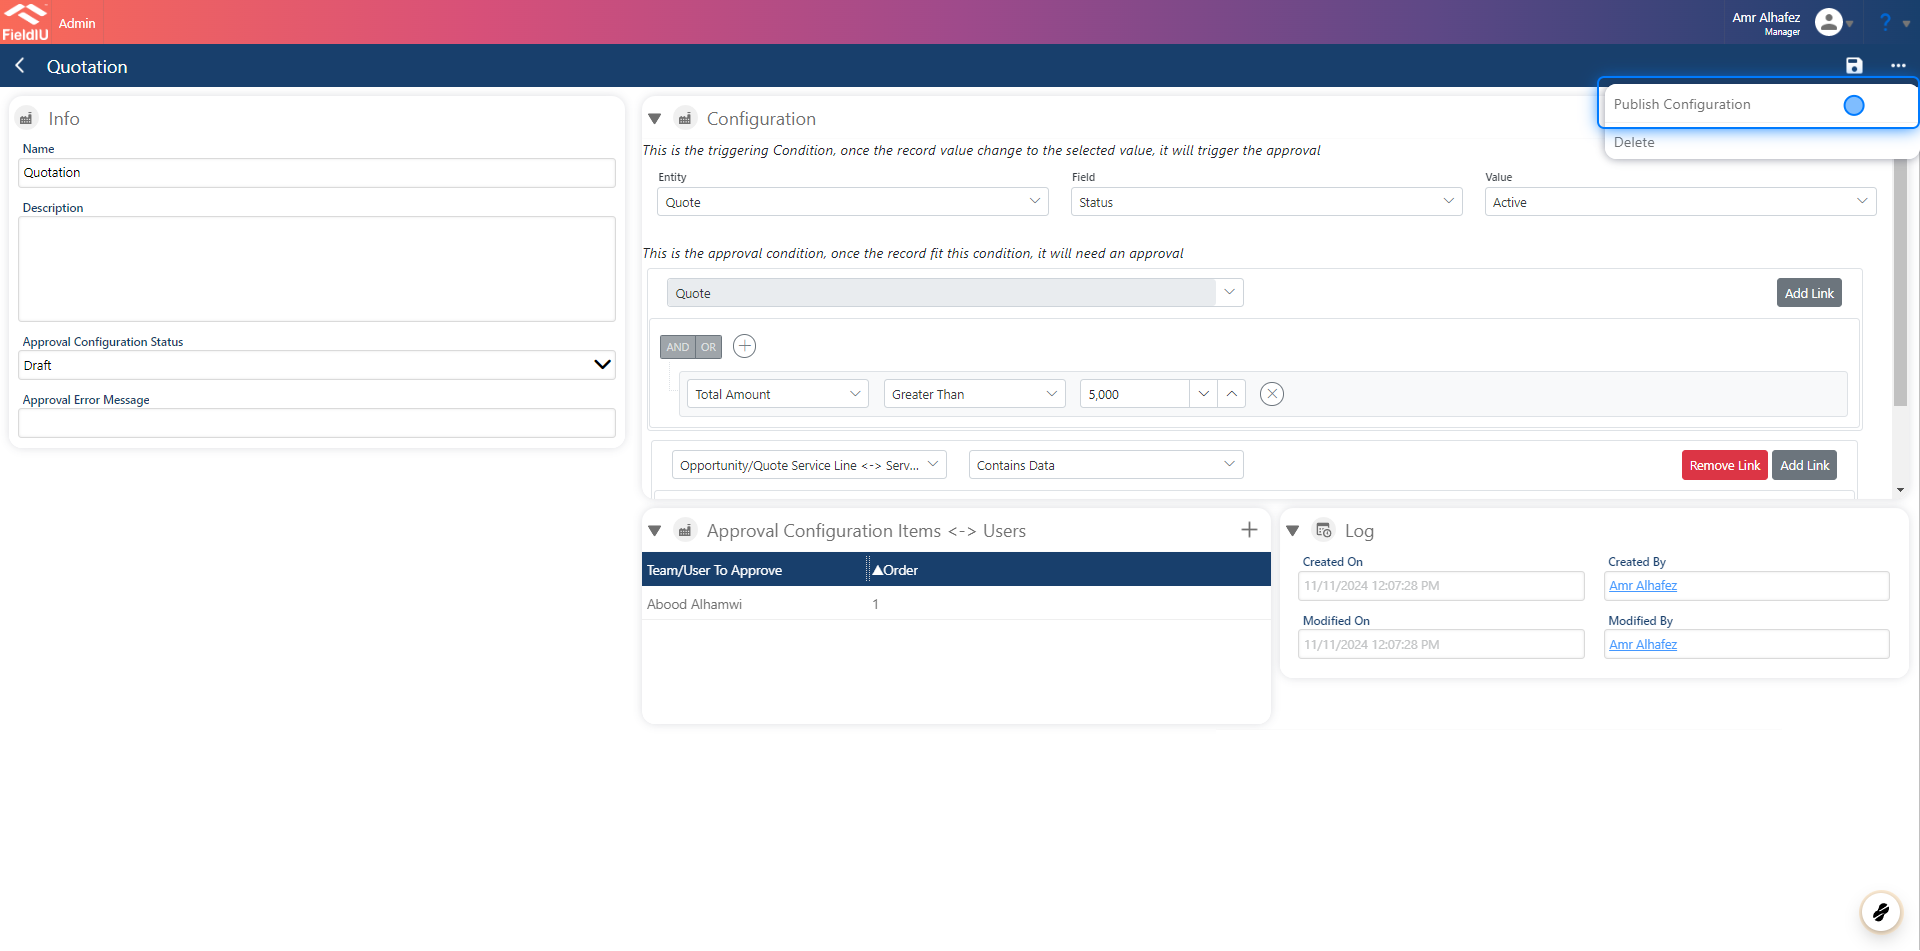
After finishing your work, you need to save and then publish the approval for it to start working.
Click on the three-dot button in the top right corner, and you'll see the 'Publish' button. Just click it to publish the approval.
 �����������������������