

Approving
💡 Now we will see the process of the approve
We created an example approval to demonstrate how a user with the permission to approve can make the decision.
1. Example
We created an example for inventory transfer, where anyone wanting to transfer a dangerous product must first obtain the Operation Manager's approval.
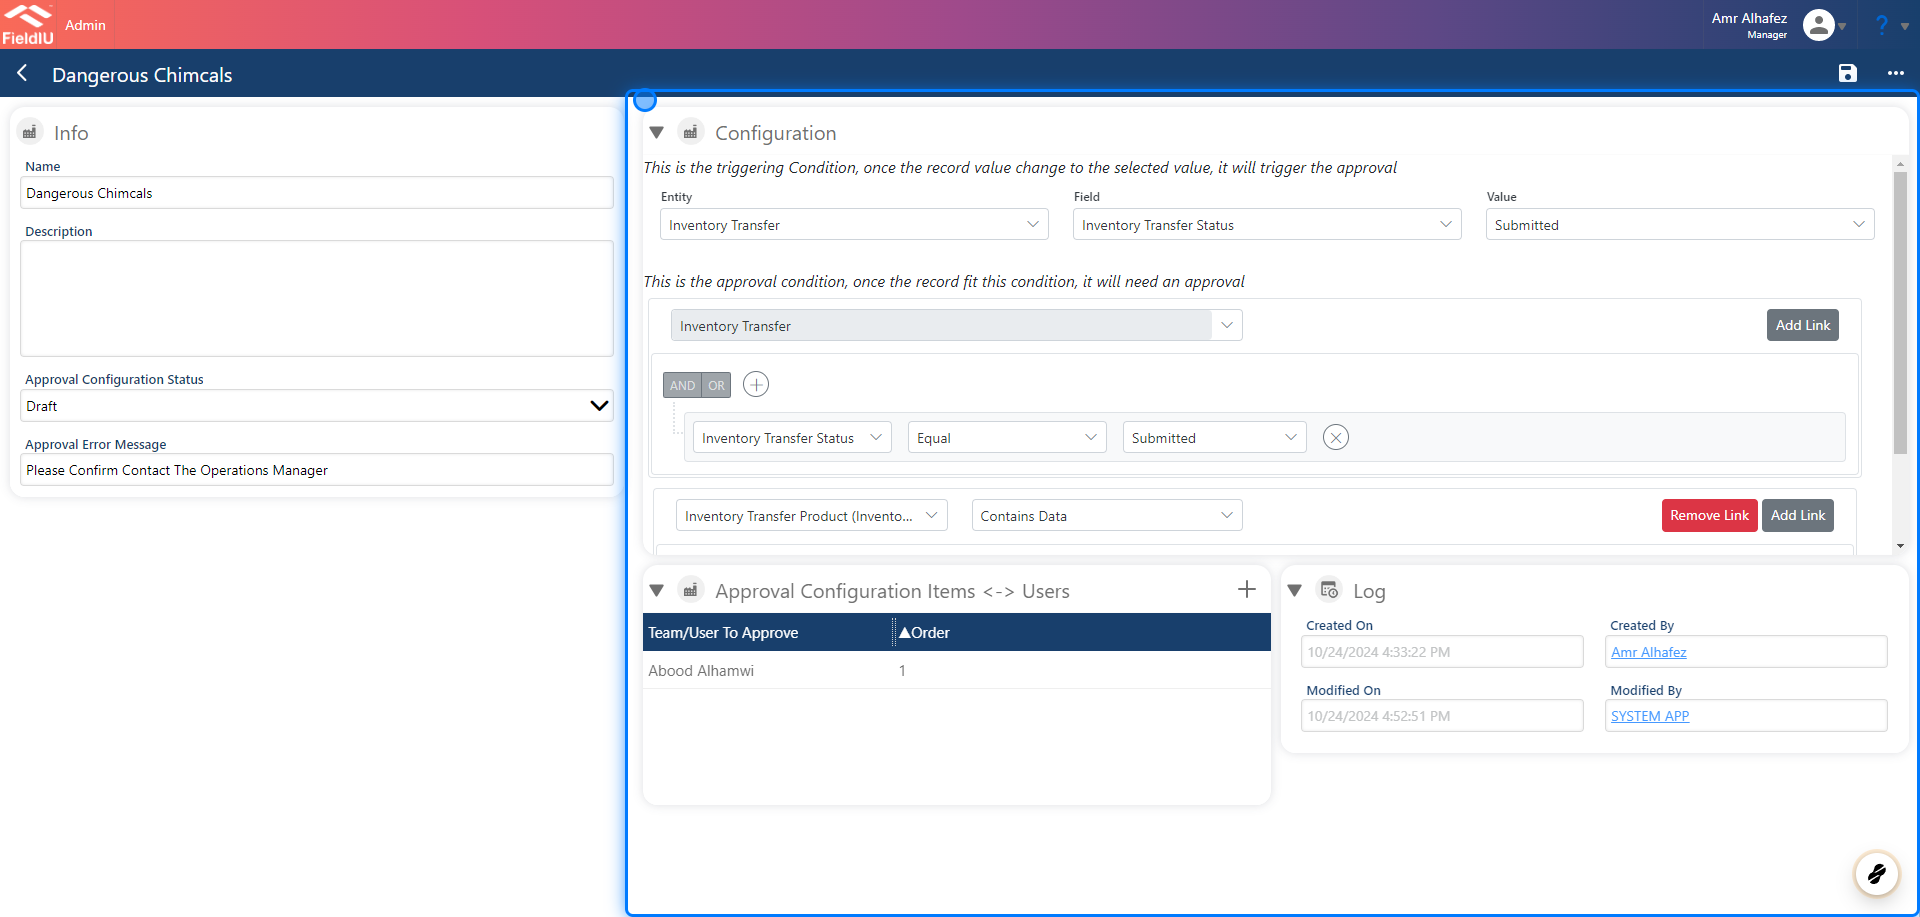
2. Trigger Entity
We chose 'Inventory Transfer' as the trigger entity and selected the value 'Submitted' to trigger the function. Now, the request will require approval from the Operation Manager before the transfer process can be completed.
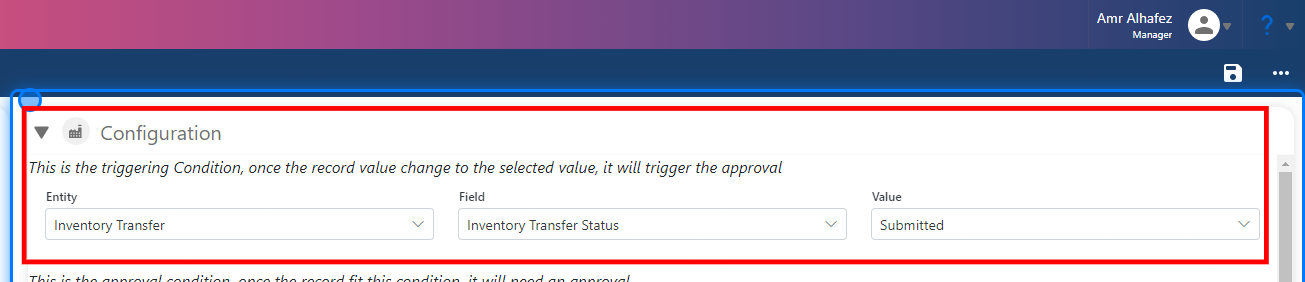
3. Function
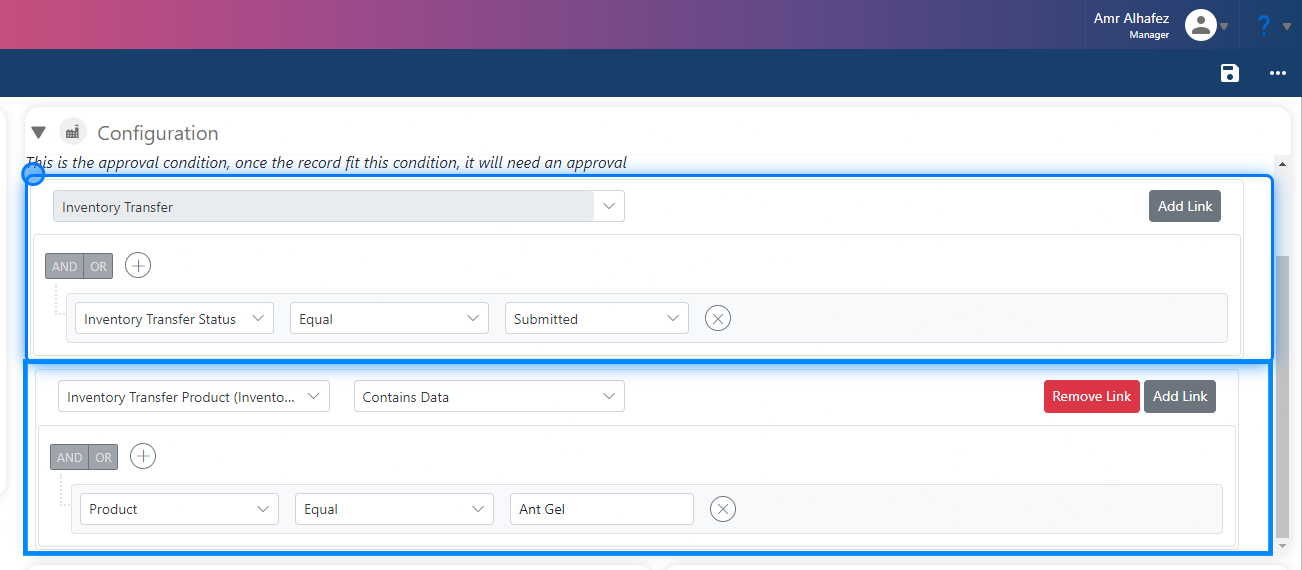
As you can see, we created the main function where the trigger is activated if the 'Inventory Transfer' status is equal to 'Waiting for Source Approval.' We also added a linked entity for the product, which is 'Inventory Transfer Product.'
Now, we can create another function on this linked entity to specify the dangerous products. In our example, we will choose 'Ant Gel.'
The function will be:
-
Field -> Product
-
Operator -> Equal
-
Value -> Select the product (e.g., Ant Gel).
You can also use the logical function OR to add more products, or AND to combine conditions for more specific criteria.
4. Transfer
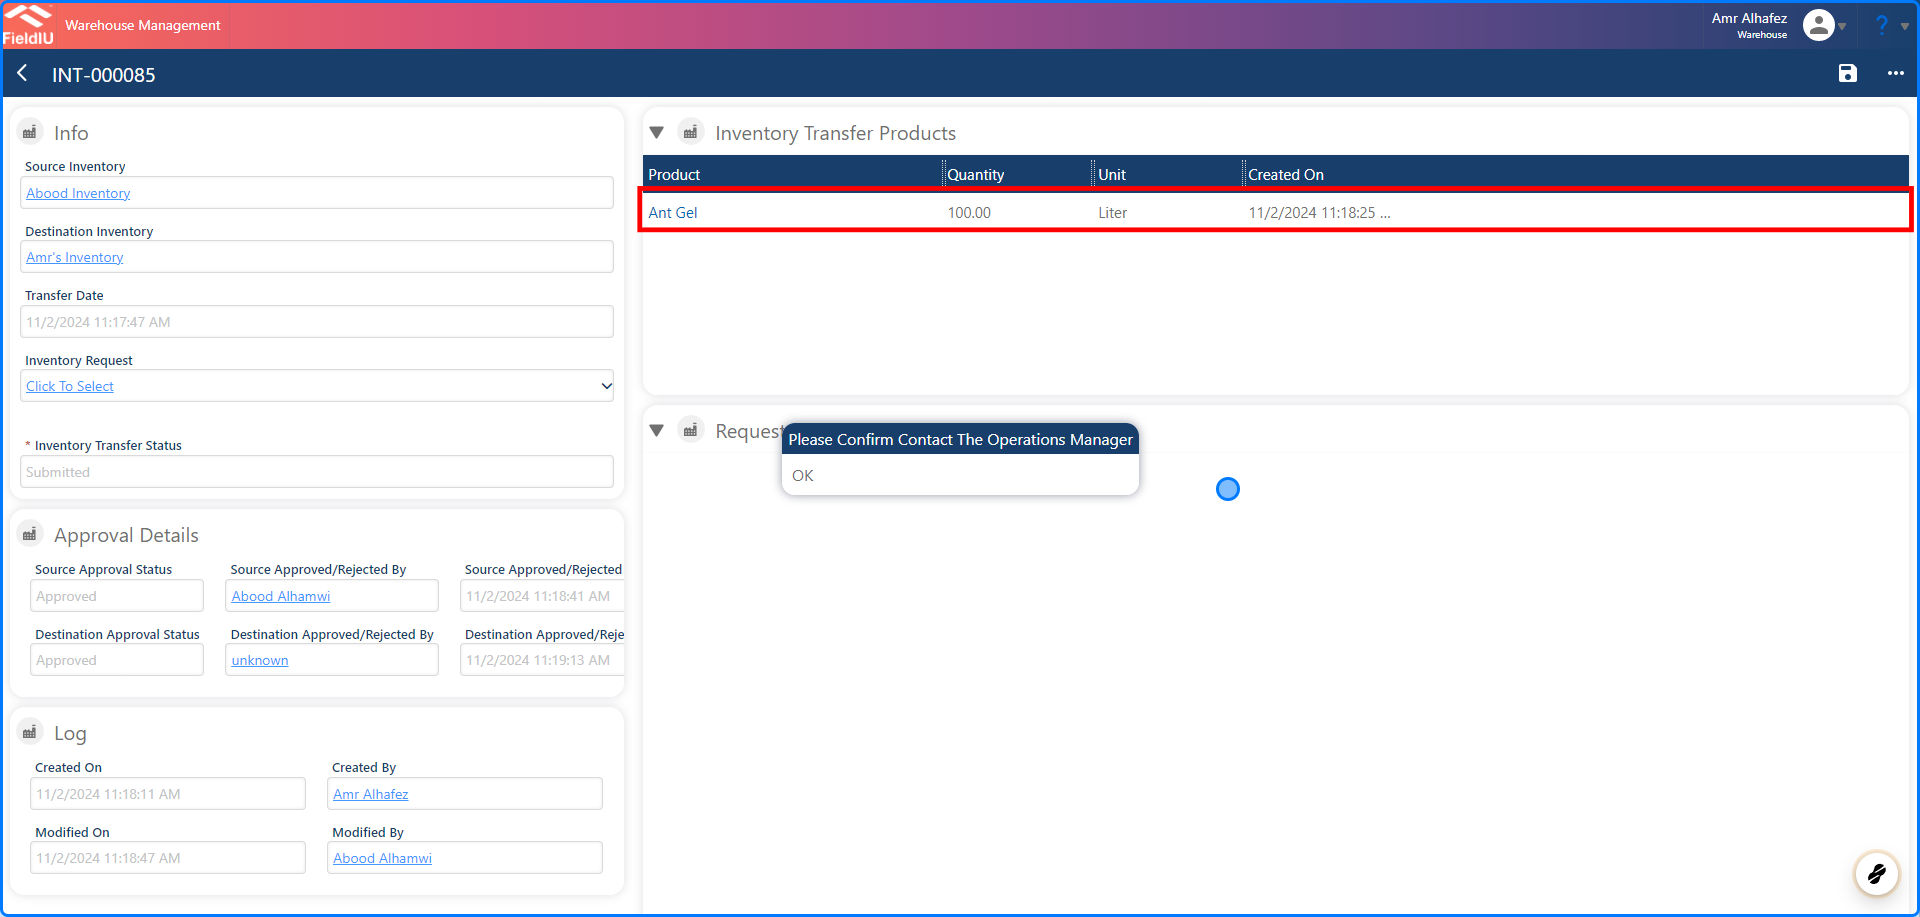
Once any transfer is saved with the approval settings we created, an error message will appear displaying the same approval error that we outlined in the approval creation steps.
Where To Approve
5. Operation App
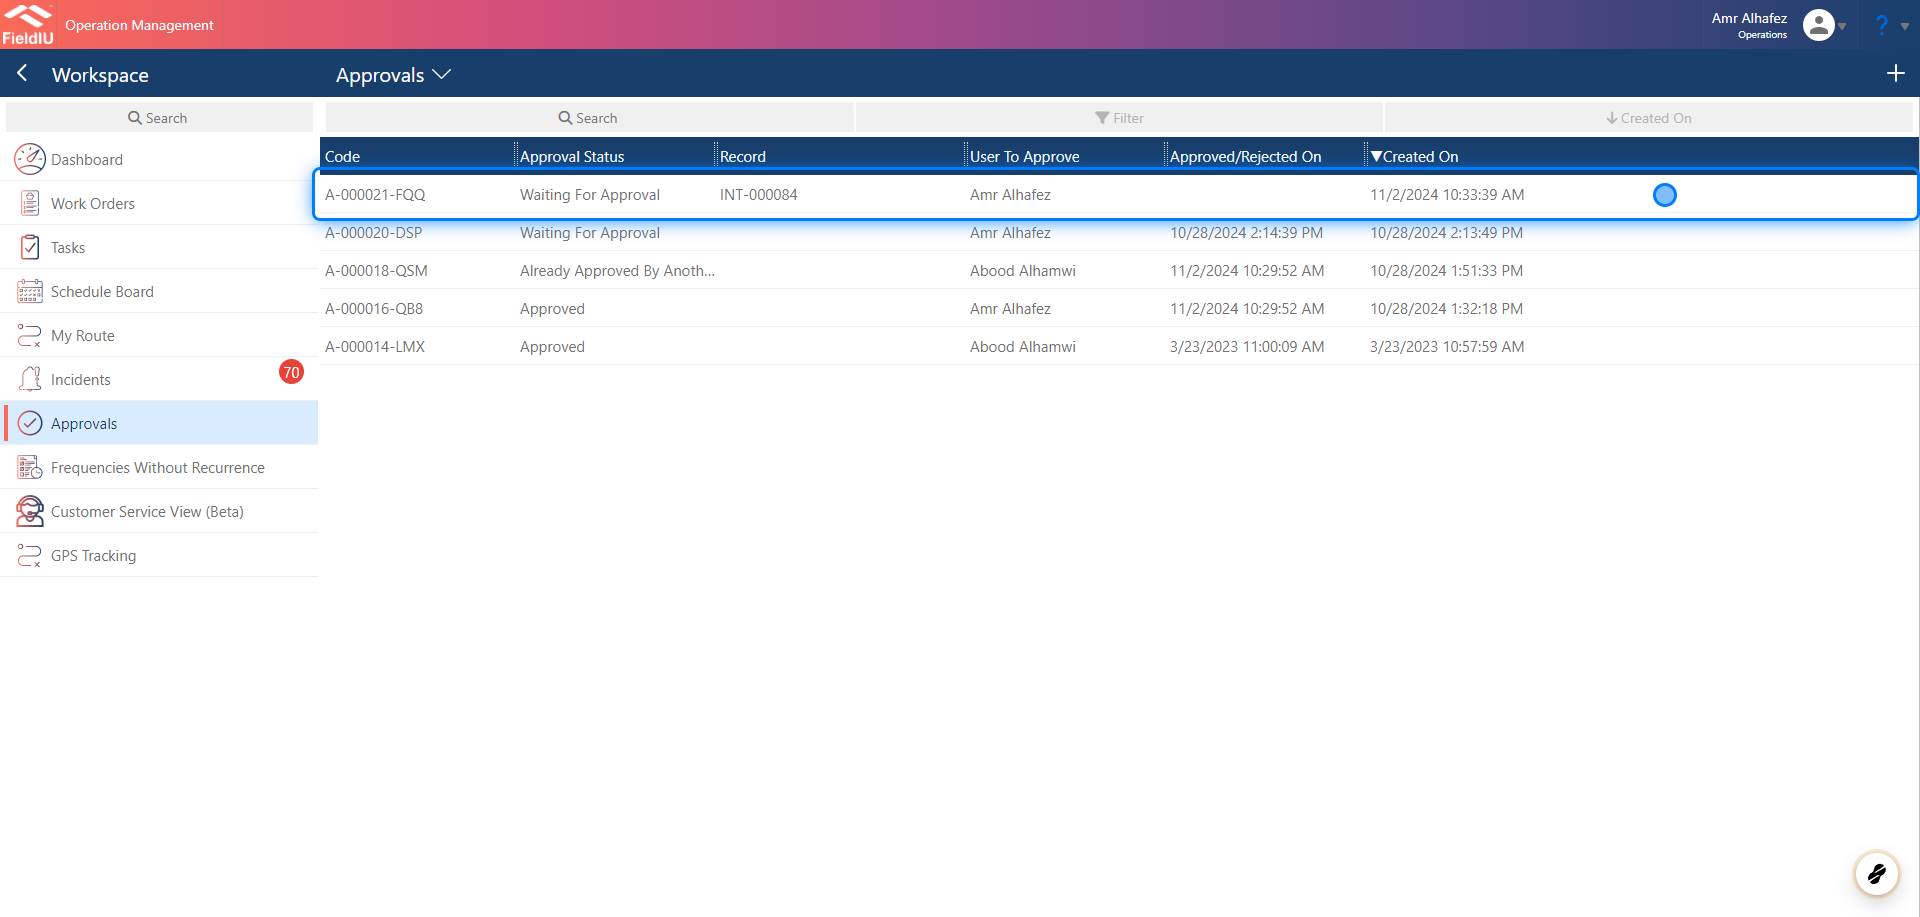
In the operation app, you can approve all transfer requests. To access the approvals list, click on "Approvals" in the side menu.
Once you're in, you’ll find a complete list of approvals along with their main details.
6. Reject / Approve
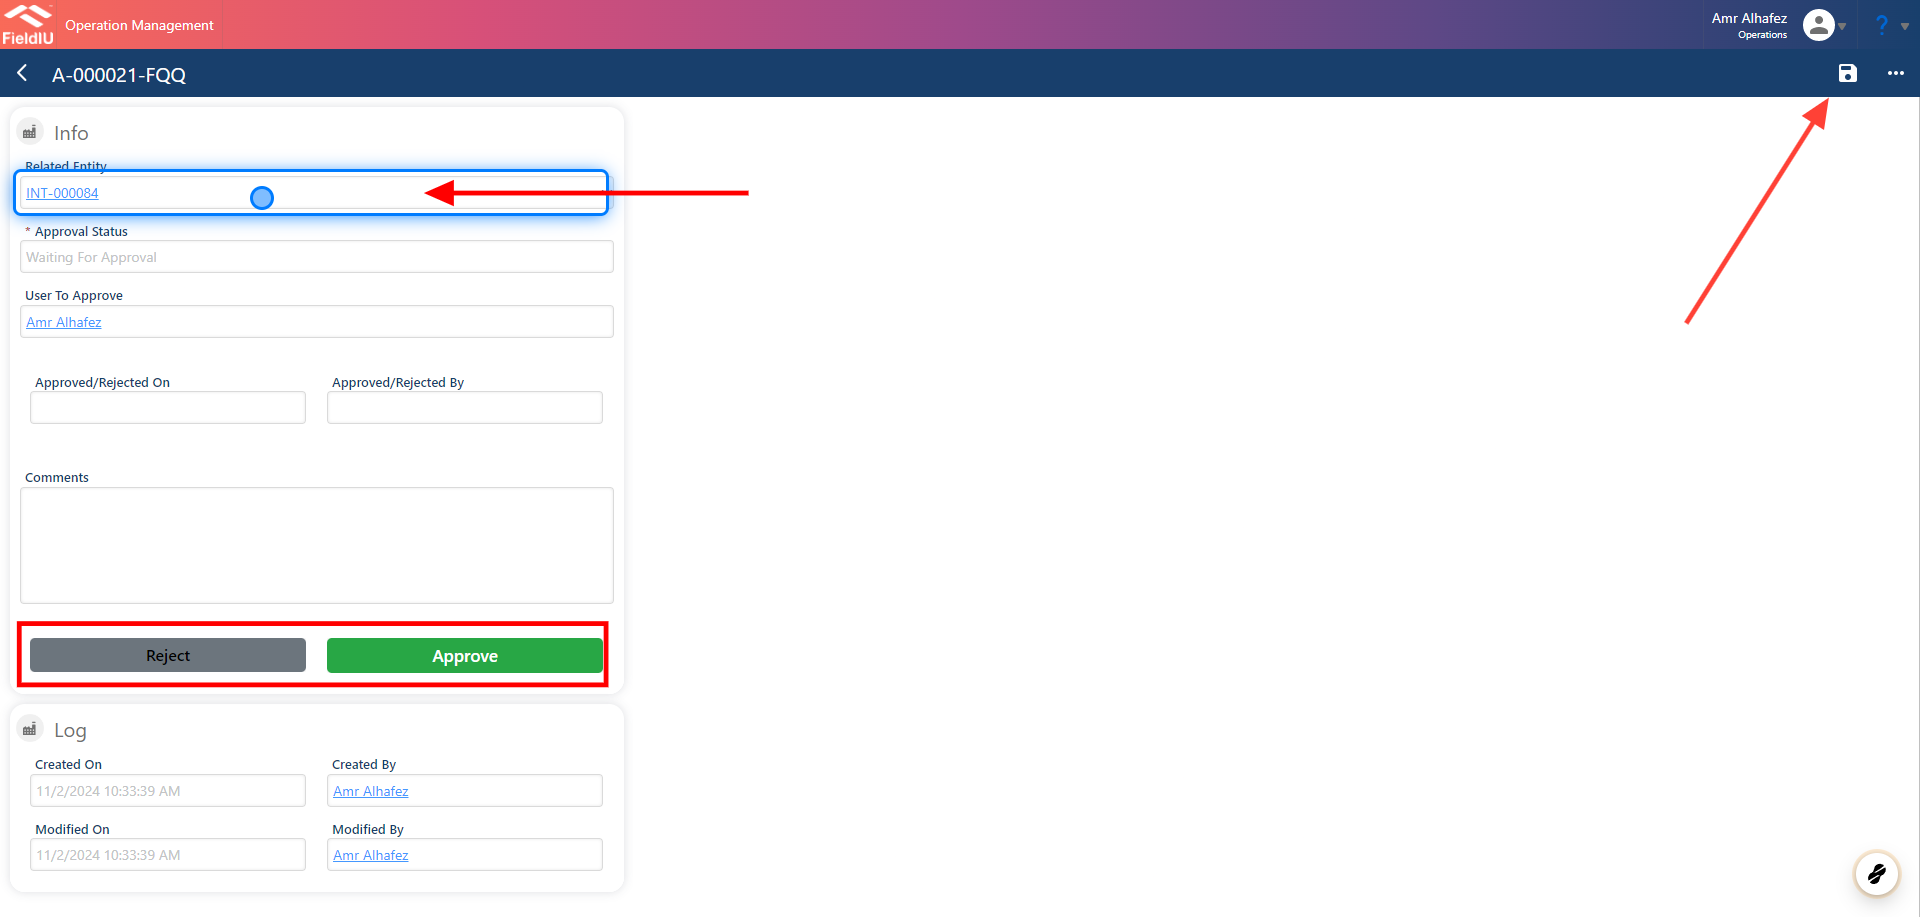
Now, once you select the approval you want to approve or reject, a new window will open. Here, you’ll find information about the approval, including the transfer number, dates, and status.
You can view the transfer details by clicking on it.
As an operation user, if you want to approve or reject the transfer, simply click the button for the desired status.
Don't forget to save your changes!
 �����������������������