

Project Invoicing
1. Invoicing
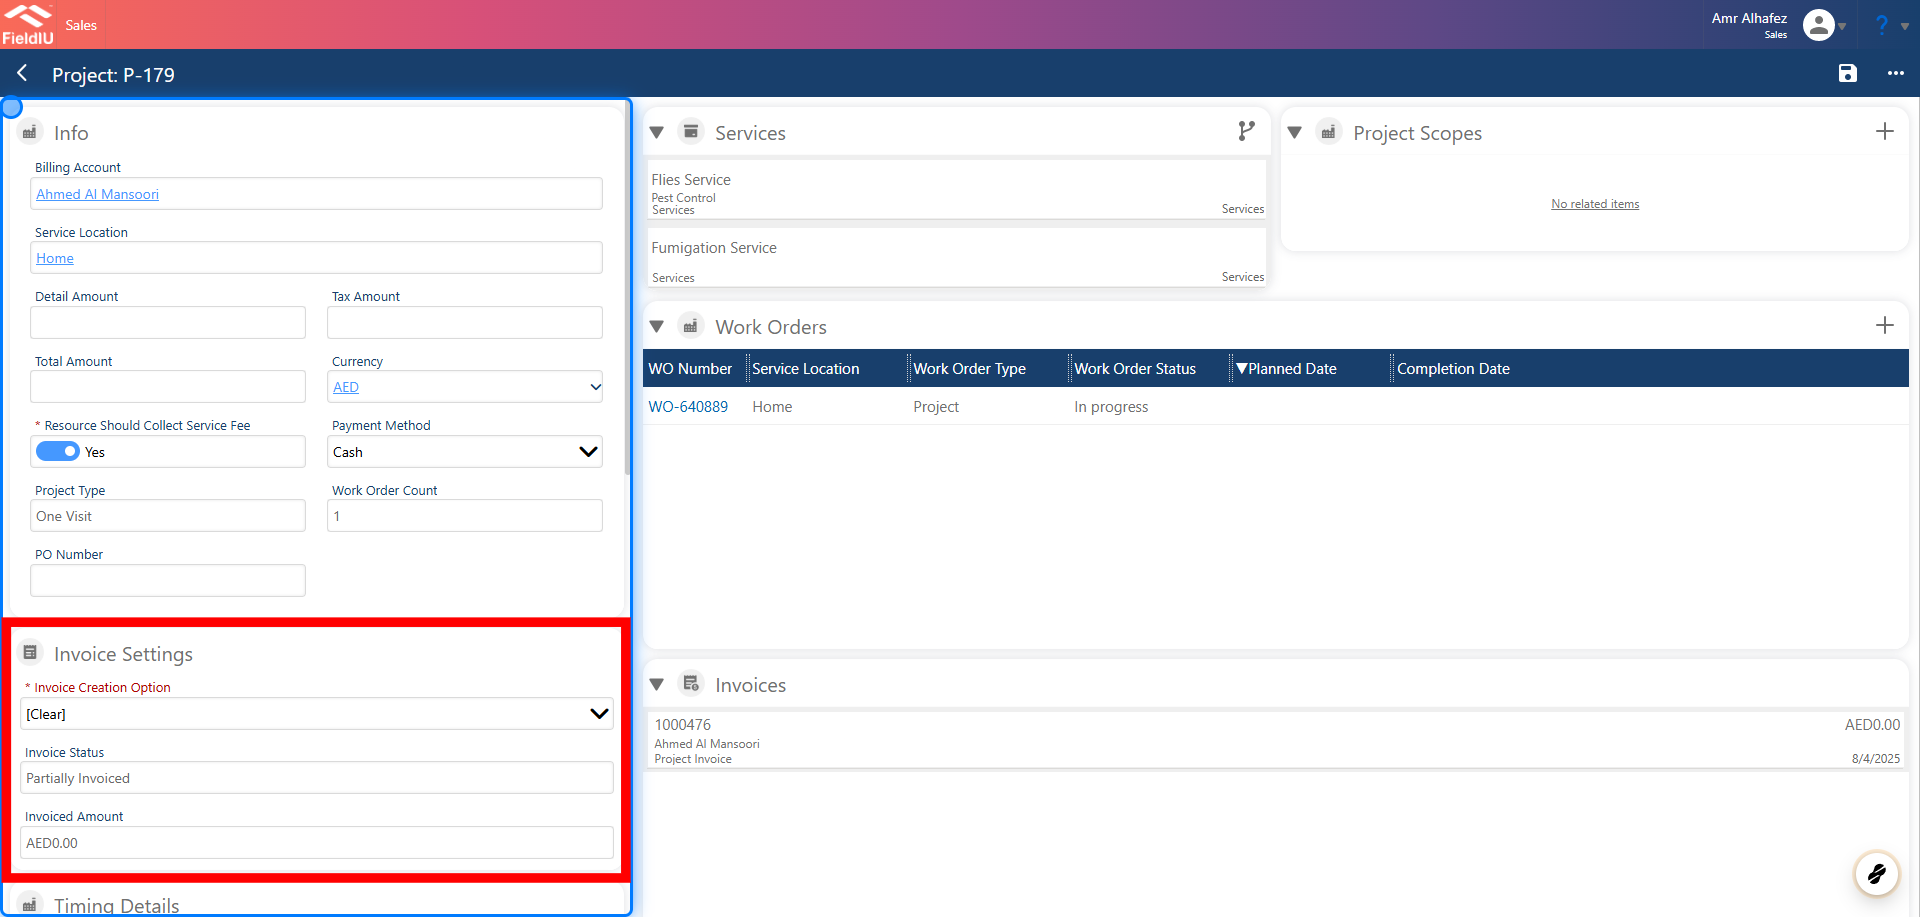
To generate invoices for a project, go to the Invoicing Settings within the project.
There, you'll find Invoice Creation Options , where you can define how invoices should be created and managed.
2. Select the Creation option
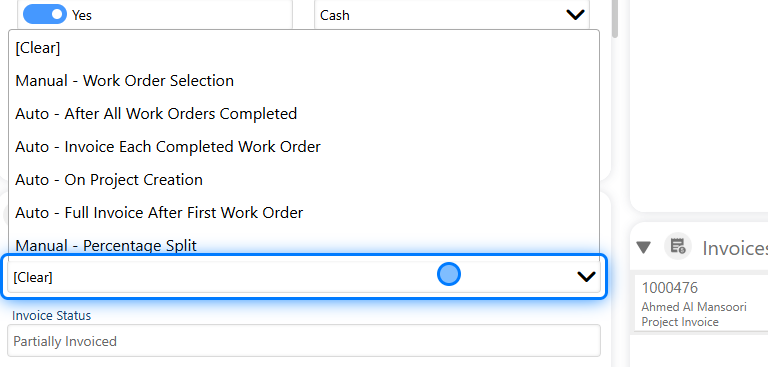
Invoice Creation Options
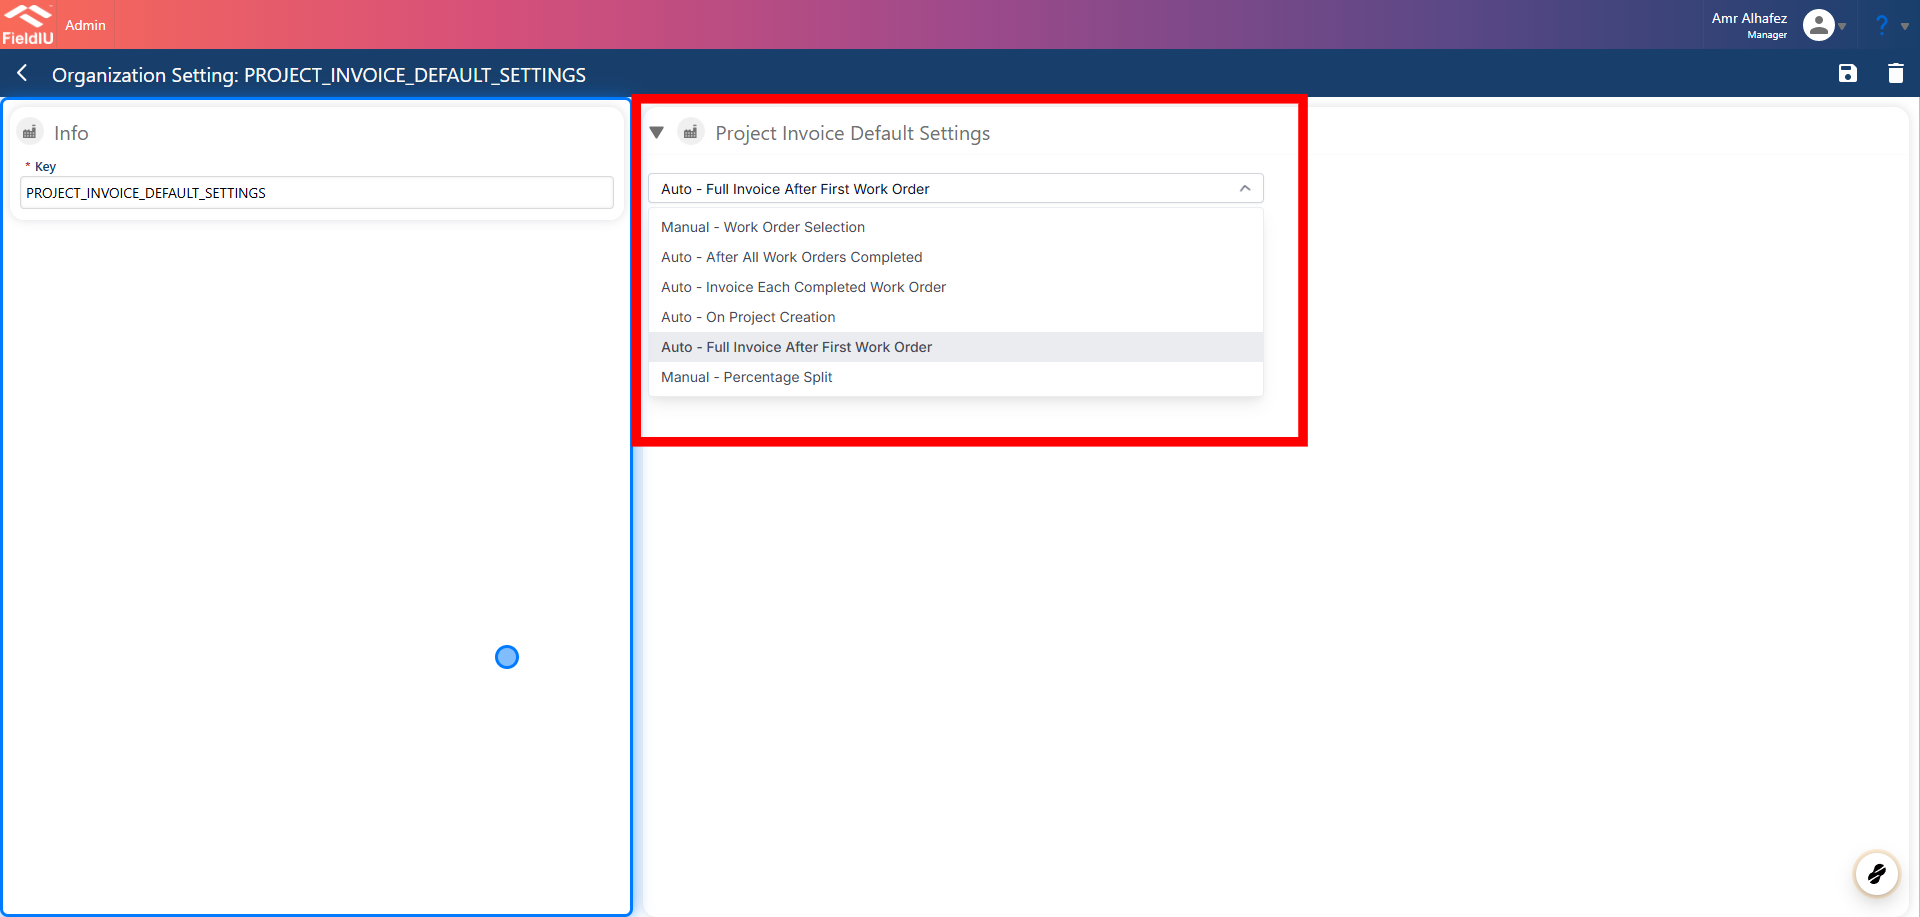
There are six available options for creating invoices:
-
Manual - Work Order Selection
Invoices are created manually by selecting specific work orders. -
Auto - After All Work Orders are Completed
An invoice is automatically created once all work orders are completed. -
Auto - Invoice Each Completed Work Order
An invoice is automatically generated for each completed work order. -
Auto - Upon Project Creation
An invoice is automatically generated when the project is created. -
Auto - Full Invoice After First Work Order
A full invoice is created automatically after the first work order is completed. -
Manual - Percentage Split
Invoices are manually created with a percentage split based on predefined criteria.
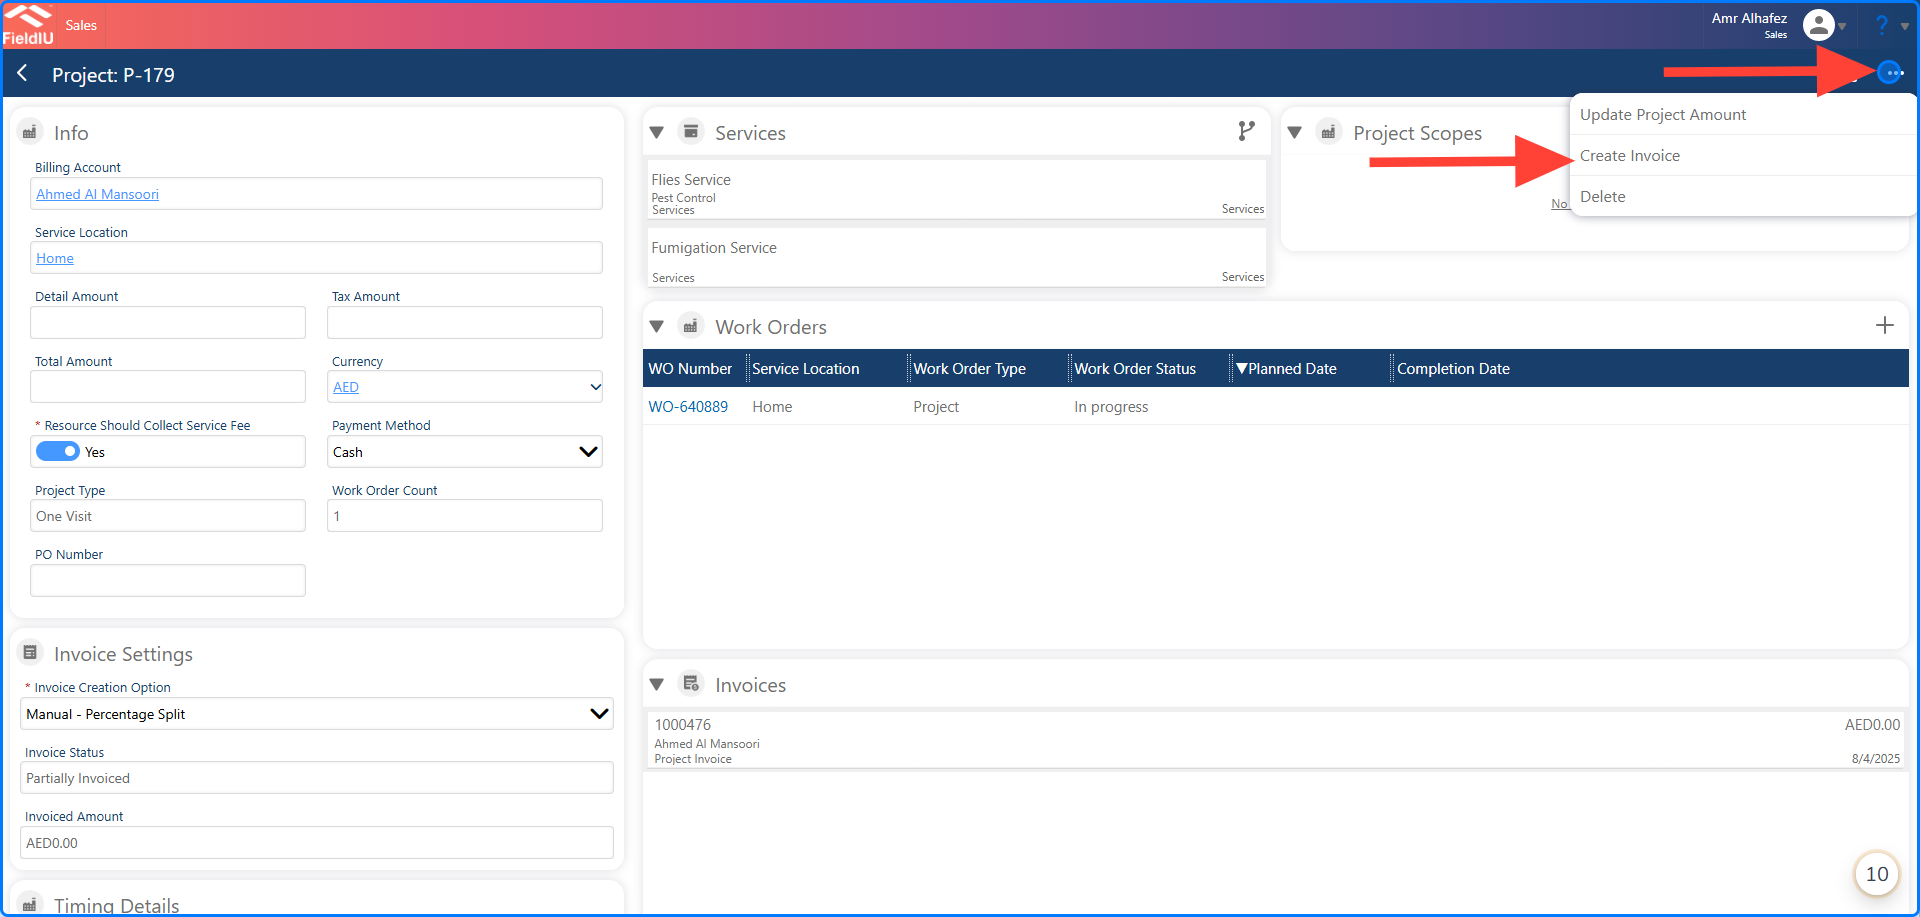
Creating Invoices
3. Click on Create Invoice
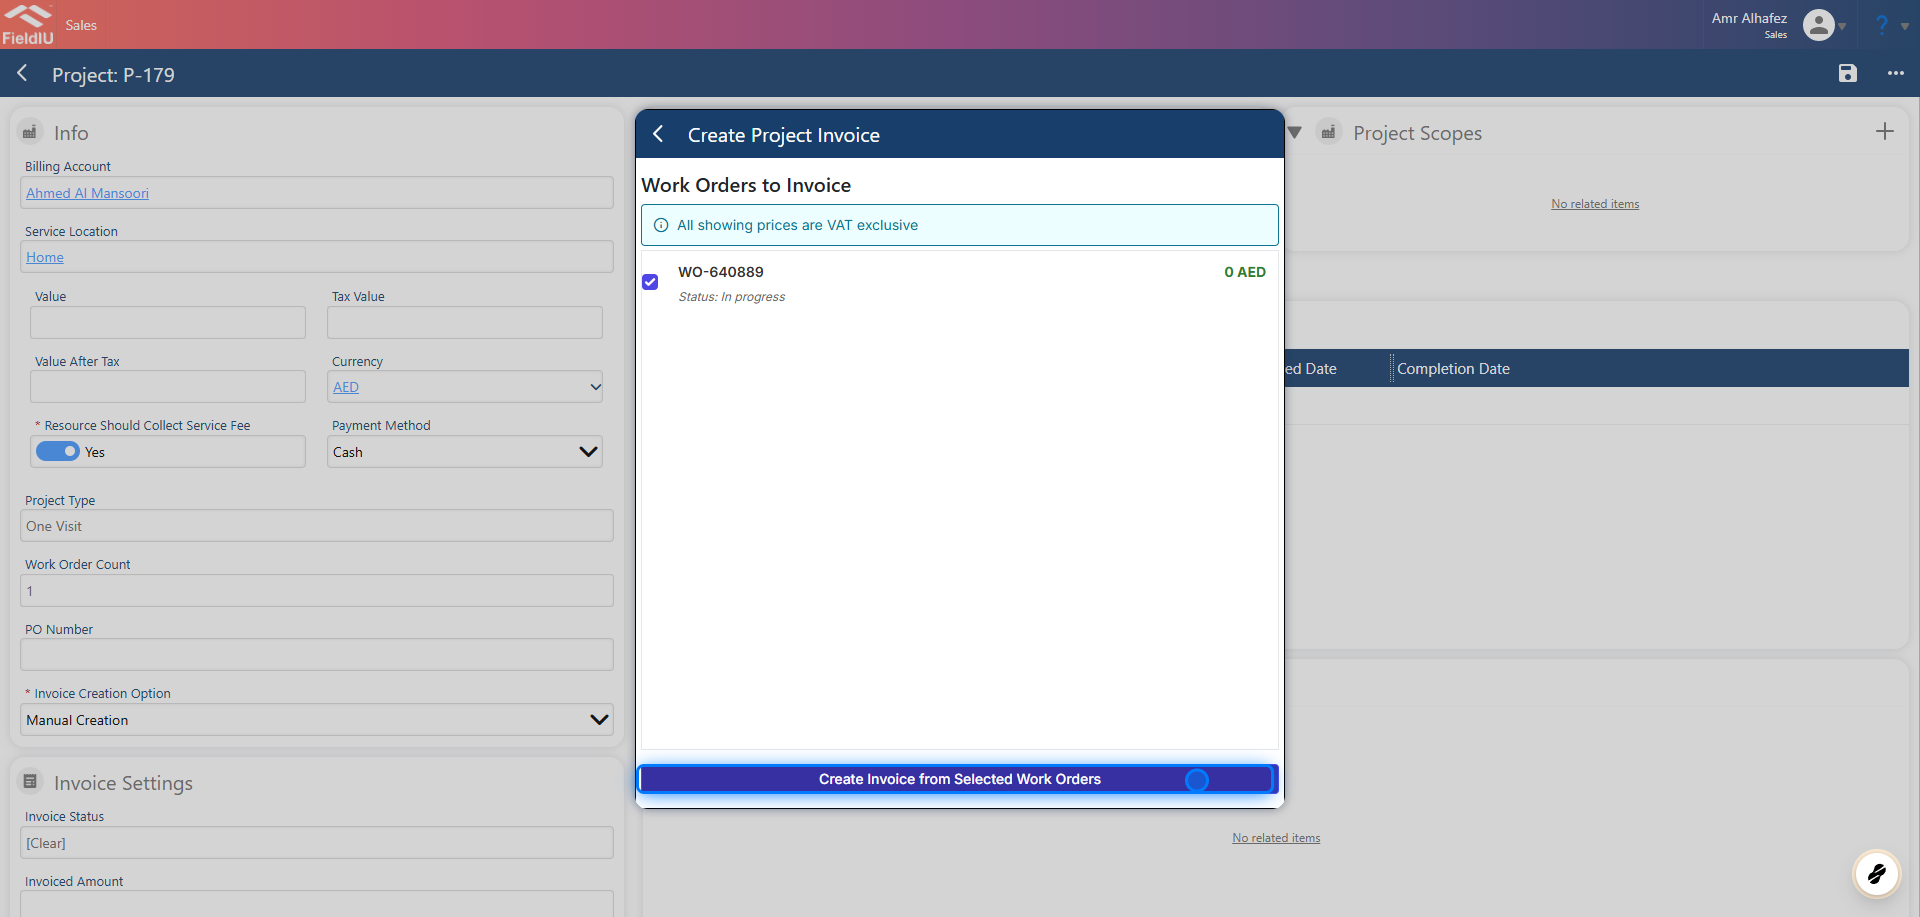
4. Work Order Selection
For manual creation, simply select the desired work order to be invoiced.
5. Invoice Created
As we can see, the invoice has been created successfully.
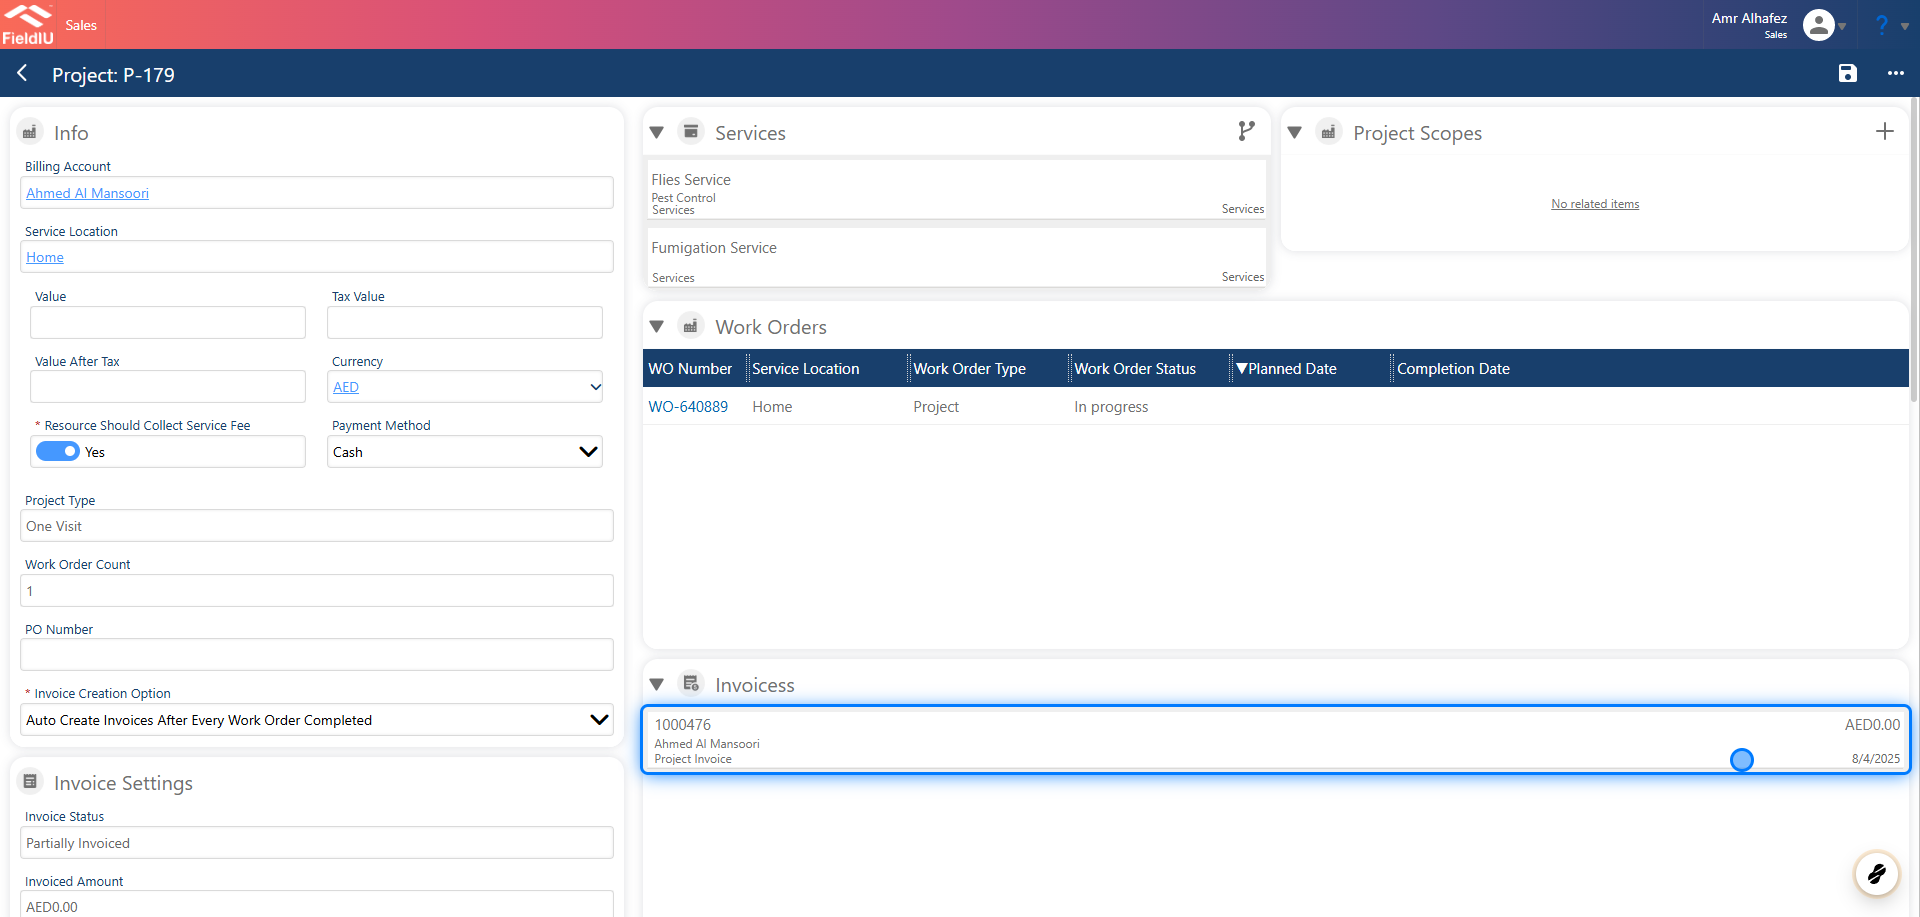
6. Percentage Split
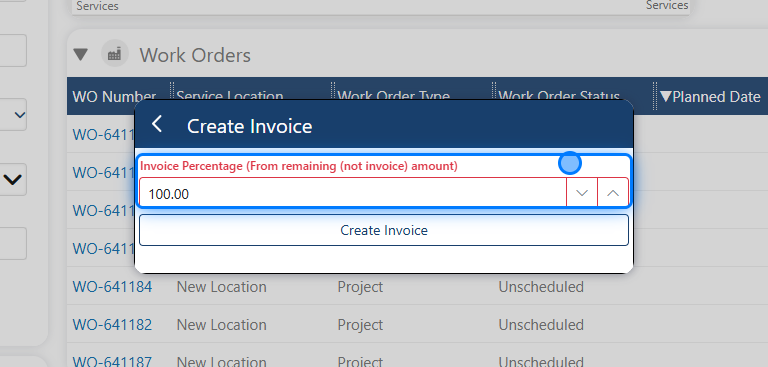
⚠️ Invoice Percentage
From remaining (not invoice) amount
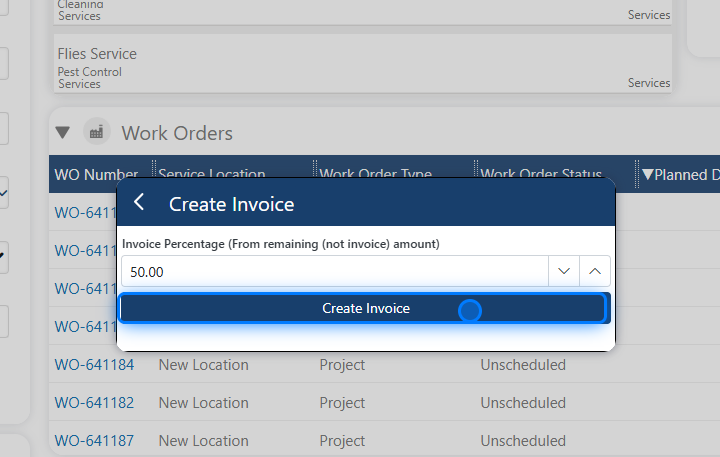
7. Insert the value
Insert the values from the remaining (not invoiced) amount and click Create Invoice .
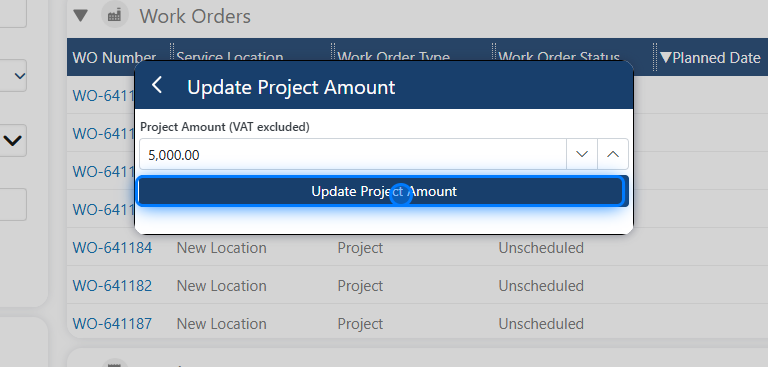
💡 Updating the project amount
You can also update the project amount as needed.
8. Update
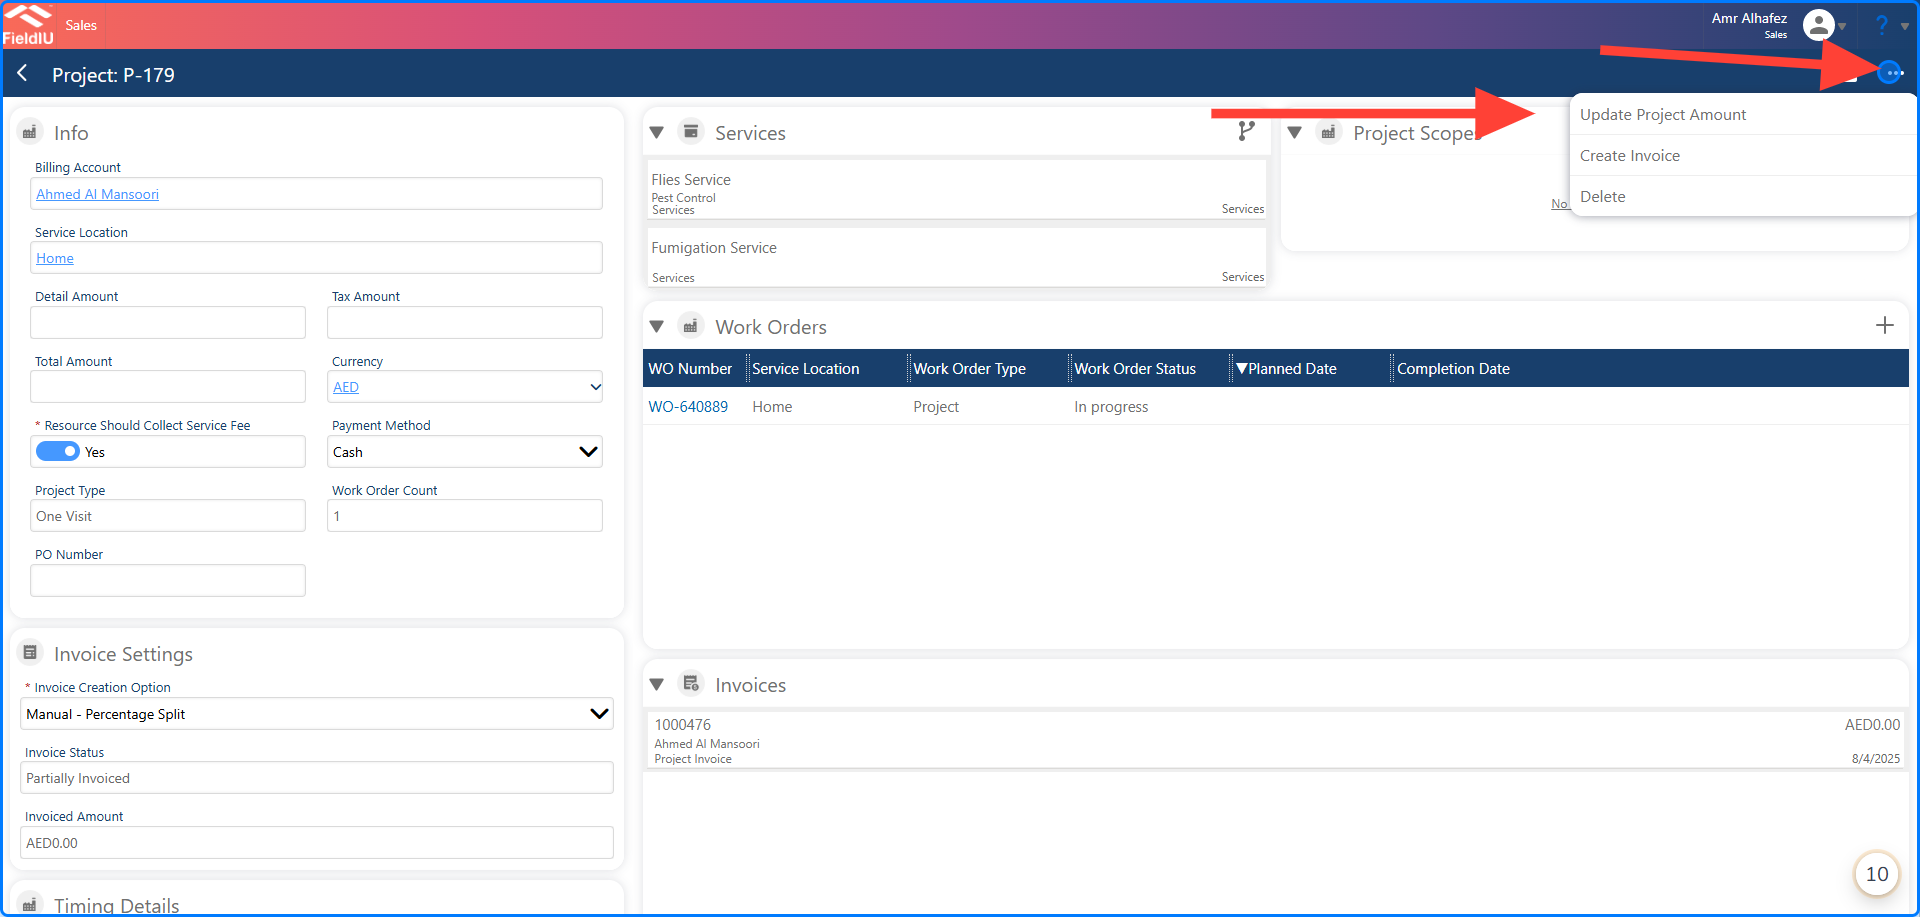
9. Enter the amount (VAT Excluded)
💡 Select the Default Option
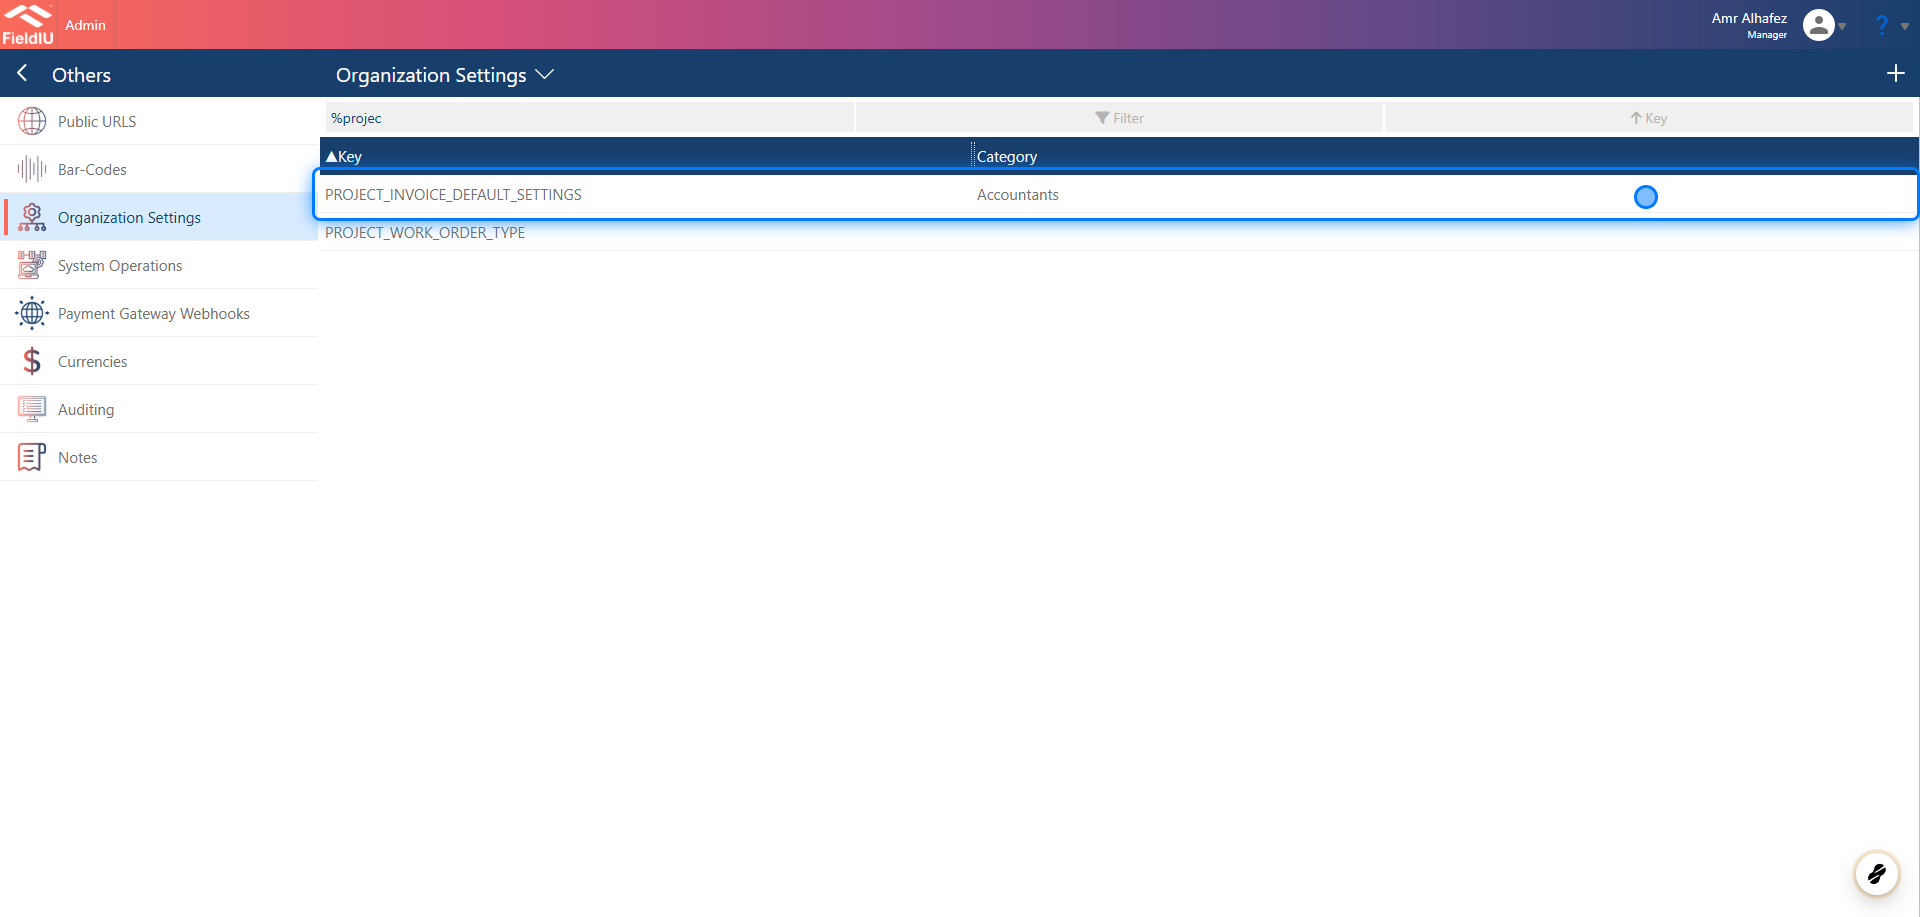
To select the default invoice option, open the Manager app and navigate to: Tools → Organization Settings. Then, search for 'PROJECT_INVOICE_DEFAULT_SETTING'.
10. Search for the key
Search for the key: PROJECT_INVOICE_DEFAULT_SETTINGS
11. Select your default option
Simply select your preferred option and click Save.
⚠️ Do not change the key name.�����������������������