

Requests
1. Access & Create Requests
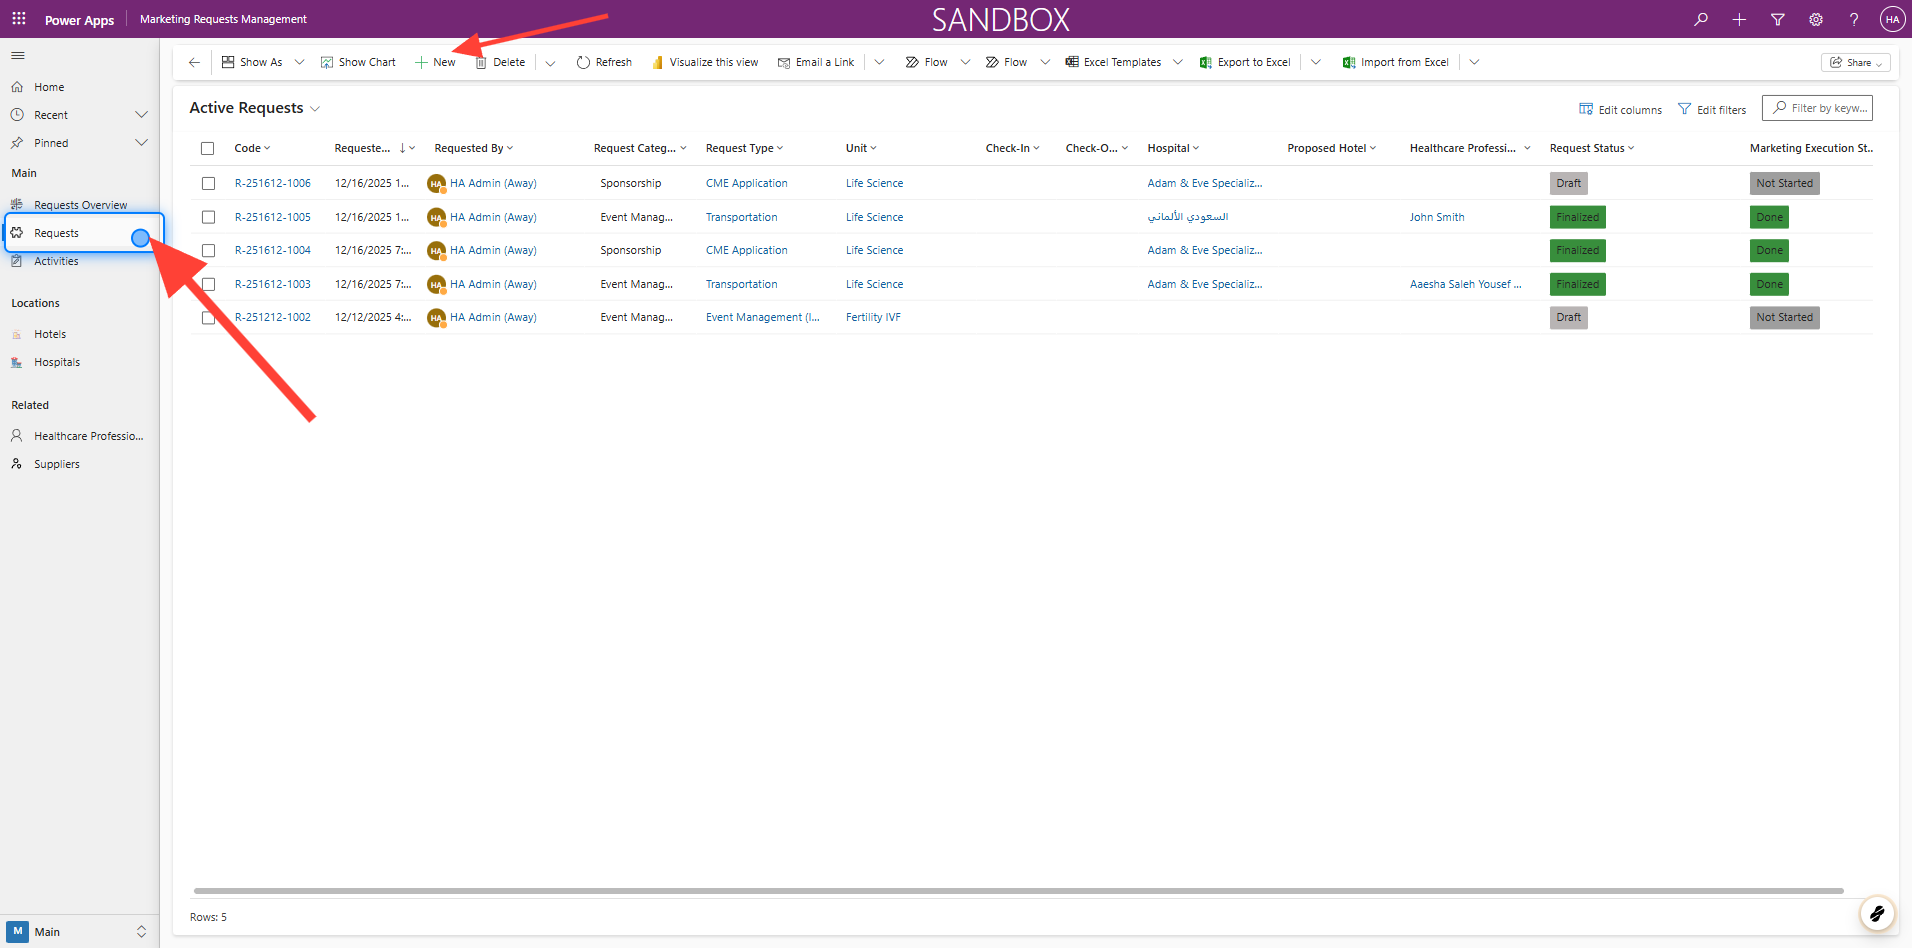
To access requests, navigate to the Requests tab in the sidebar menu. Once opened, you will see a list of all requests along with their available controls.
To create a new request, simply click the New button.
2. Main Screen Overview
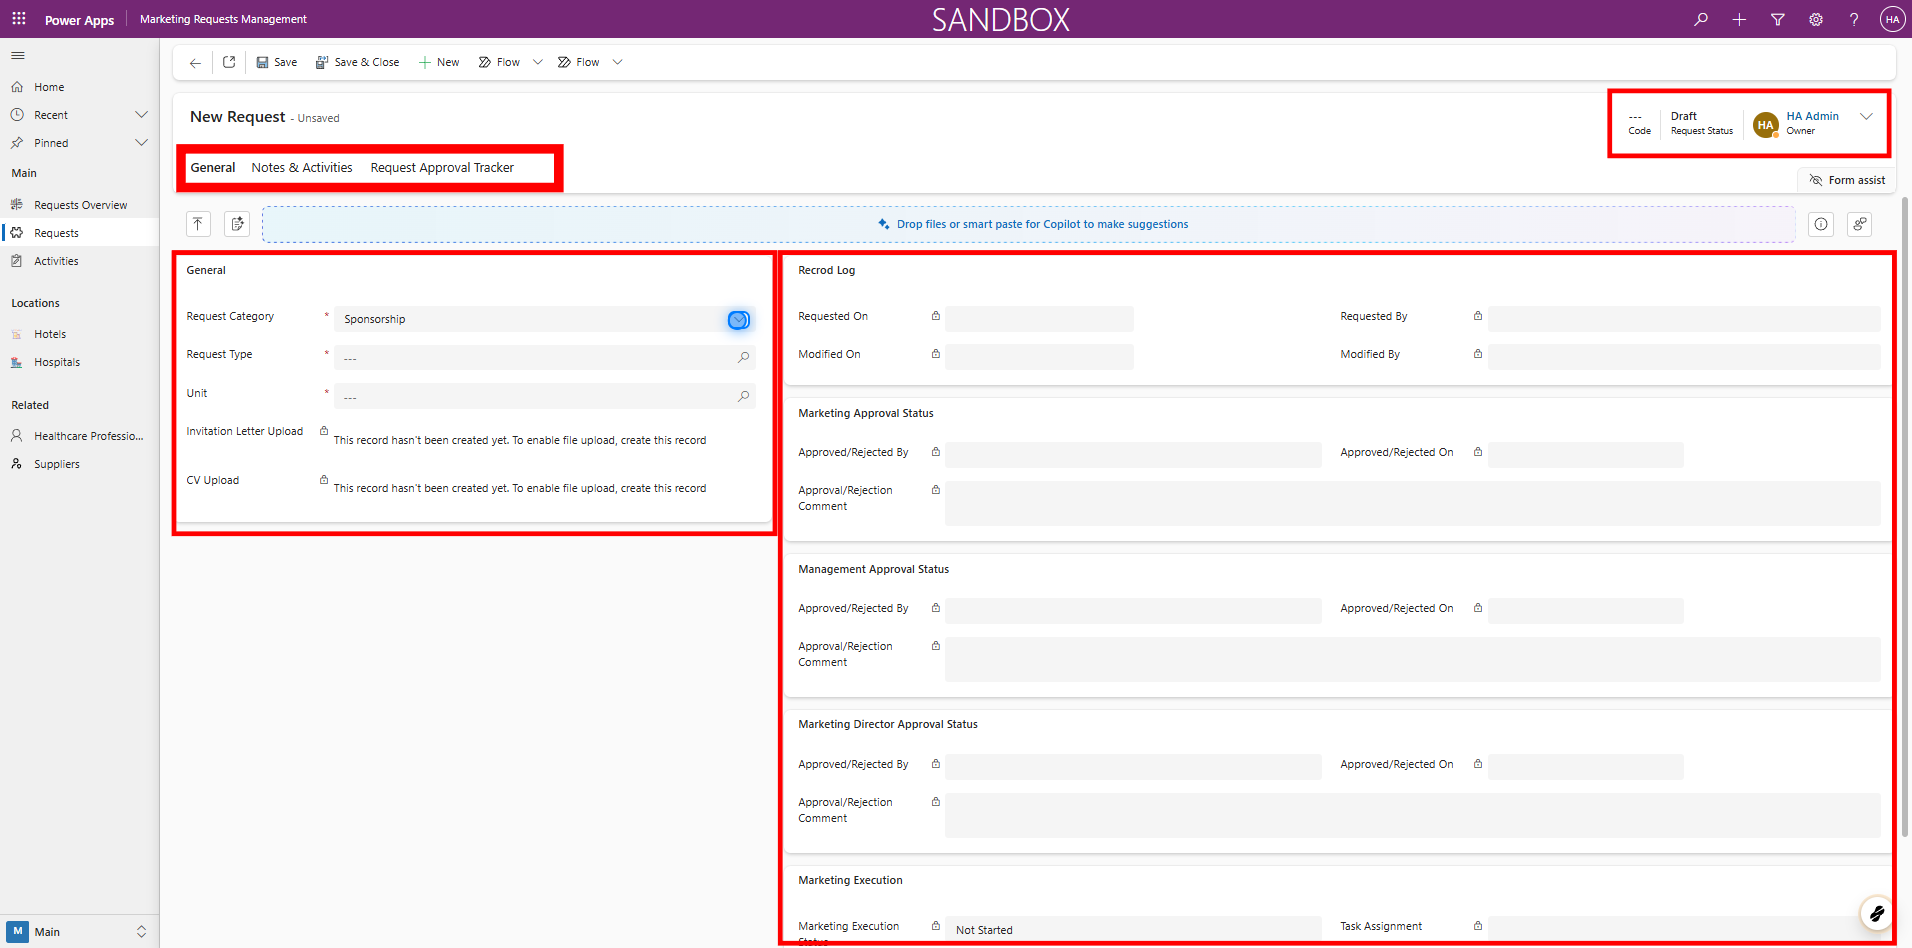
The main screen displays the status of the request , along with the general request data and the approval history and comments .
It also includes the Approval Tracker , Notes & Activities sections. Additionally, some requests include an SOP section.
3. General Details
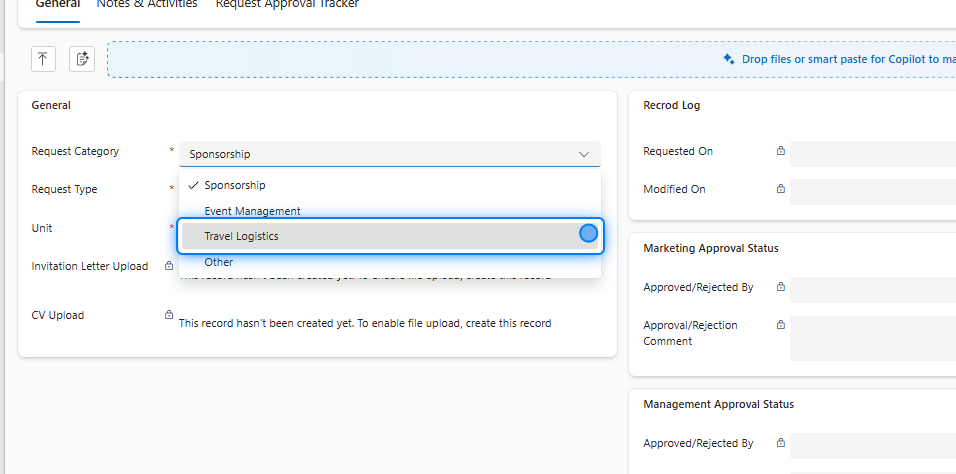
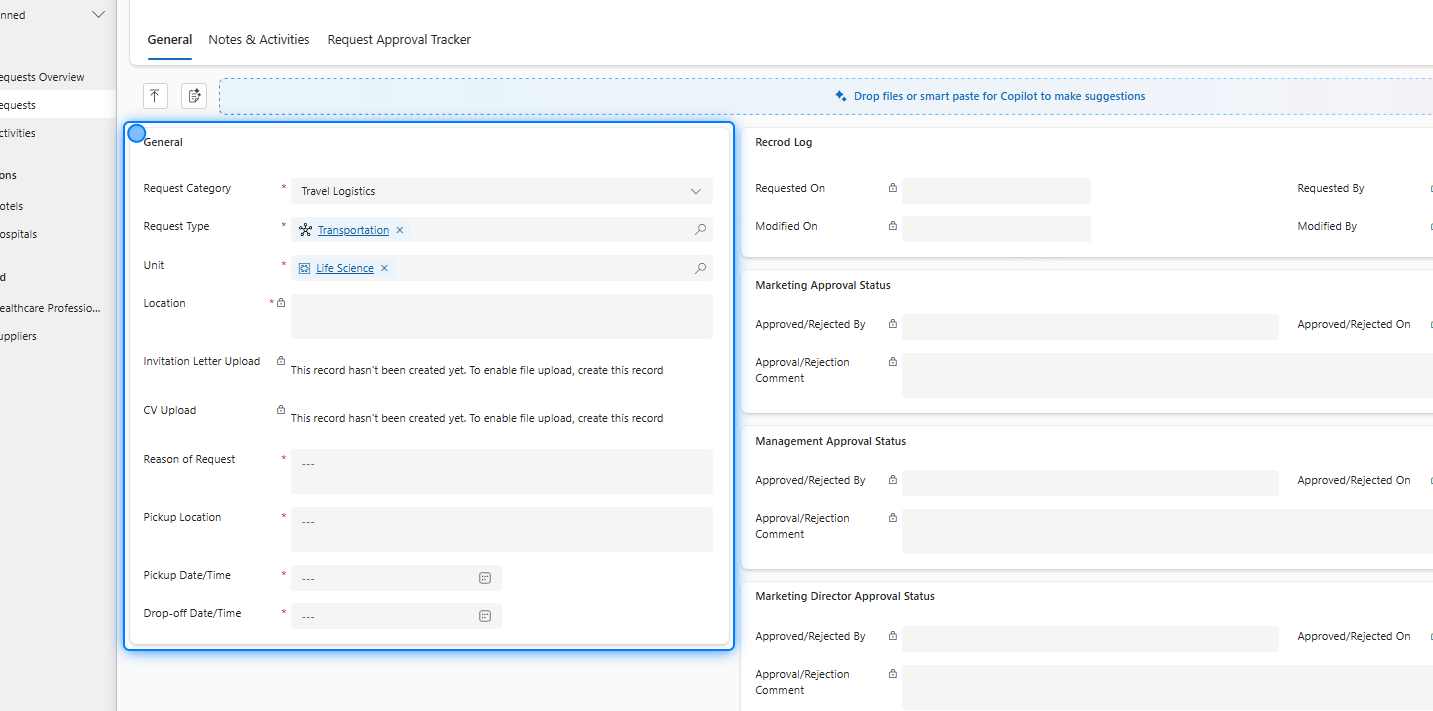
The most important field is the Request Category , as each category has different inputs and fields based on its specific requirements.
We have four main categories:
-
Sponsorship
-
Event Management
-
Travel Logistics
-
Other
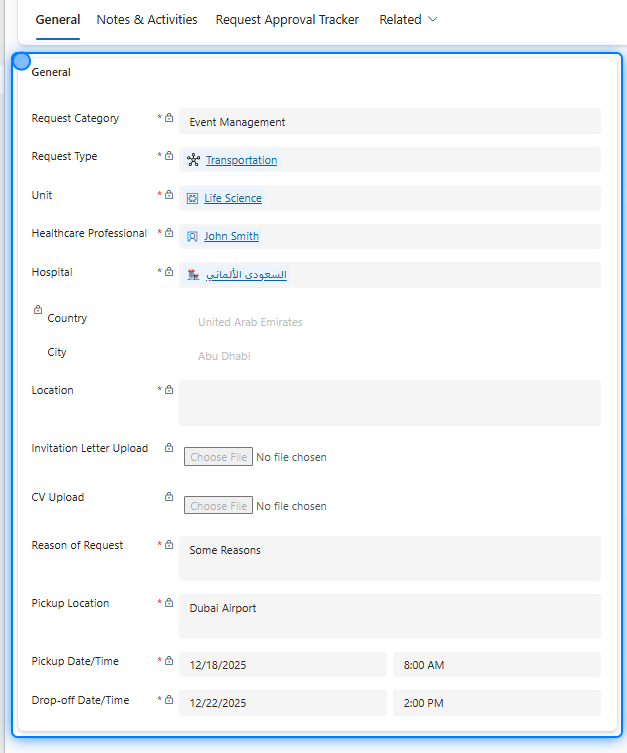
4. Click on General
5. Fill up the Data
Fill in all mandatory fields with accurate and relevant information.
6. Submit Request

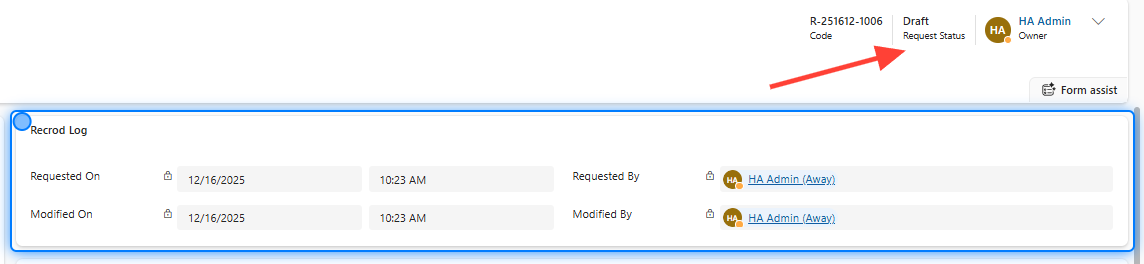
7. Record Log
Once the request is submitted, the status will change, and the record log will be filled automatically.
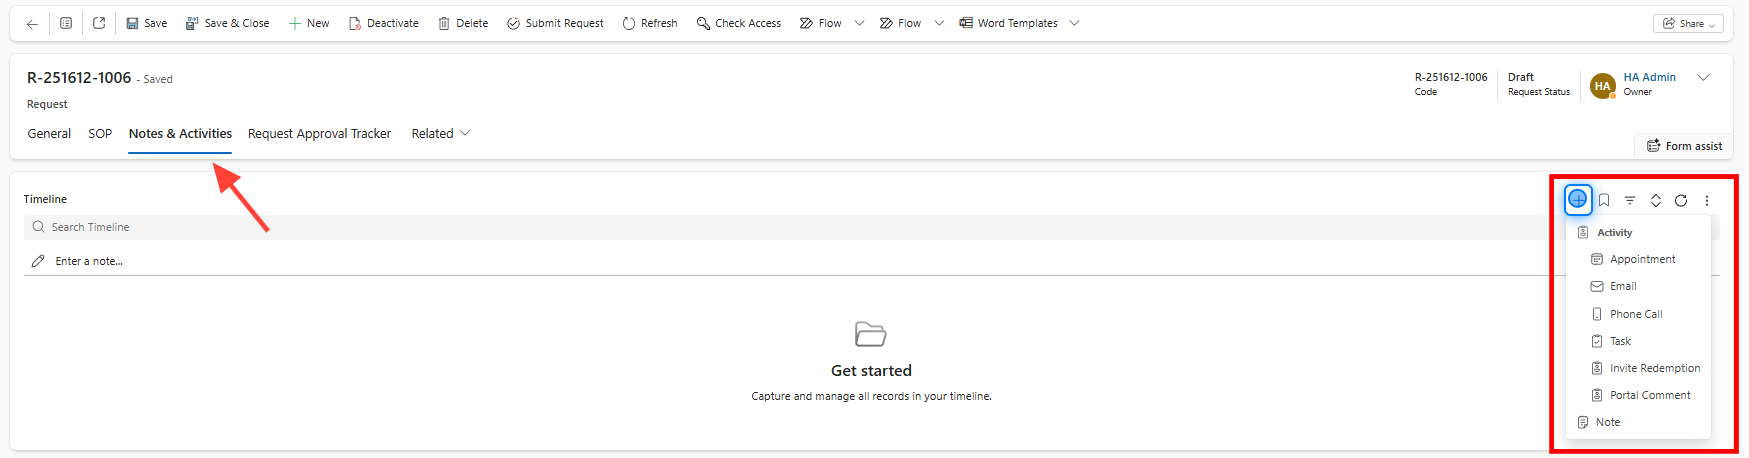
8. Adding Activities and Notes
You can add Activities and Notes to the request or attaching files to provide additional information, updates, or comments related to the request.
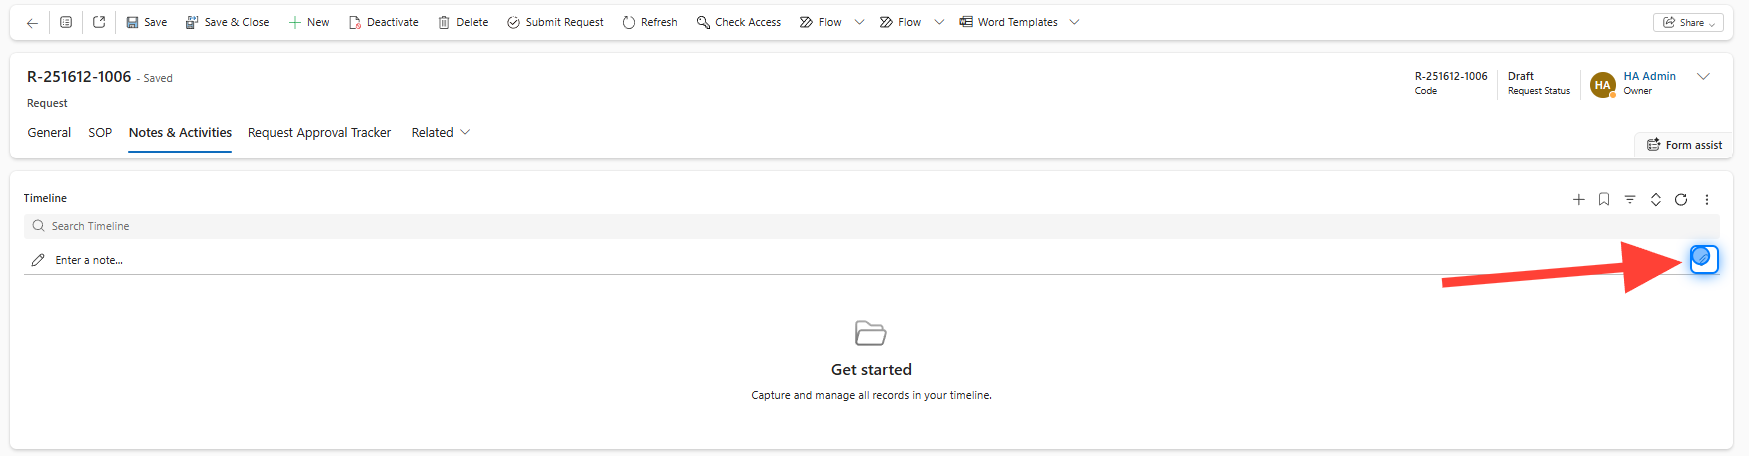
9. Attaching Files
10. SOP Section
The SOP section is required for managing certain request categories.

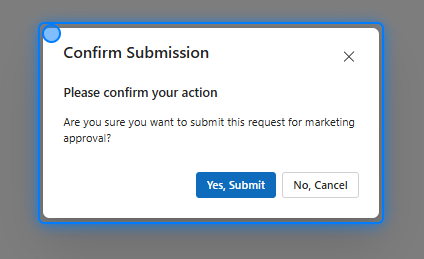
11. Confirm Submission
Approvals
💡 Approval Tracker
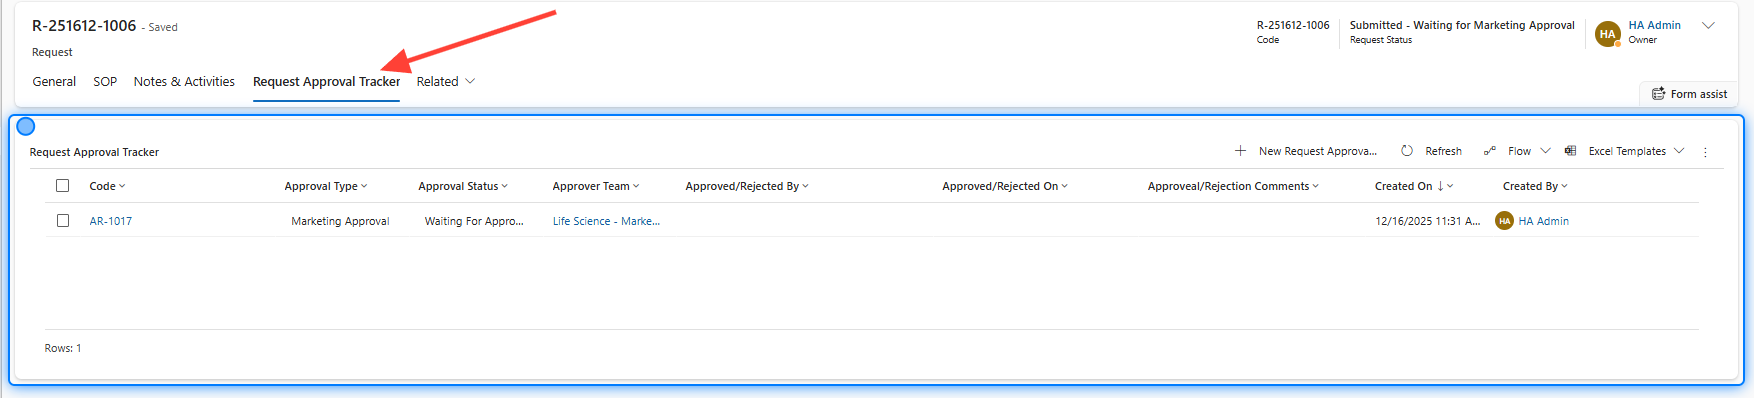
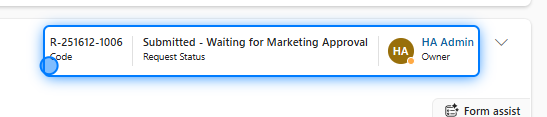
You can track the approval process from the status bar , and you can also use the Approval Tracker for detailed progress.
12. Request Approval Tracker
13. Status Bar
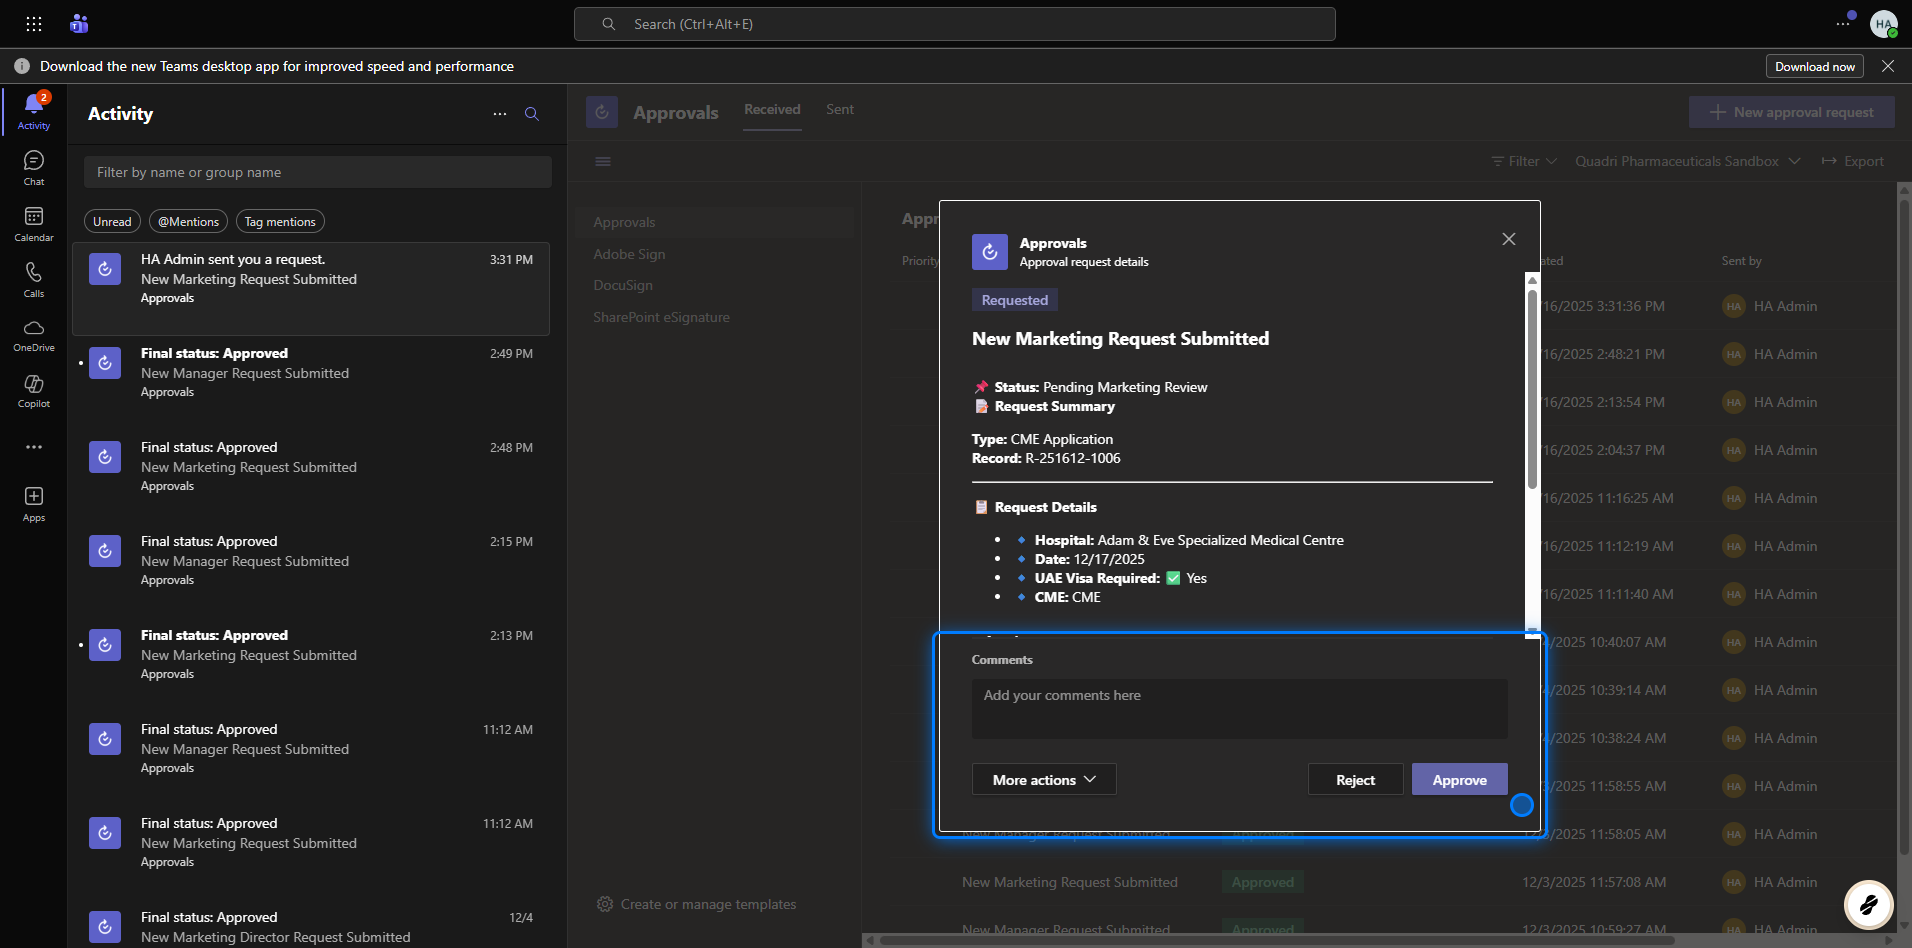
14. Admin Approval
The admin will receive the approval request via Microsoft Teams and email , allowing them to approve or reject the request and add notes to the approval.
15. Click on Marketing Approval Status
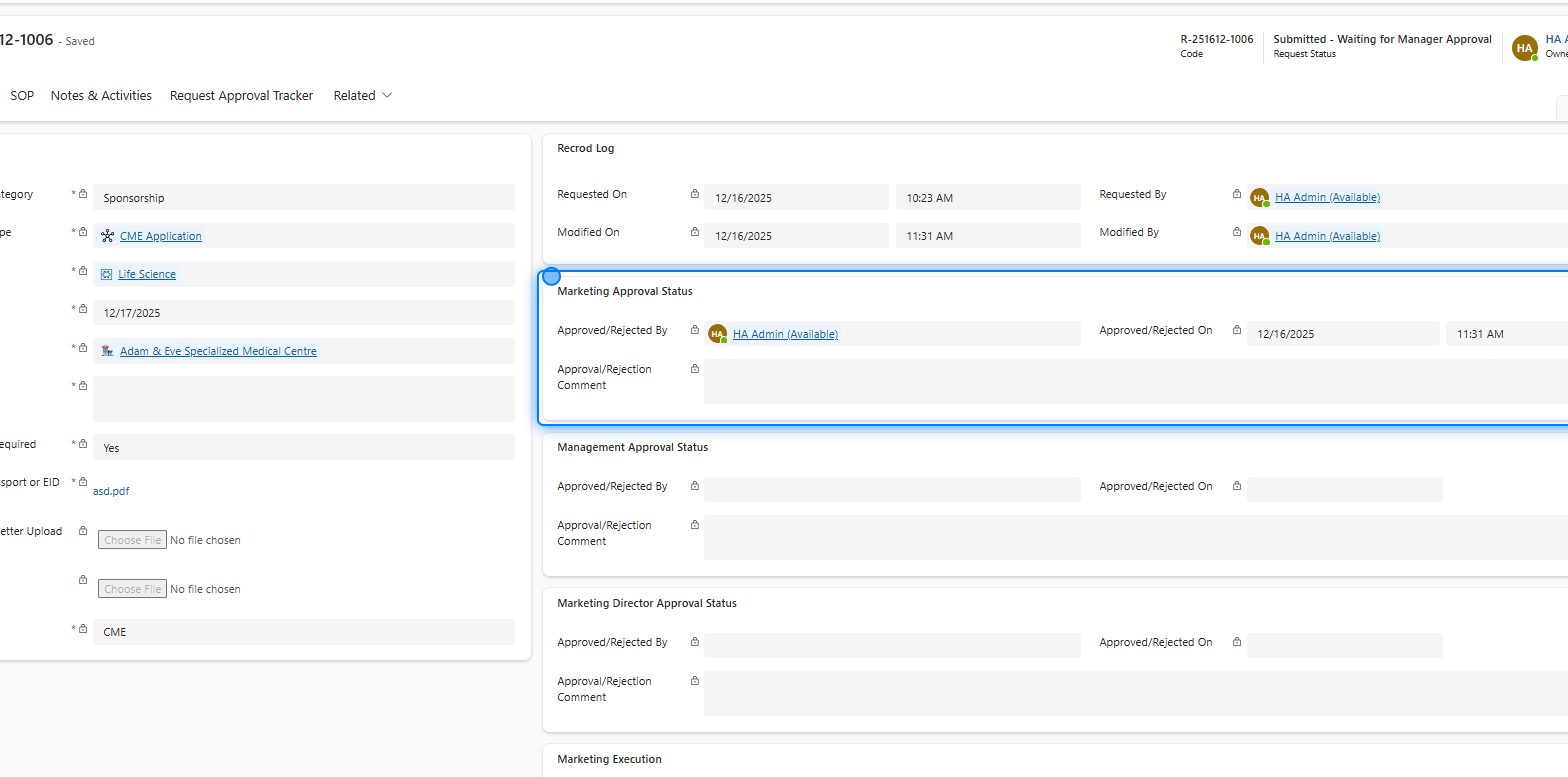
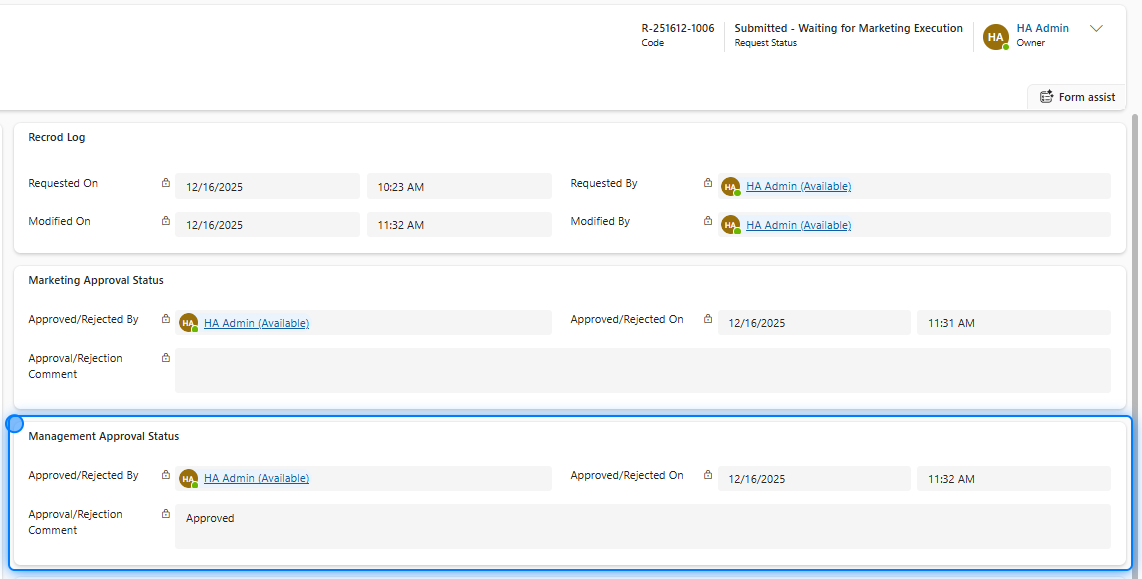
16. Management & Marketing Approval Status
Once the admin approves or rejects the request, the status will change automatically, and the Approval section will be updated automatically, whether it is a Marketing or Management approval.
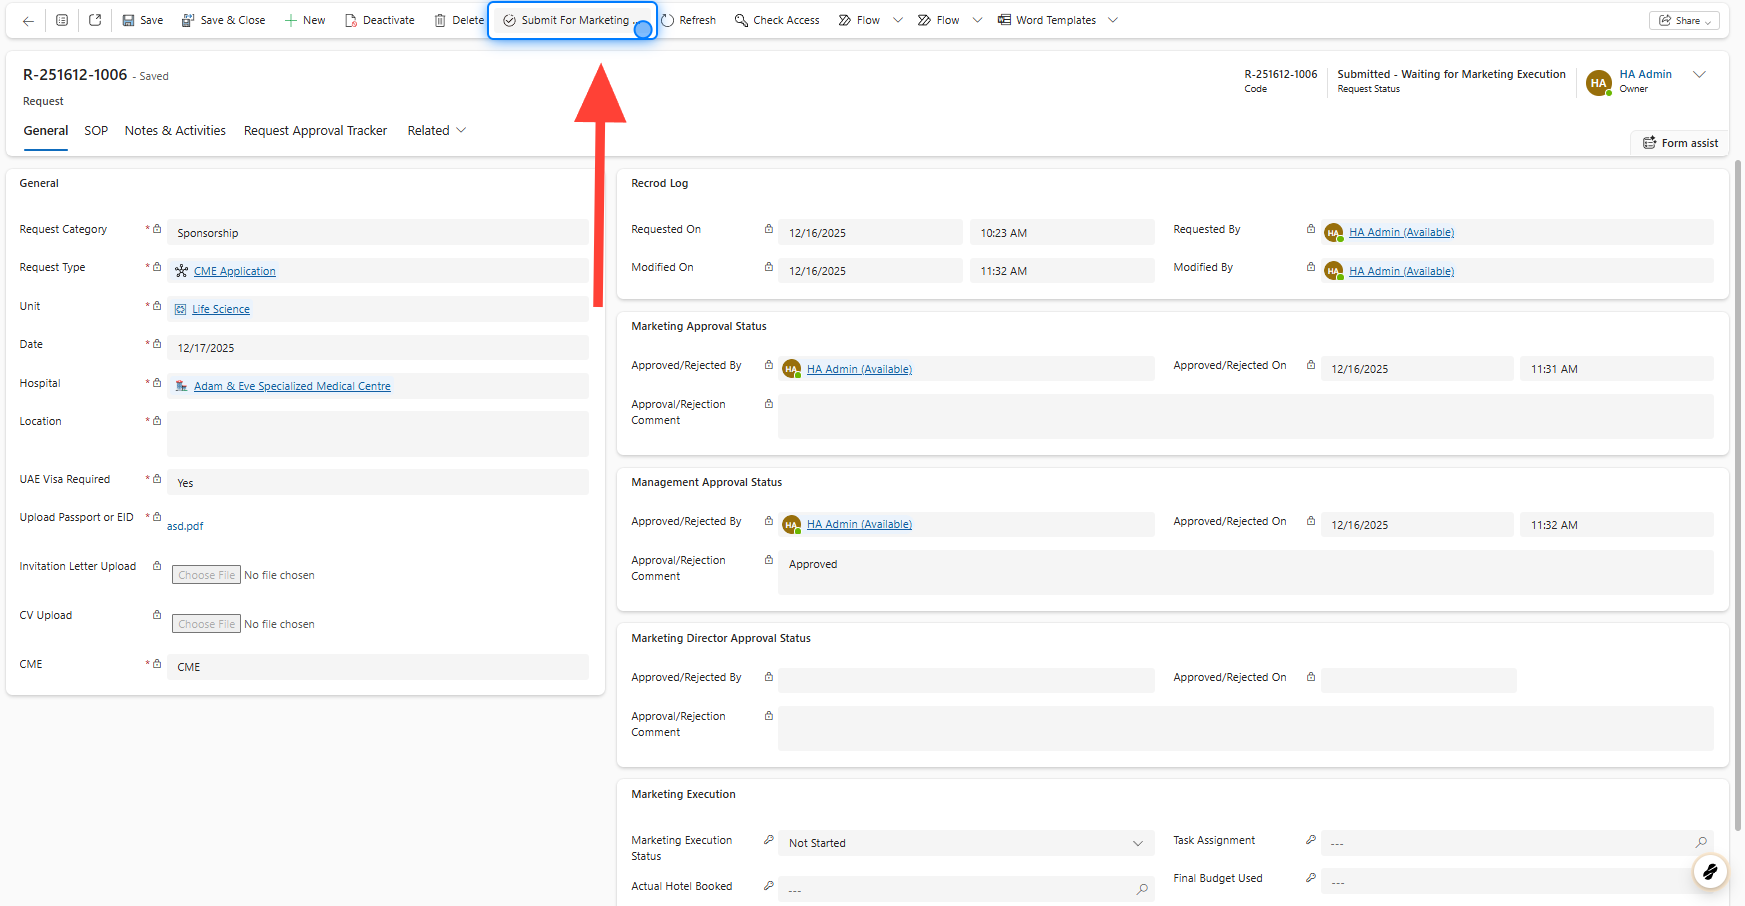
💡 Submit For Marketing Director Approval
17.
You can also submit the request for Marketing Director approval from the top menu bar.
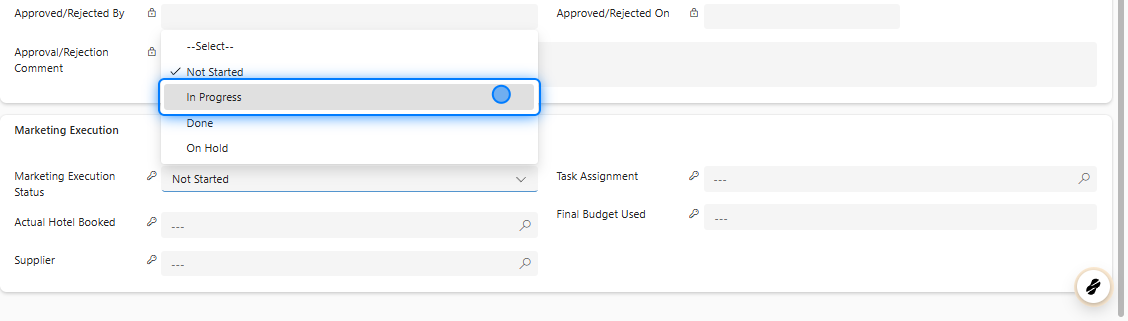
18. Marketing Execution
Finally, after the request is approved, you can work on it by selecting the Marketing Execution status. This allows you to:
-
Assign tasks to users
-
Add the final budget
-
Select a hotel (for example)
-
Add suppliers
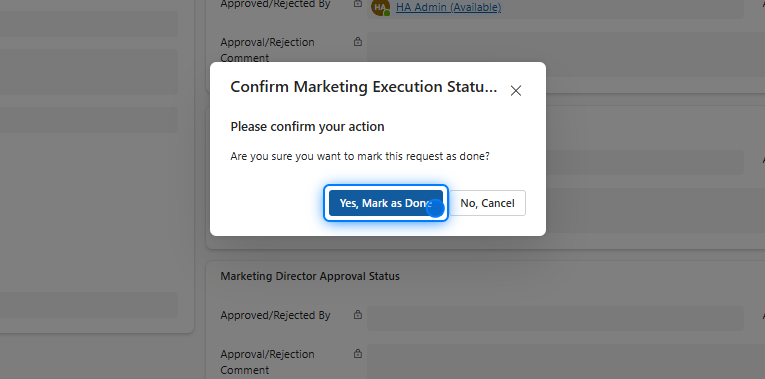
19. Complete The Request
Once the Marketing Execution status is completed, the request will be closed .
Splitting Request
💡 We Can Split The Request On Many Units
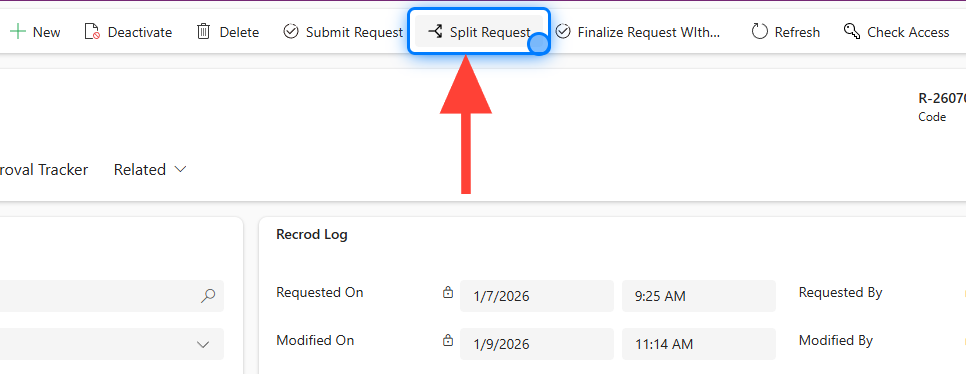
20. Selecting Split Request
From the top menu, click the Split Request button.
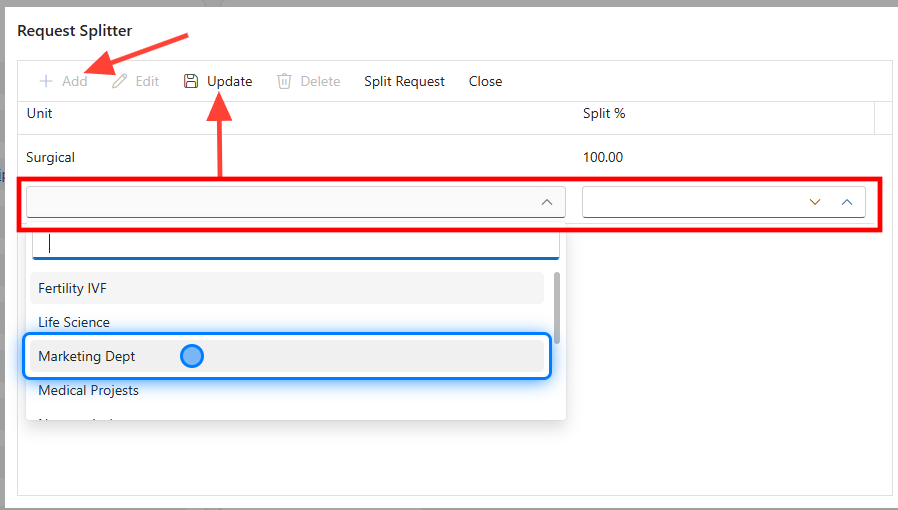
21. Add The Unit And The Percentage.
Simply add the unit and the percentage you want, then click Update .
22. Click on Request Splitter
Now, as you can see, the percentage automatically changes on the main unit. Once you click the Split button, the system copies the main request details and creates another request based on the added unit. The estimated cost and the final budget used are adjusted according to the selected percentage.
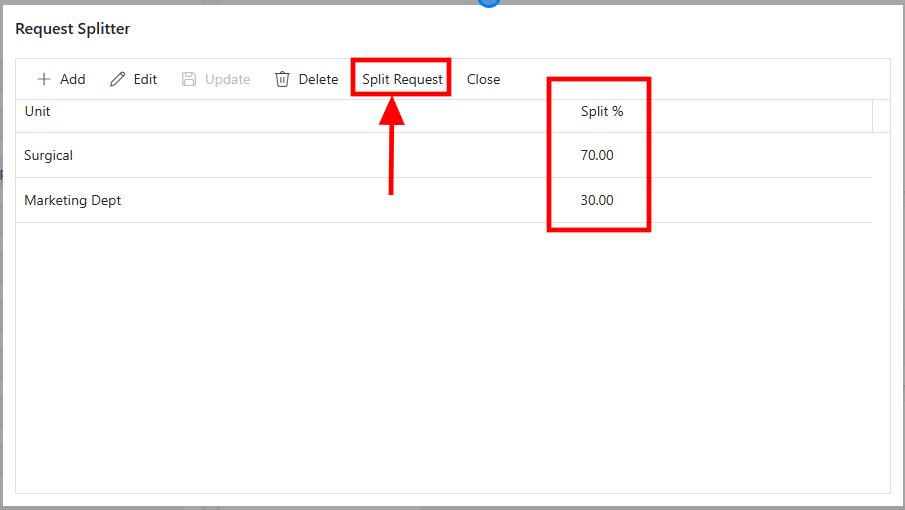
💡 The newly created request owner will be the Unit Marketing Team.�����������������������