> ## Documentation Index
> Fetch the complete documentation index at: https://docs.fieldiu.com/llms.txt
> Use this file to discover all available pages before exploring further.
# Purchase Orders
### 1. Create Purchase Orders
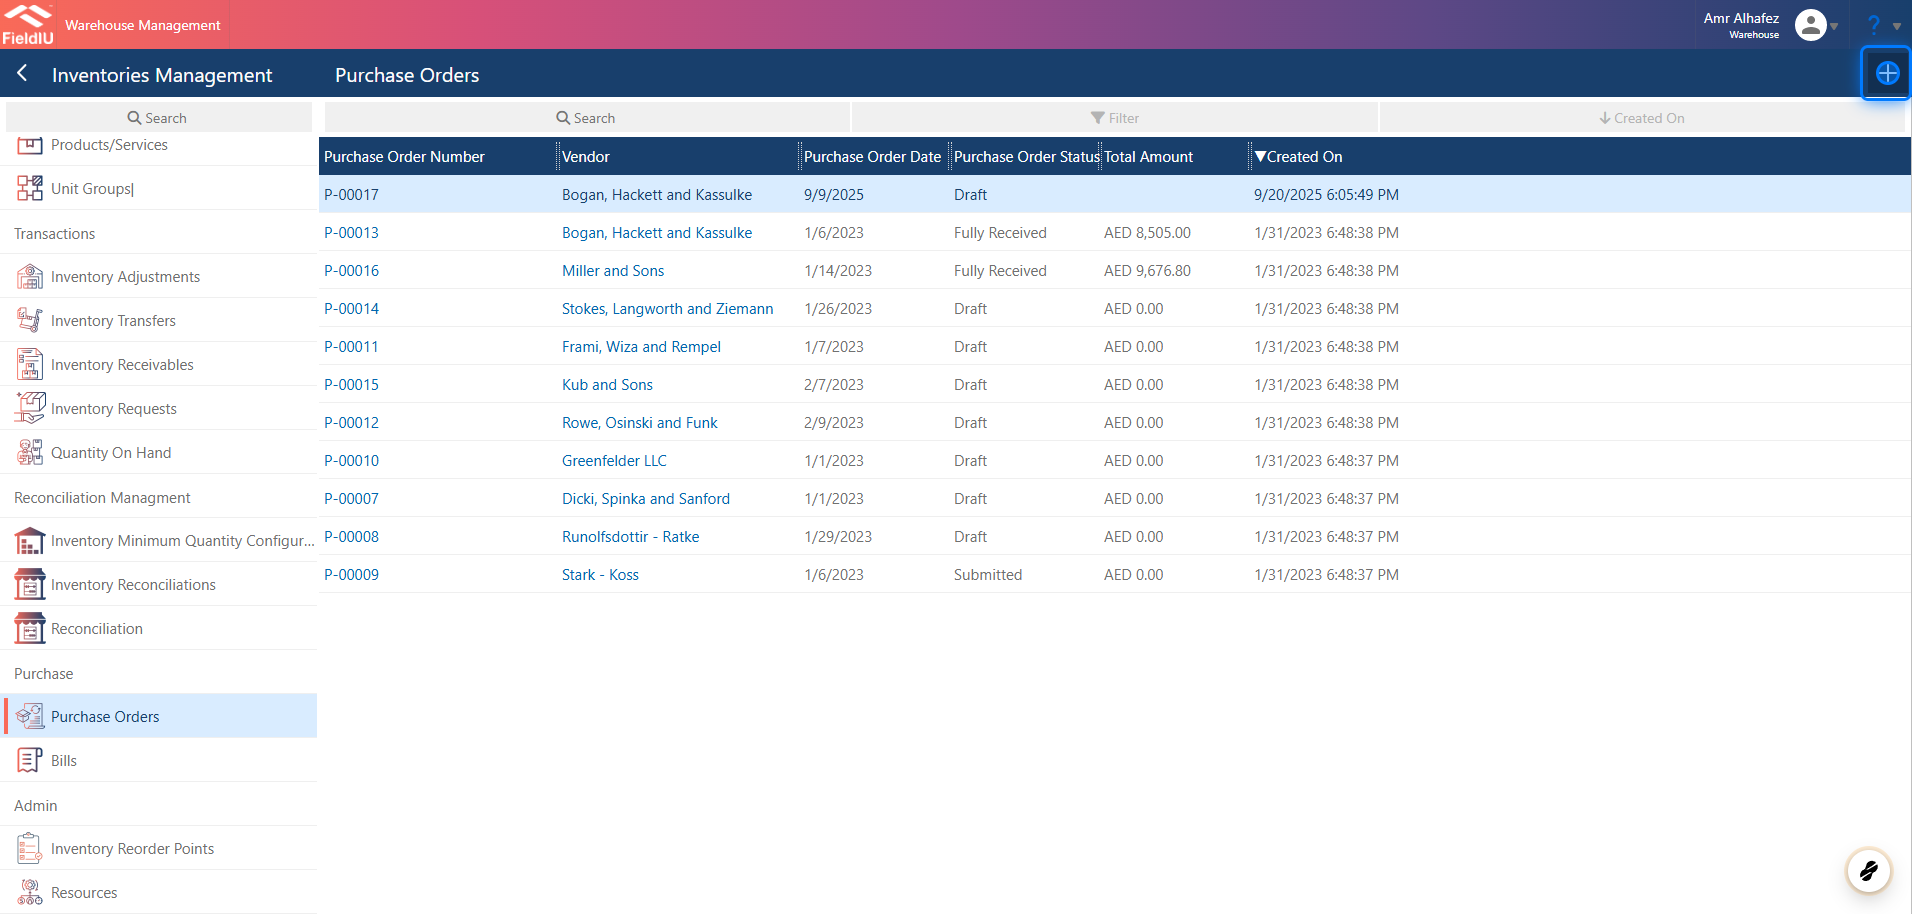
To access the purchase orders, open the **Warehouse** app. Then, from the side menu bar, click **Inventory Management** ; you will find **Purchase Orders** in the same menu.
You can create a new purchase order by clicking the **+** button, or you can enter any record by clicking on it.
 ### 2. Purchase Order Details
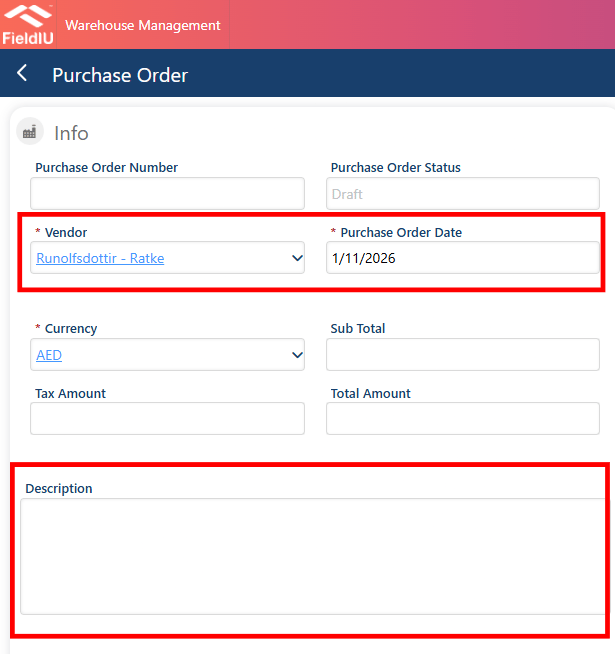
A new window will open for you to enter the purchase order details, including the vendor and purchase order date. Then click **Save** .
### 2. Purchase Order Details
A new window will open for you to enter the purchase order details, including the vendor and purchase order date. Then click **Save** .
 ### 3. Click on highlight
 ### 4. Adding Purchase Order Products
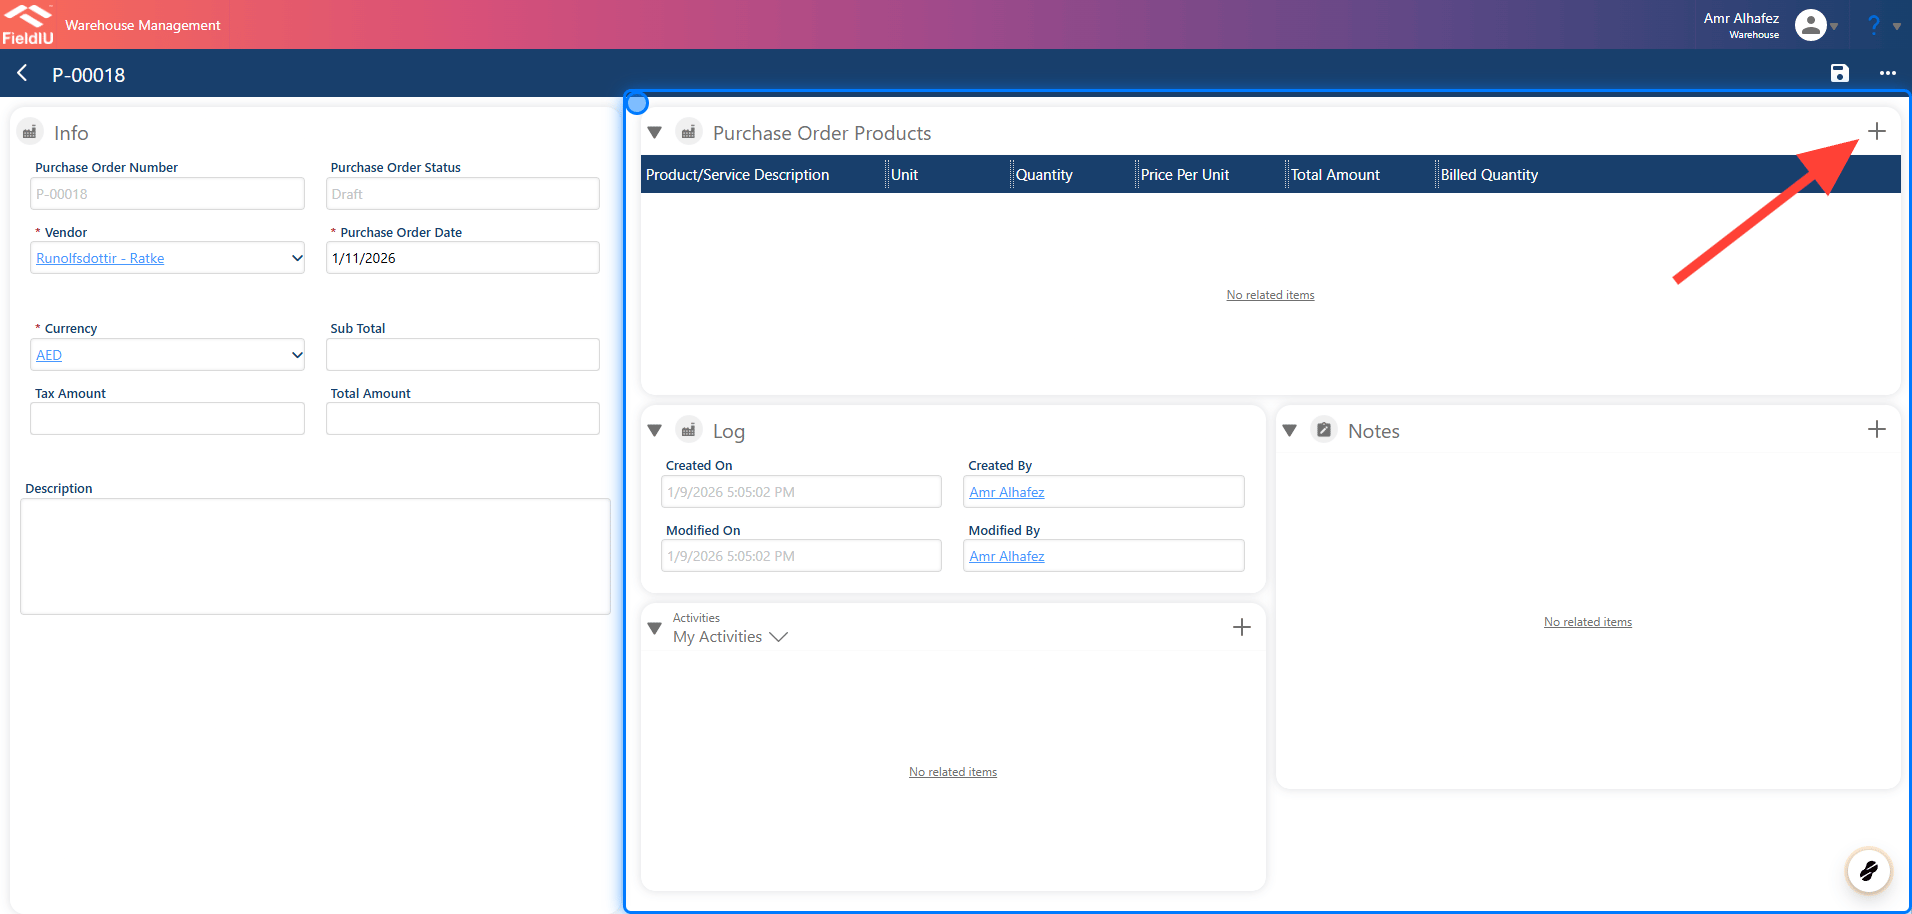
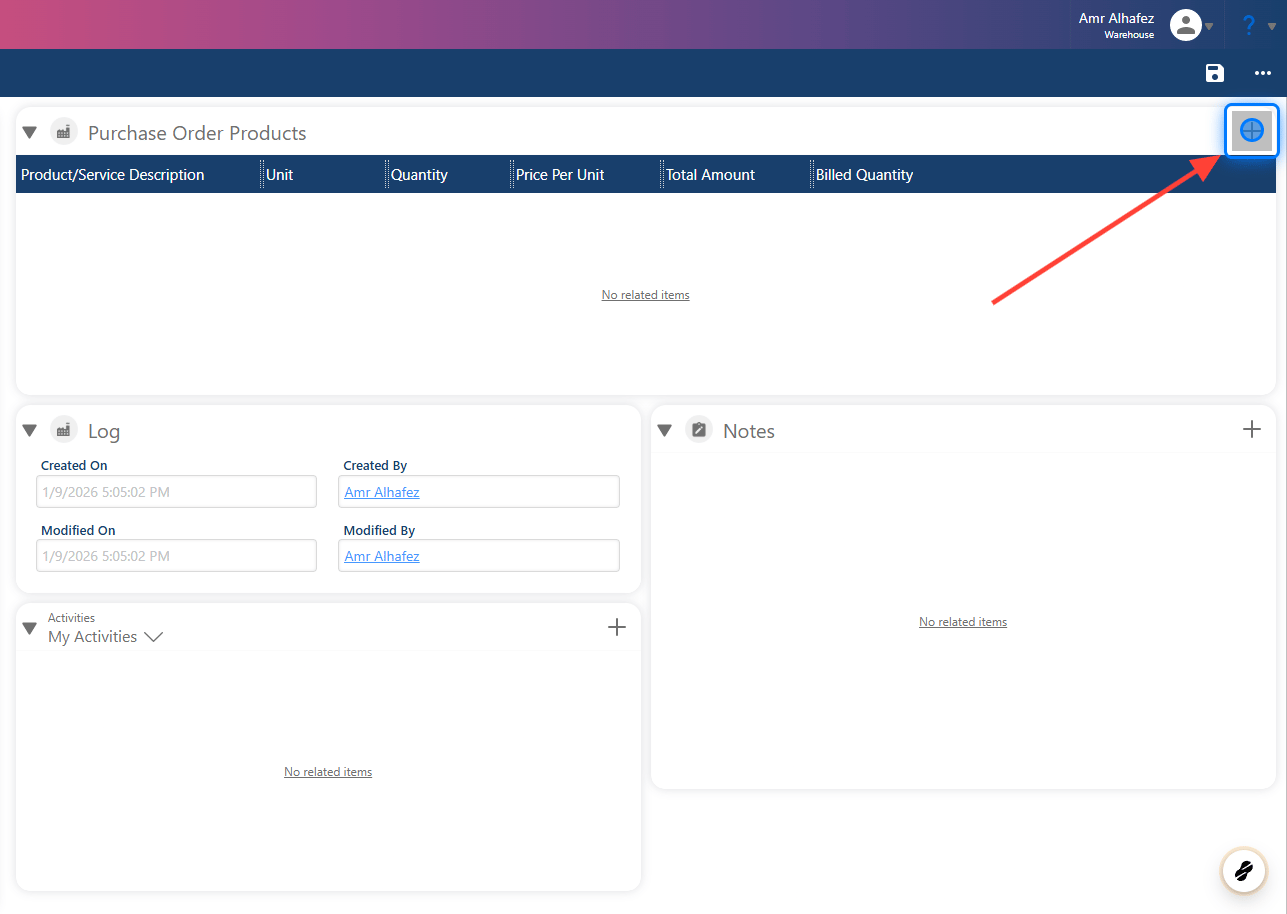
To add products to the purchase order, open the **Purchase Order Products** panel and click the **+** button to add new products.
### 4. Adding Purchase Order Products
To add products to the purchase order, open the **Purchase Order Products** panel and click the **+** button to add new products.
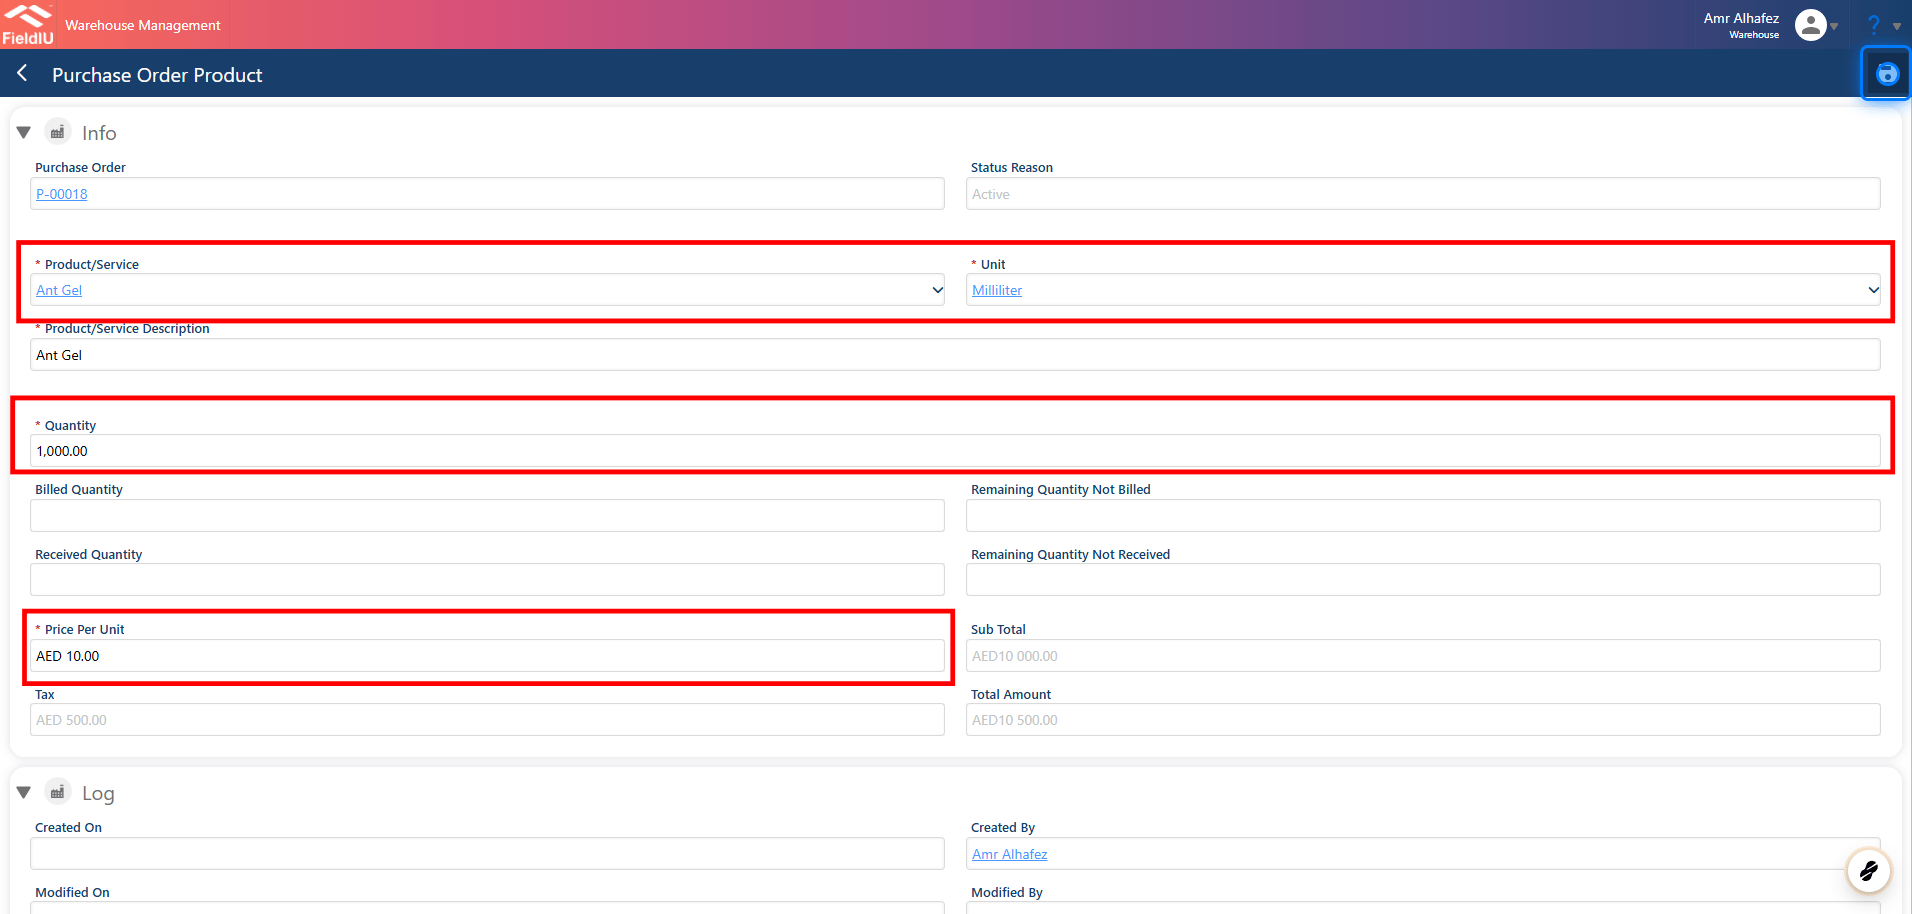
 ### 5. Fill in the product details.
 ### 6. Submit PO
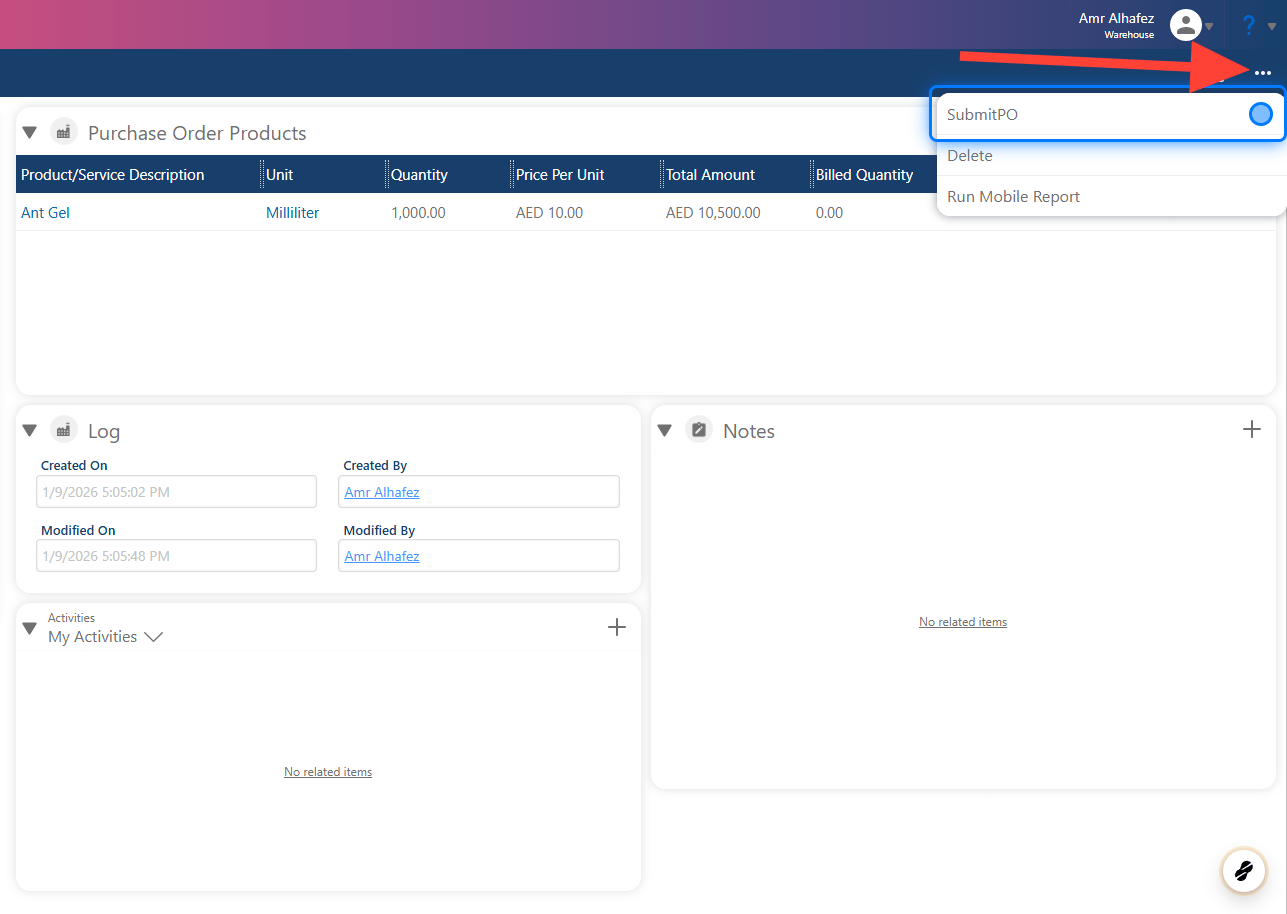
After you finish the purchase order, it will remain in **Draft** status until you submit it. To submit, click the **three-dot** button and select **Submit PO** .
### 6. Submit PO
After you finish the purchase order, it will remain in **Draft** status until you submit it. To submit, click the **three-dot** button and select **Submit PO** .
 ### 7. Confirm Submit
After you confirm, you can no longer edit the purchase order, and its status will change to **Submitted** .
### 7. Confirm Submit
After you confirm, you can no longer edit the purchase order, and its status will change to **Submitted** .
 �����������������������