> ## Documentation Index
> Fetch the complete documentation index at: https://docs.fieldiu.com/llms.txt
> Use this file to discover all available pages before exploring further.
# Inventory Request
When a user wants to request items from another inventory, we use Inventory Request. This helps manage requests quickly and automatically creates Inventory Transfer records.
### 1. Create New Request
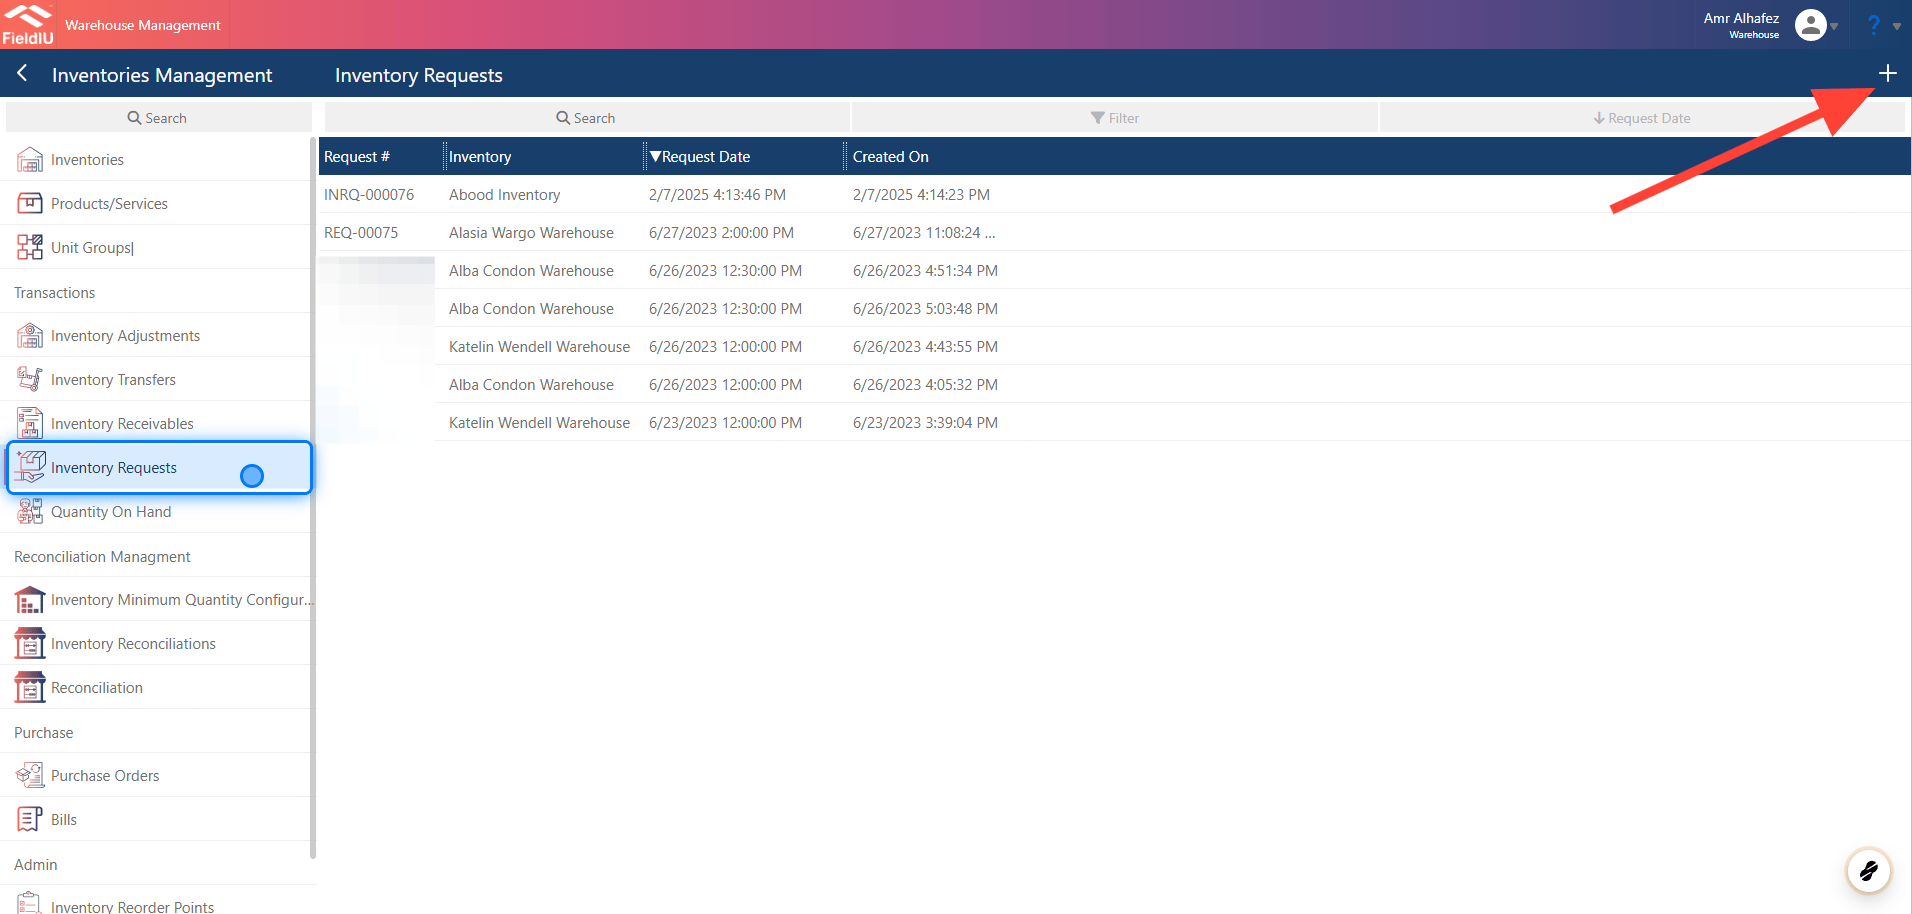
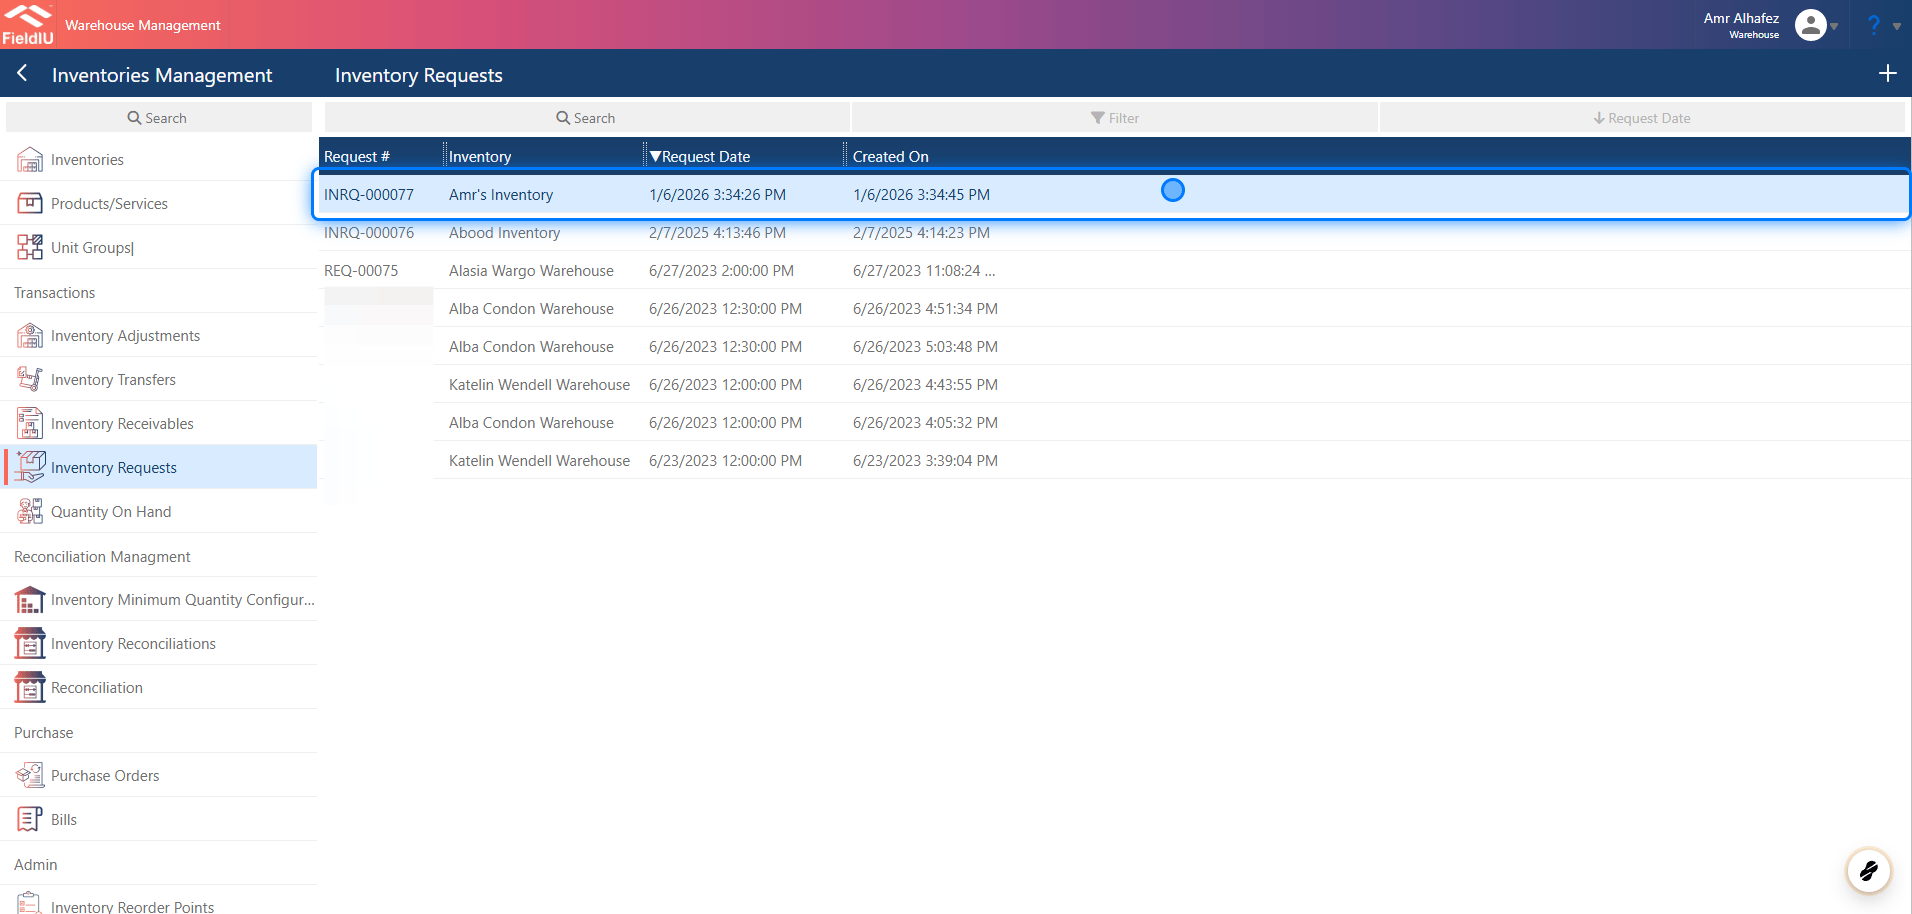
To create a new request record, open the Warehouse app. From the sidebar menu, click on the Inventory Management tab, then select Inventory Requests from the same menu. Click the + button to create a new request, or open an existing record by clicking on it.
 ### 2. New Request
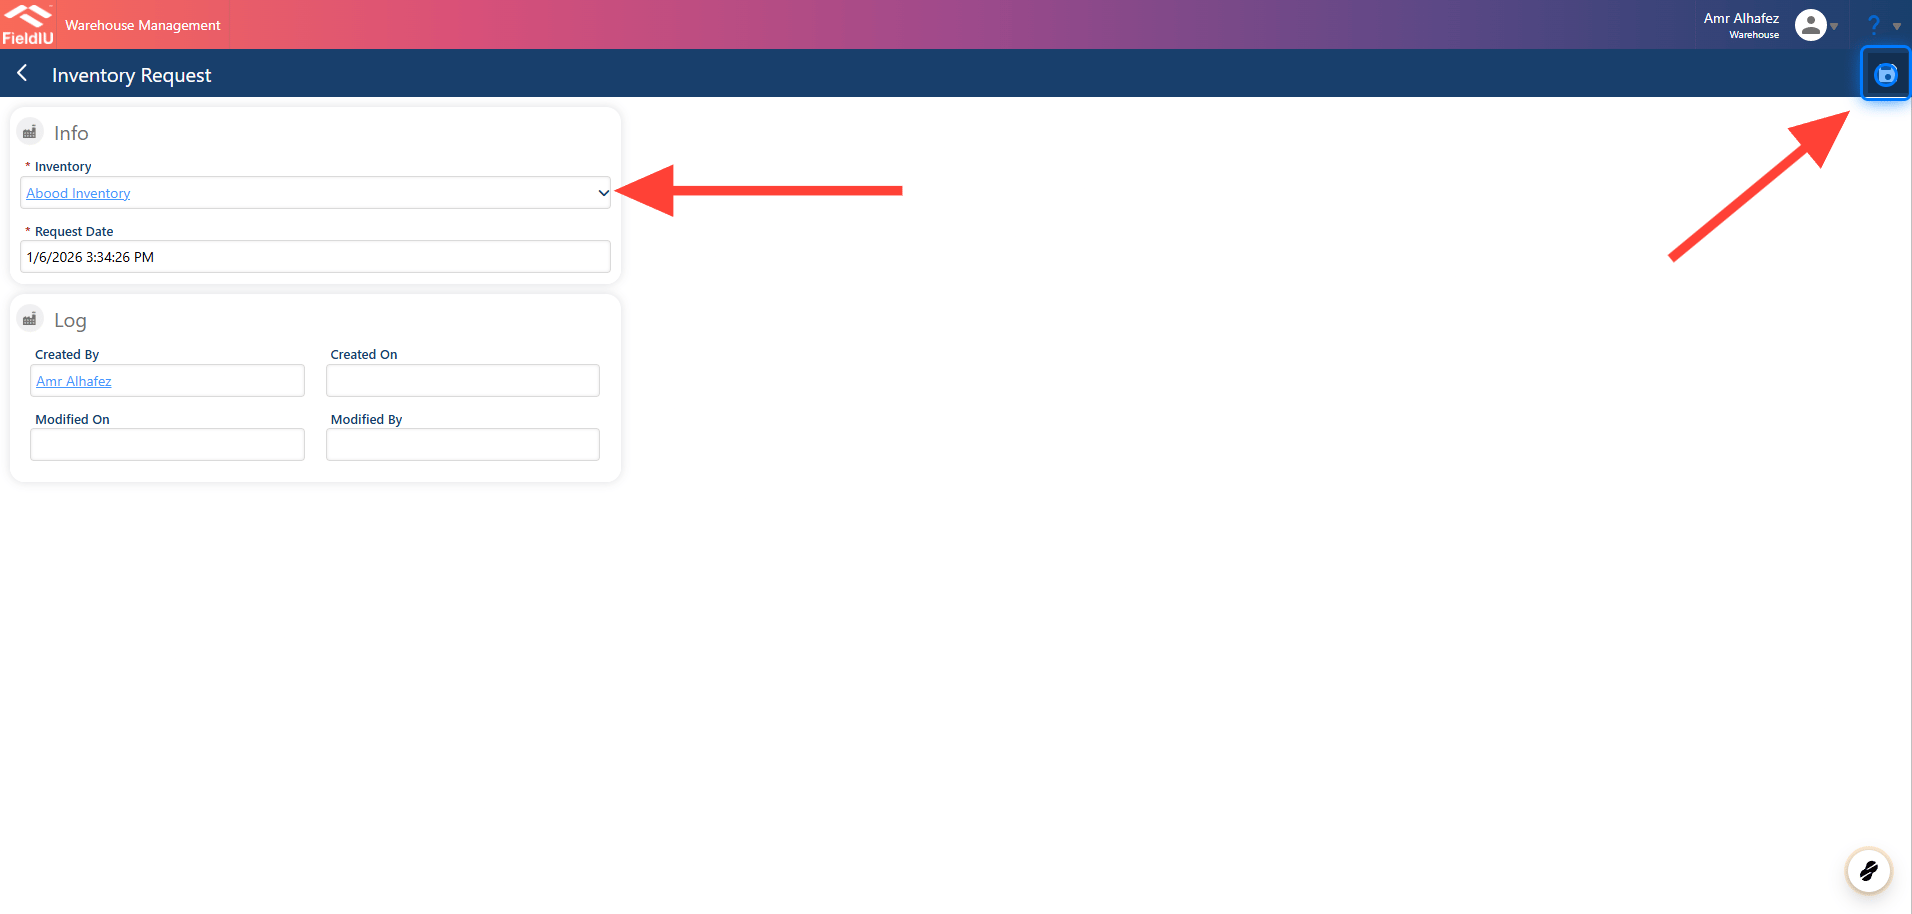
Once you click on Create, a new window will open. Fill in the form by selecting the source inventory (the date will be set automatically to the current date)
### 2. New Request
Once you click on Create, a new window will open. Fill in the form by selecting the source inventory (the date will be set automatically to the current date)
 ### 3. Adding Items
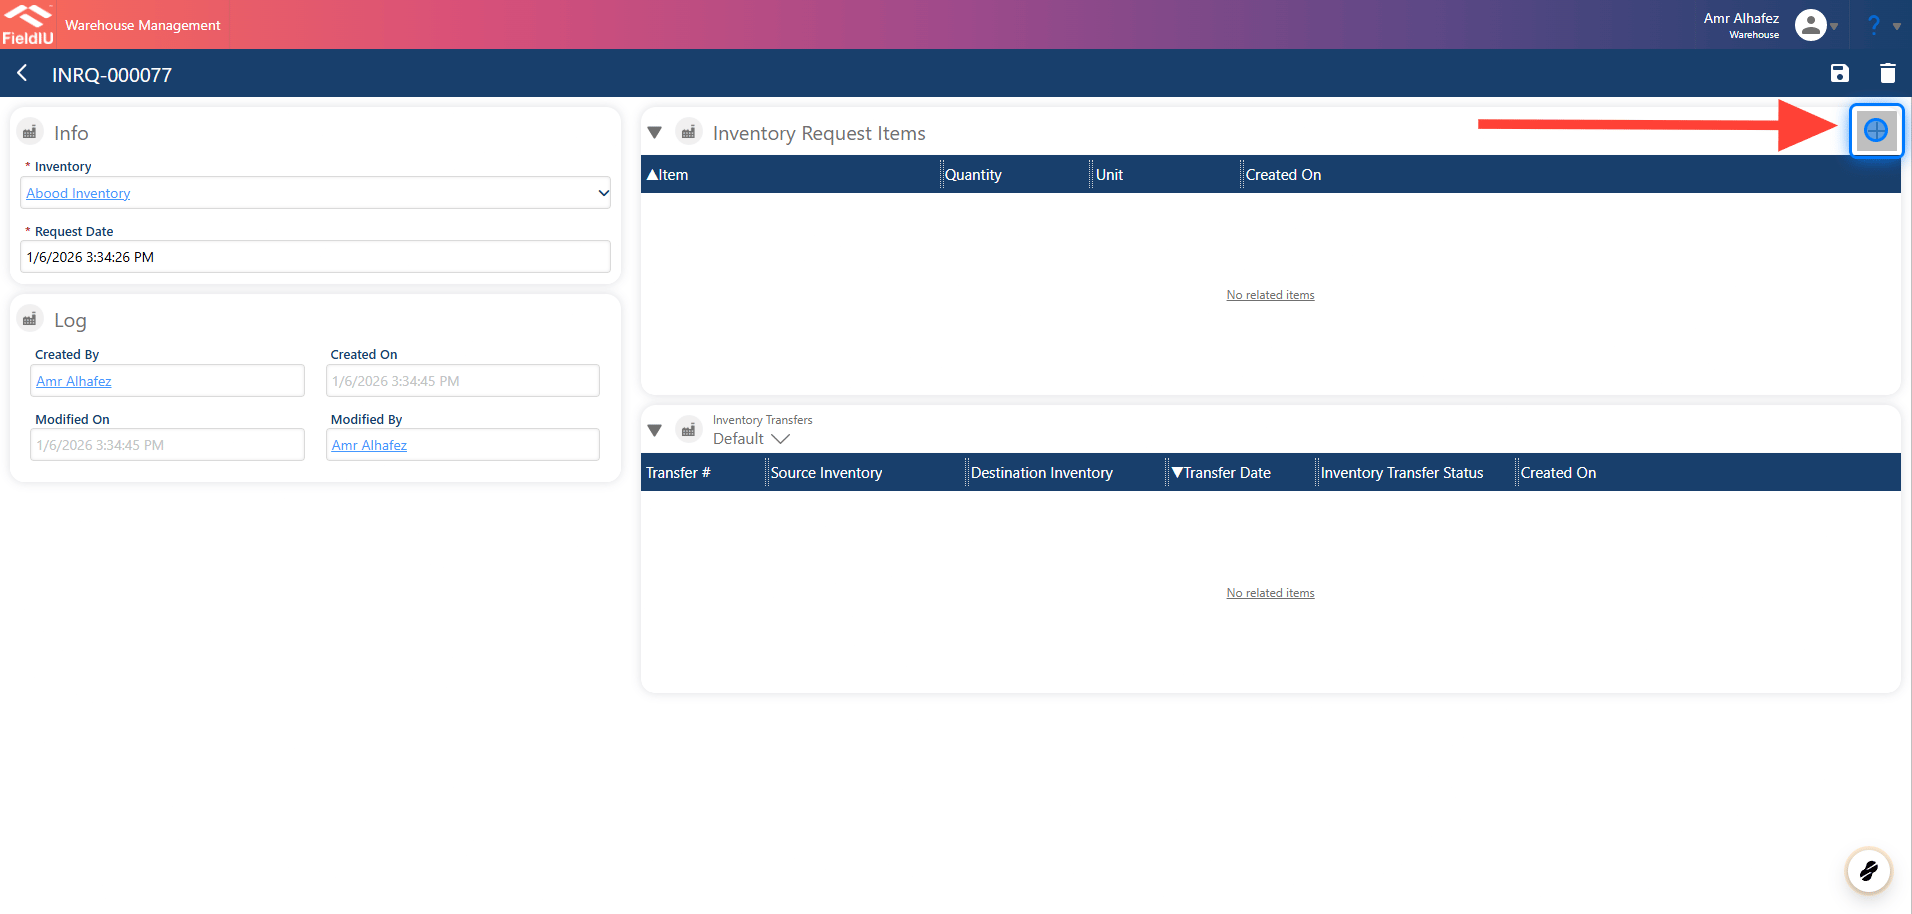
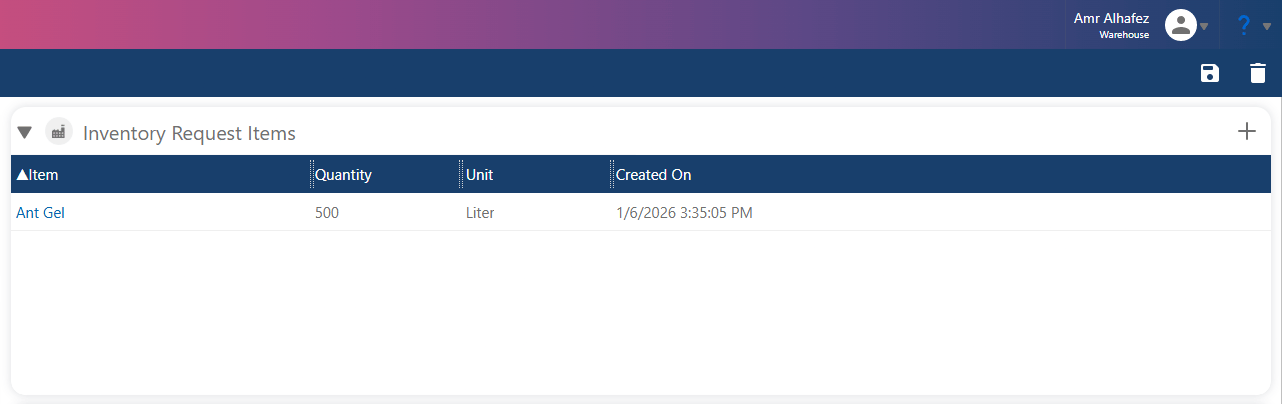
Once you save, you can add items to the request from the Inventory Request Item panel. Just click the + button to add a new item to the request.
### 3. Adding Items
Once you save, you can add items to the request from the Inventory Request Item panel. Just click the + button to add a new item to the request.
 ### 4. Fill The Item Details And Save
 ### 5.
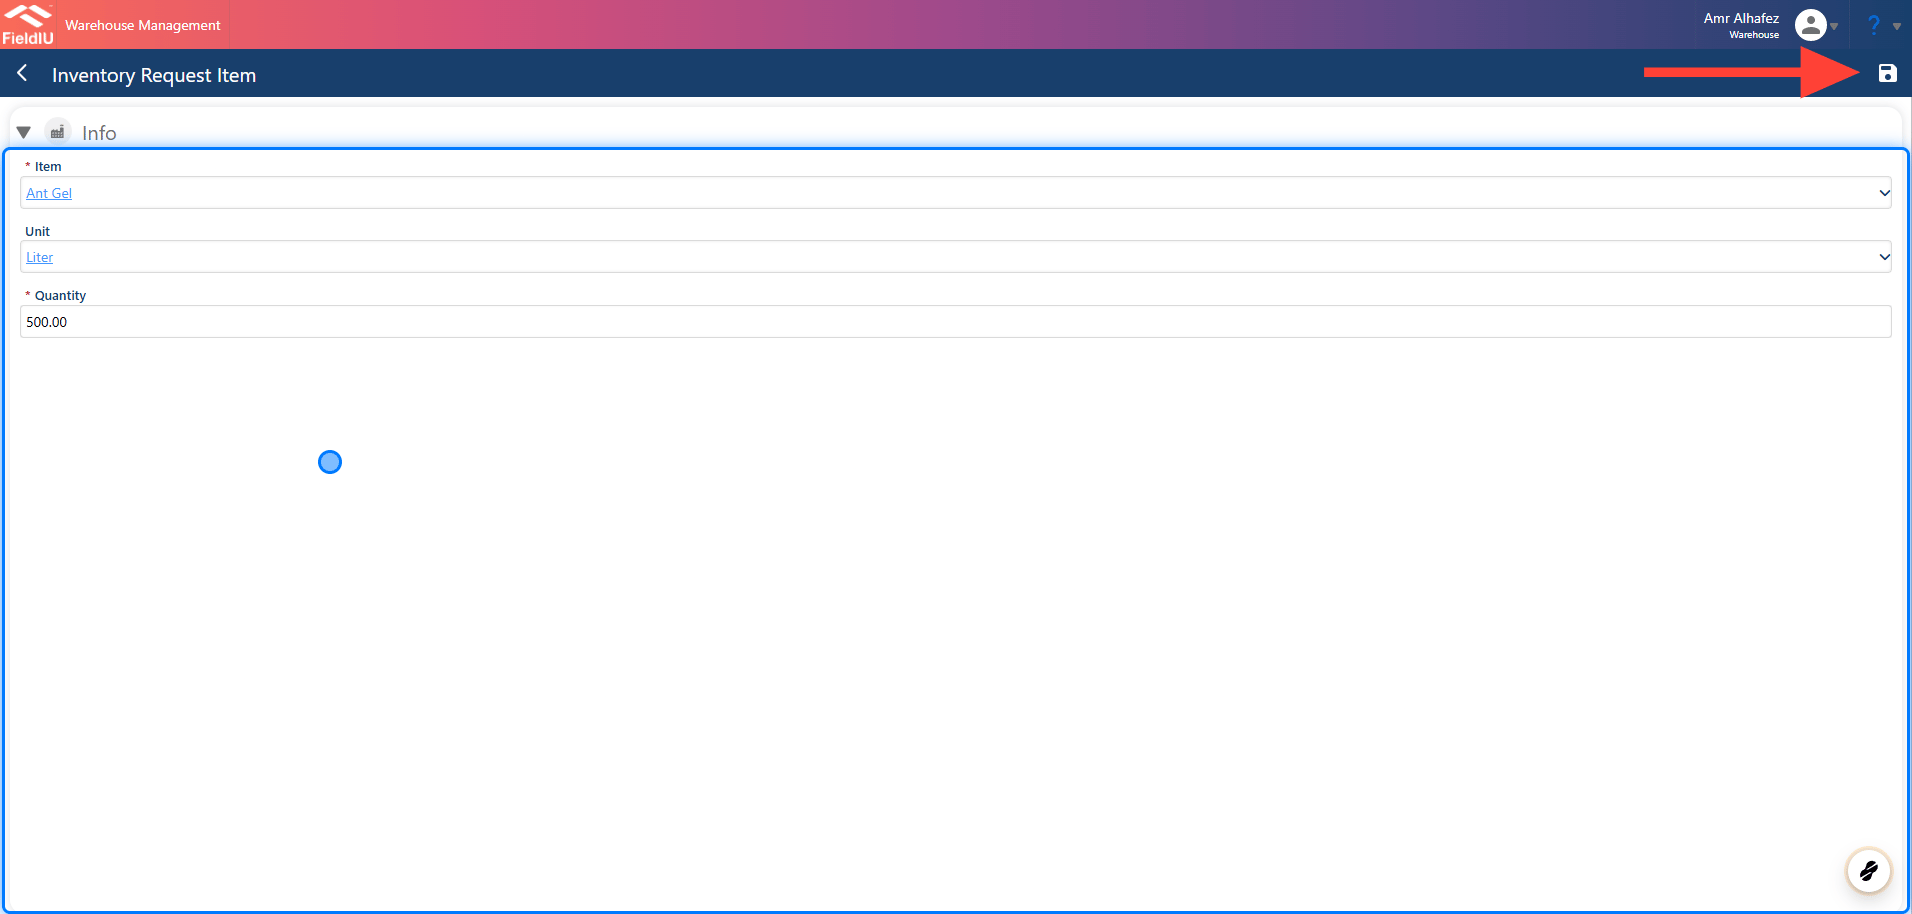
As you can see, the item is now listed in the Inventory Request Item panel.
### 5.
As you can see, the item is now listed in the Inventory Request Item panel.
 > ### 💡 Sending The Request
>
> **Once you save the request, it will appear in the Source Inventory Owner’s Request List.**
## Submitting Inventory Request
### 6. Open The Request
**The Source Inventory Owner should create the inventory transfer.**
> ### 💡 Sending The Request
>
> **Once you save the request, it will appear in the Source Inventory Owner’s Request List.**
## Submitting Inventory Request
### 6. Open The Request
**The Source Inventory Owner should create the inventory transfer.**
 ### 7. Create Inventory Transfer
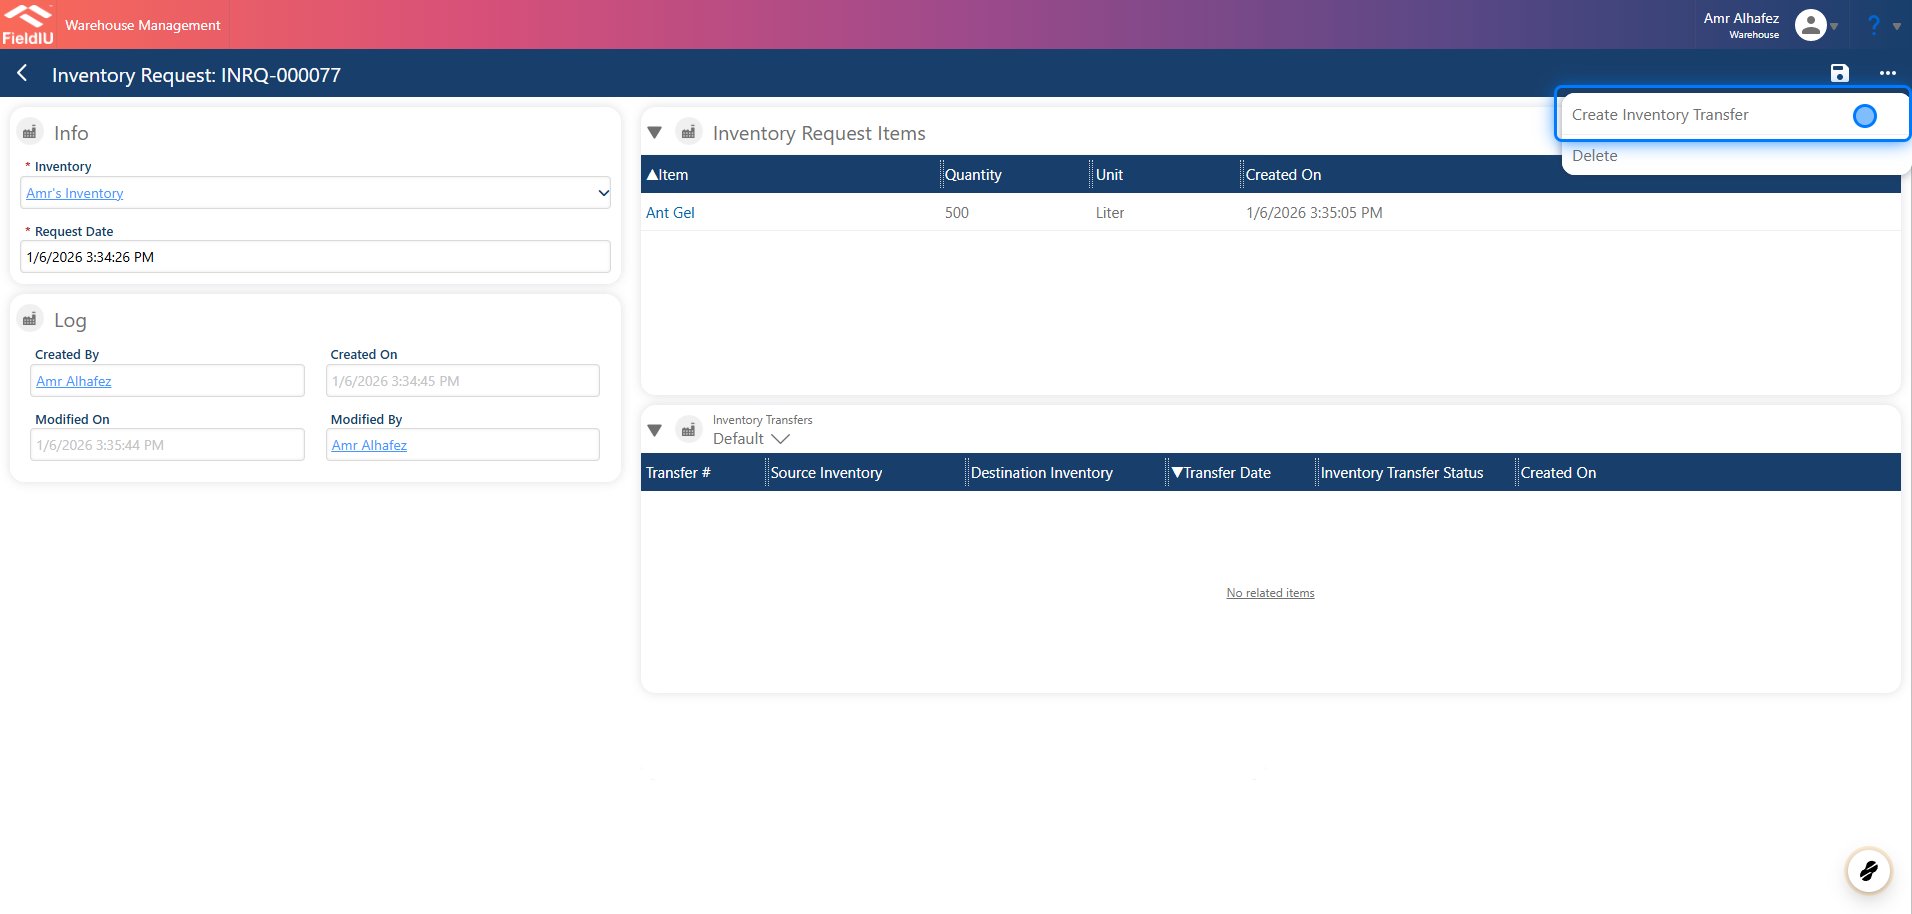
Click the 3-dots button, then select ‘Create Inventory Transfer.’
### 7. Create Inventory Transfer
Click the 3-dots button, then select ‘Create Inventory Transfer.’
 ### 8. The System Will Automatically Create Inventory Transfer Record
 �����������������������