> ## Documentation Index
> Fetch the complete documentation index at: https://docs.fieldiu.com/llms.txt
> Use this file to discover all available pages before exploring further.
# Scopes
**Scopes** provide a structured way to define the specific tasks and target insects that need to be addressed during a work order. By assigning a scope, you ensure that all necessary actions are clearly outlined and visible to field staff through their mobile application. This helps streamline execution, reduce the risk of oversight, and maintain consistency in service quality across different job sites
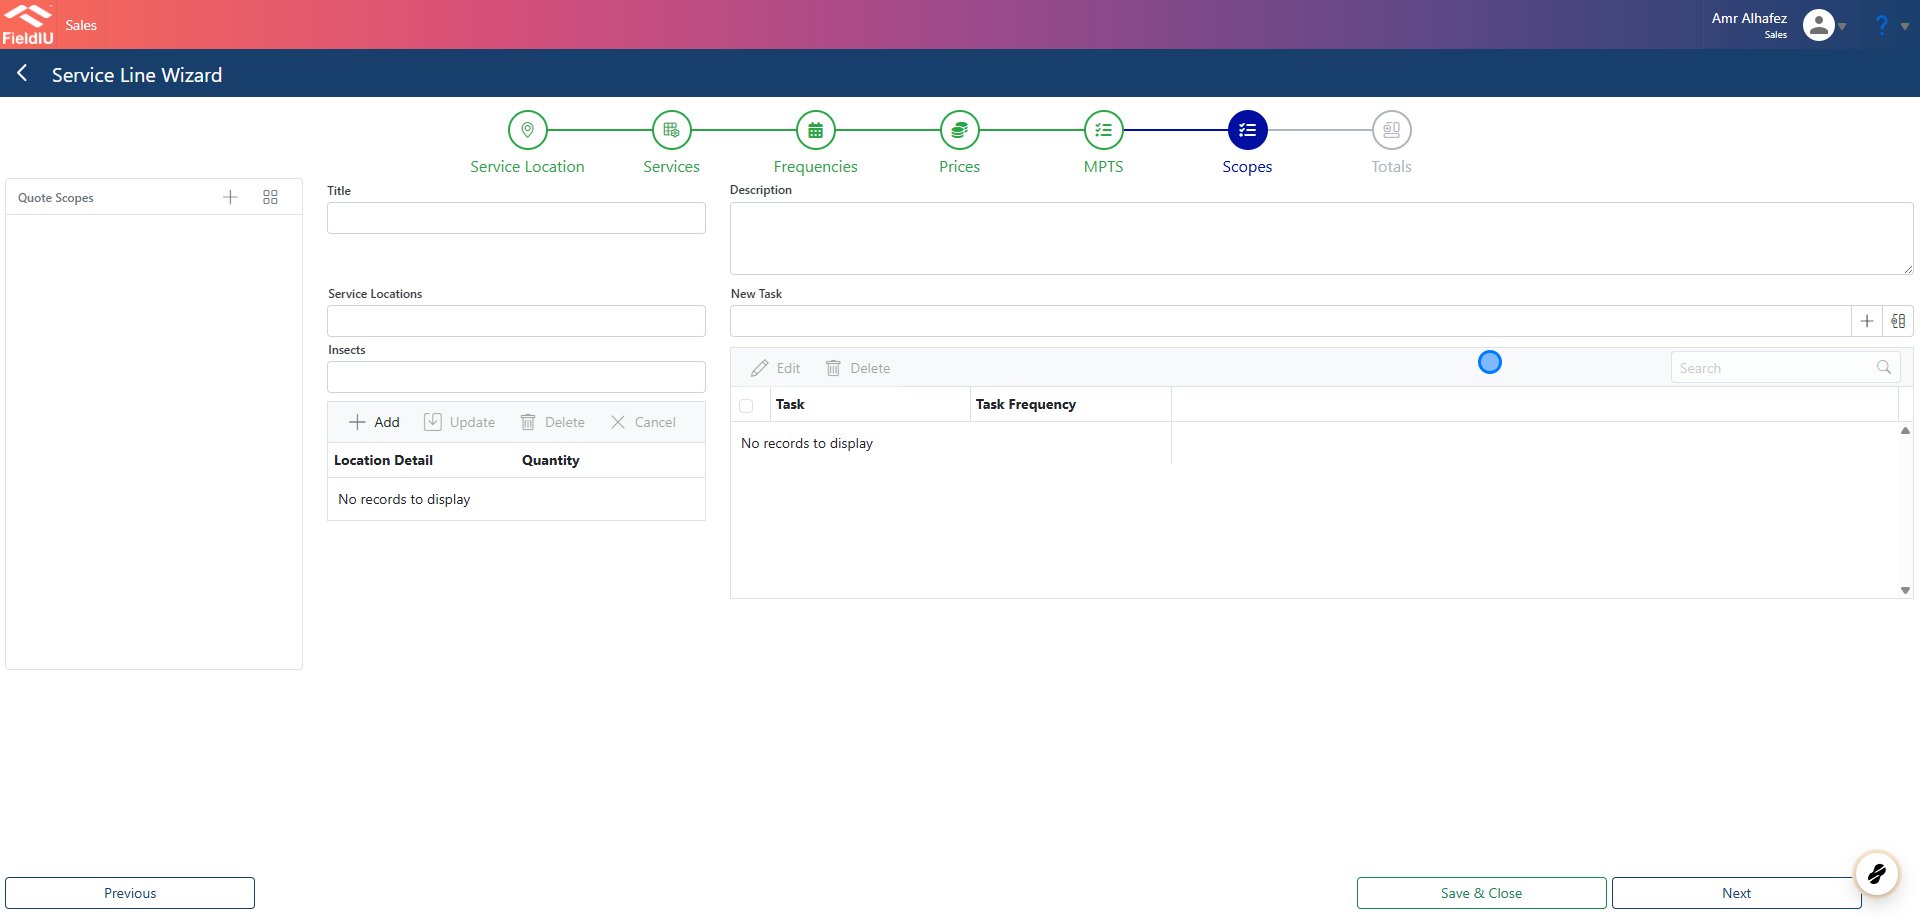
### 1. Quote "Advanced Wizard"
The first stage where you can add scopes is during the **Quotation Advanced Wizard** Setup.\
[Click here to learn more about the Advanced Wizard.](https://docs.fieldiu.com/knowledgebase/advanced-wizard/)
 ## Adding Scopes to Existed Contract
### 2. Create New Scopes
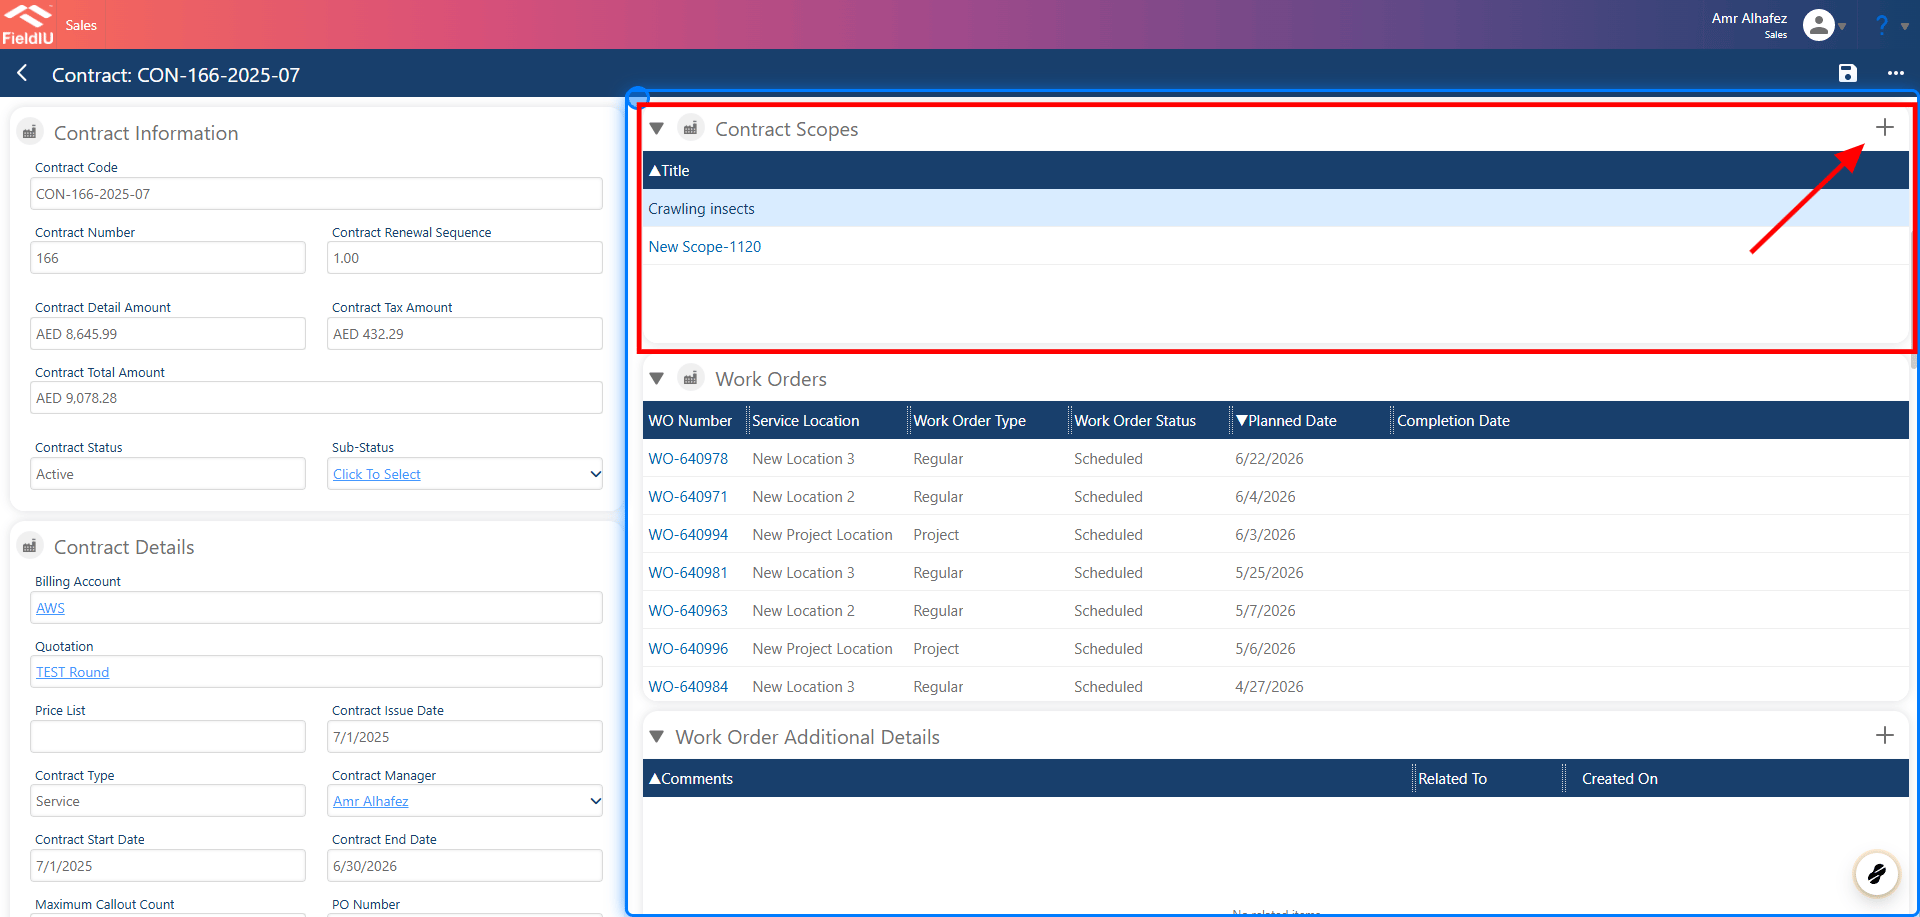
In the contract view, scroll down to find the **Scopes** section on the right side.\
From there, you can add new scopes or edit existing ones as needed.
## Adding Scopes to Existed Contract
### 2. Create New Scopes
In the contract view, scroll down to find the **Scopes** section on the right side.\
From there, you can add new scopes or edit existing ones as needed.
 ## Adding Scopes
### 3. Adding new scope
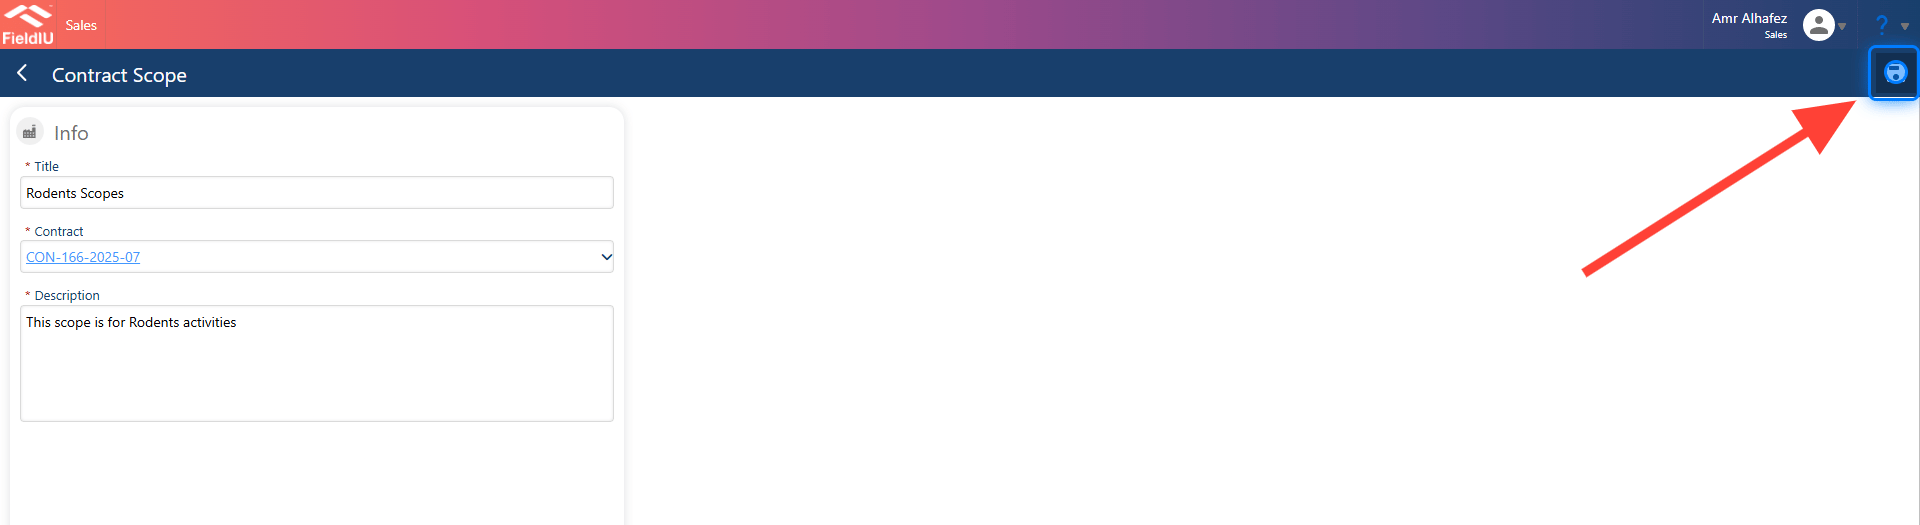
When you click the **“+”** button, a new window will open where you can define a new scope for the contract.\
Start by entering a **name** and a **description** , then click **Save** to create the scope.
## Adding Scopes
### 3. Adding new scope
When you click the **“+”** button, a new window will open where you can define a new scope for the contract.\
Start by entering a **name** and a **description** , then click **Save** to create the scope.
 ### 4. Scope sections
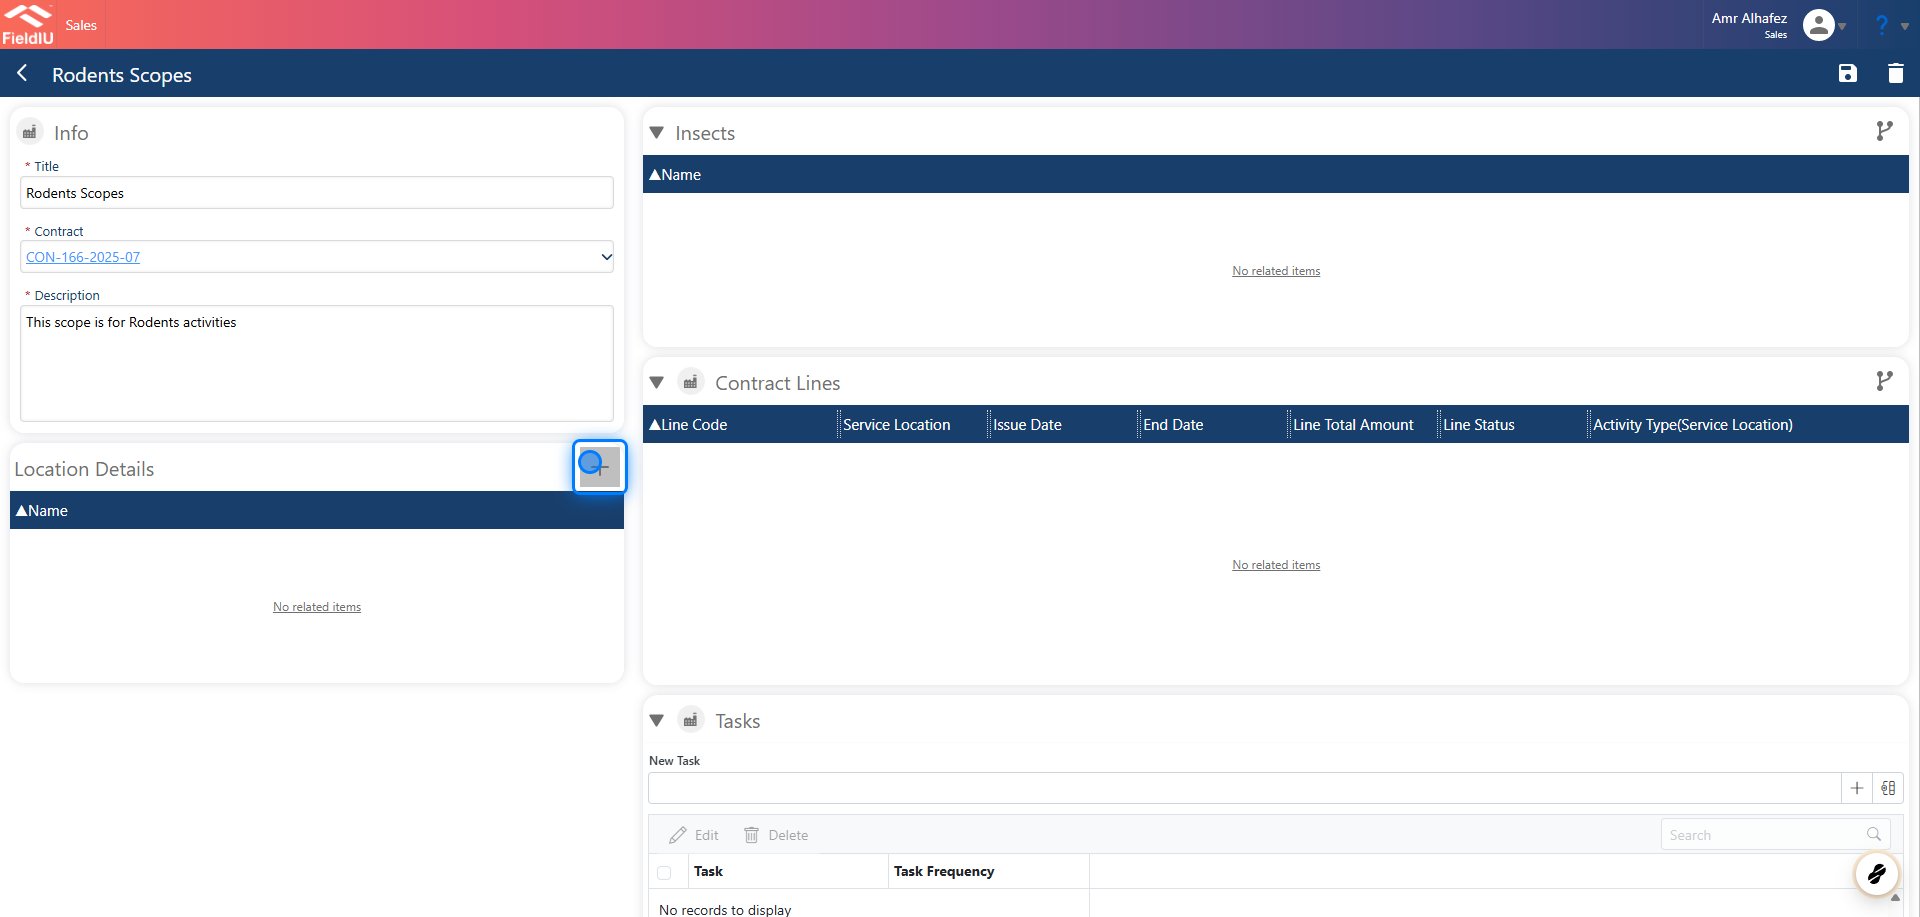
After saving the new scope, additional sections will appear for further configuration:
* **Location Details** : Specify the exact location where this scope will be applied.
* **Insects** : Link the target insects or pests that this scope should focus on.
* **Contract Lines** : Select the contract lines that should be included in this scope. You can choose one or multiple lines as needed.
* **Tasks** : Add tasks associated with the scope and define their recurrence. You can also assign specific tasks to particular work orders if required.
### 4. Scope sections
After saving the new scope, additional sections will appear for further configuration:
* **Location Details** : Specify the exact location where this scope will be applied.
* **Insects** : Link the target insects or pests that this scope should focus on.
* **Contract Lines** : Select the contract lines that should be included in this scope. You can choose one or multiple lines as needed.
* **Tasks** : Add tasks associated with the scope and define their recurrence. You can also assign specific tasks to particular work orders if required.
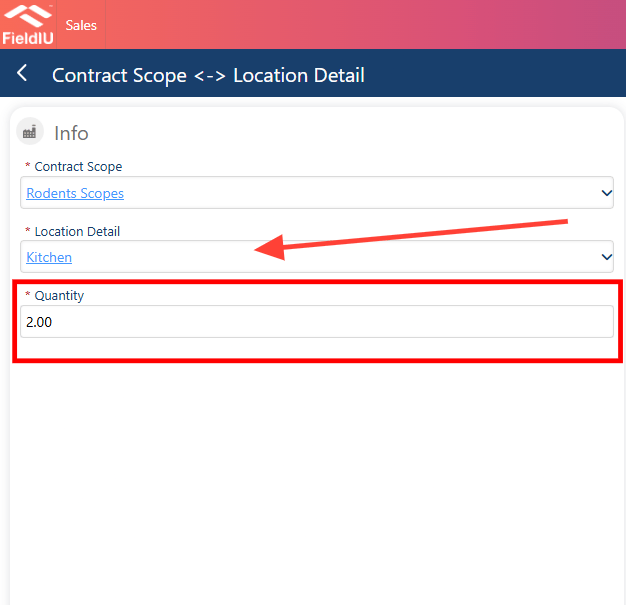
 ### 5. Location Details
In this section, you need to select the location to be scoped. These locations are **predefined in the Manager App** .\
Additionally, specify the **quantity** —i.e., how many instances of this location should be included in the scope.
### 5. Location Details
In this section, you need to select the location to be scoped. These locations are **predefined in the Manager App** .\
Additionally, specify the **quantity** —i.e., how many instances of this location should be included in the scope.
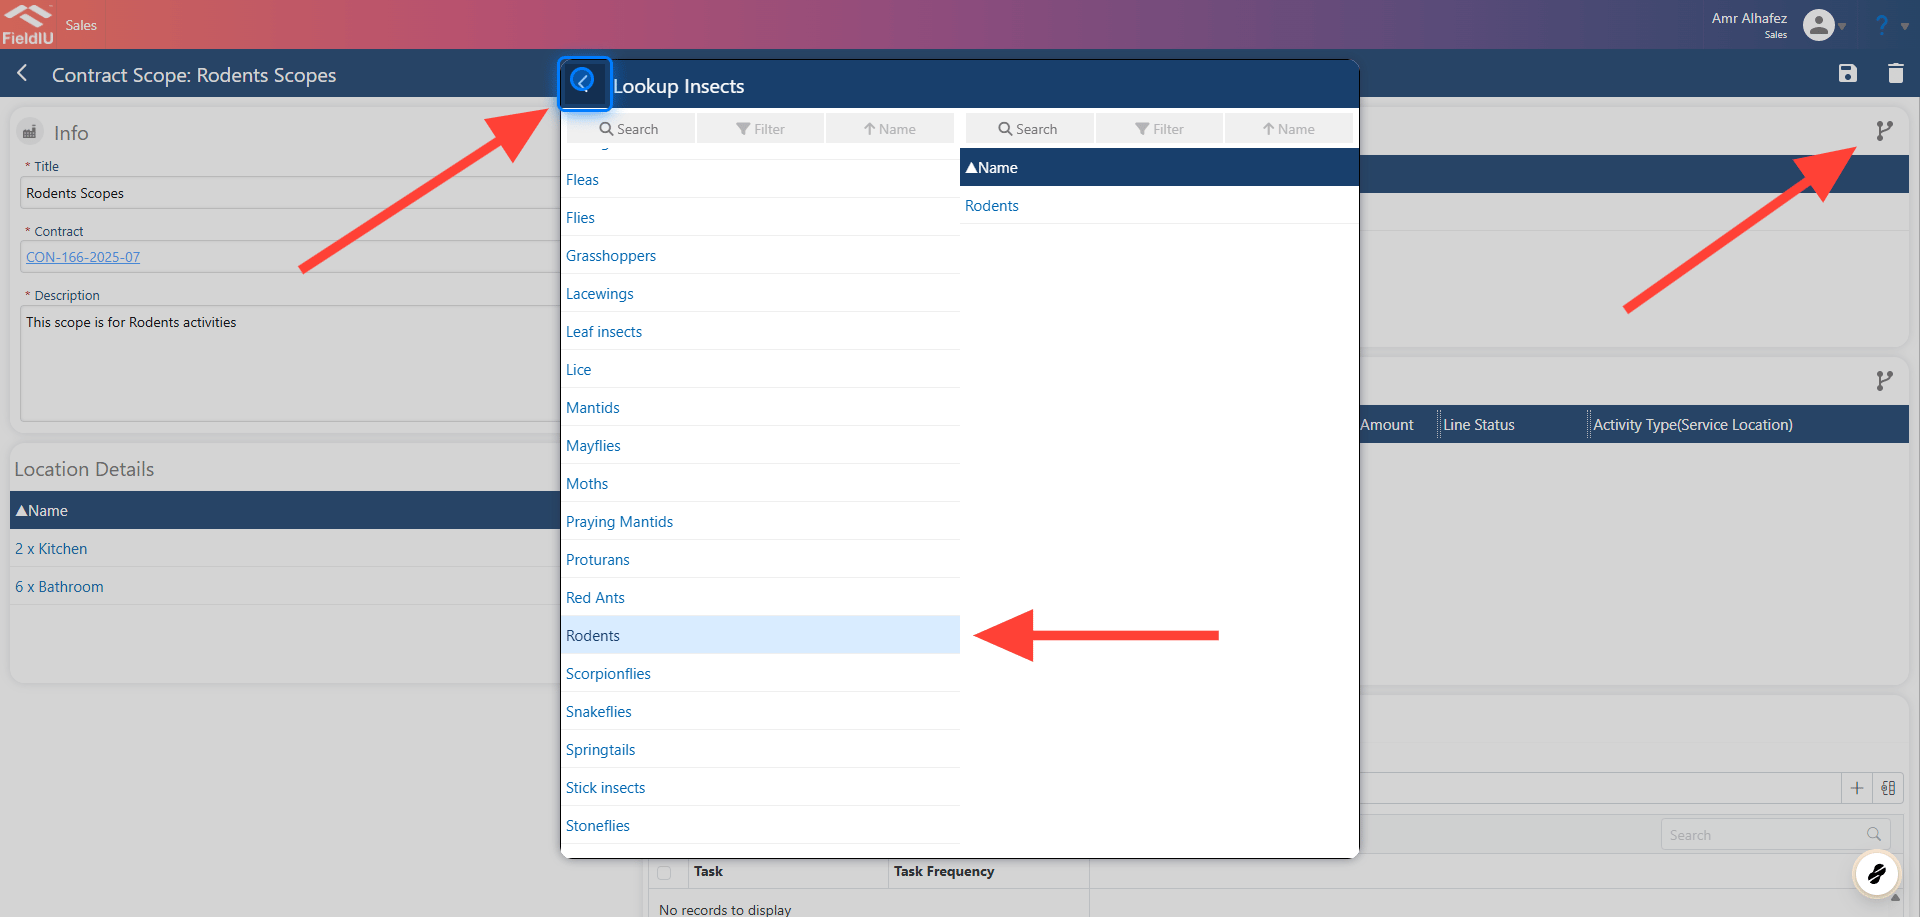
 ### 6. Insects
Link insects by clicking the **link icon** . This allows you to associate the relevant pests or insects with the
### 6. Insects
Link insects by clicking the **link icon** . This allows you to associate the relevant pests or insects with the
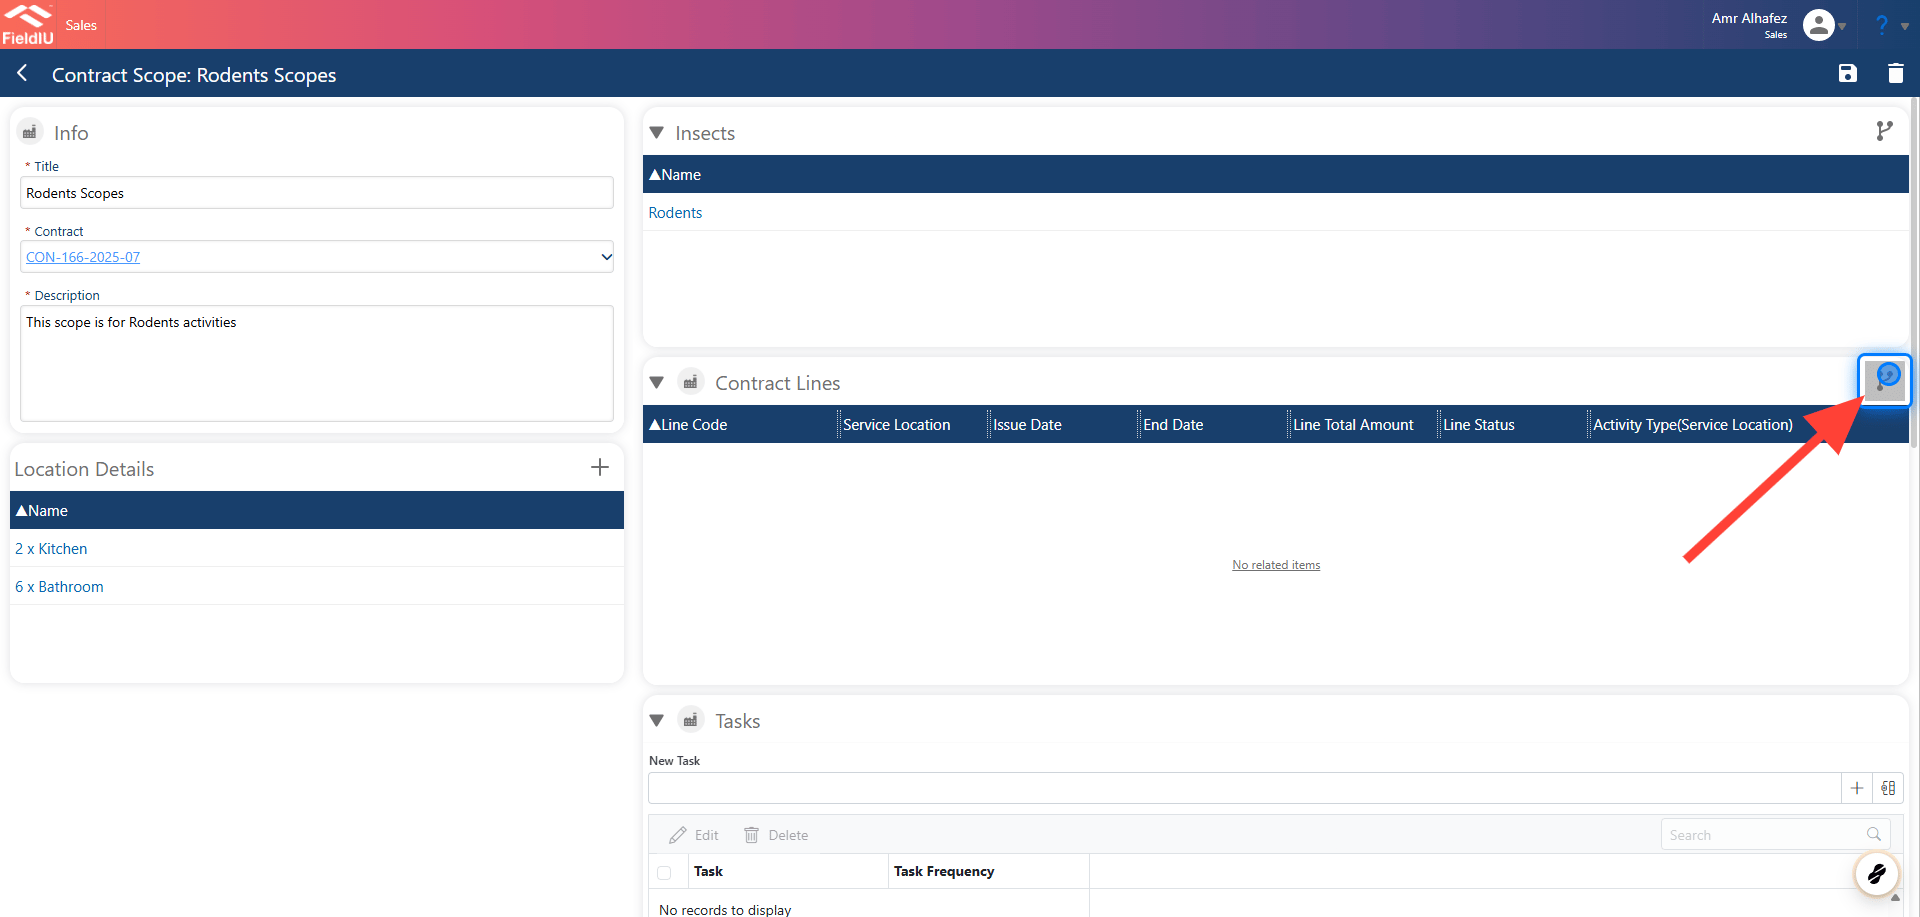
 ### 7. Contract Lines
Just like with insects, link the desired contract lines by clicking the **link icon** . You can select one or multiple contract lines to associate with this scope.
### 7. Contract Lines
Just like with insects, link the desired contract lines by clicking the **link icon** . You can select one or multiple contract lines to associate with this scope.
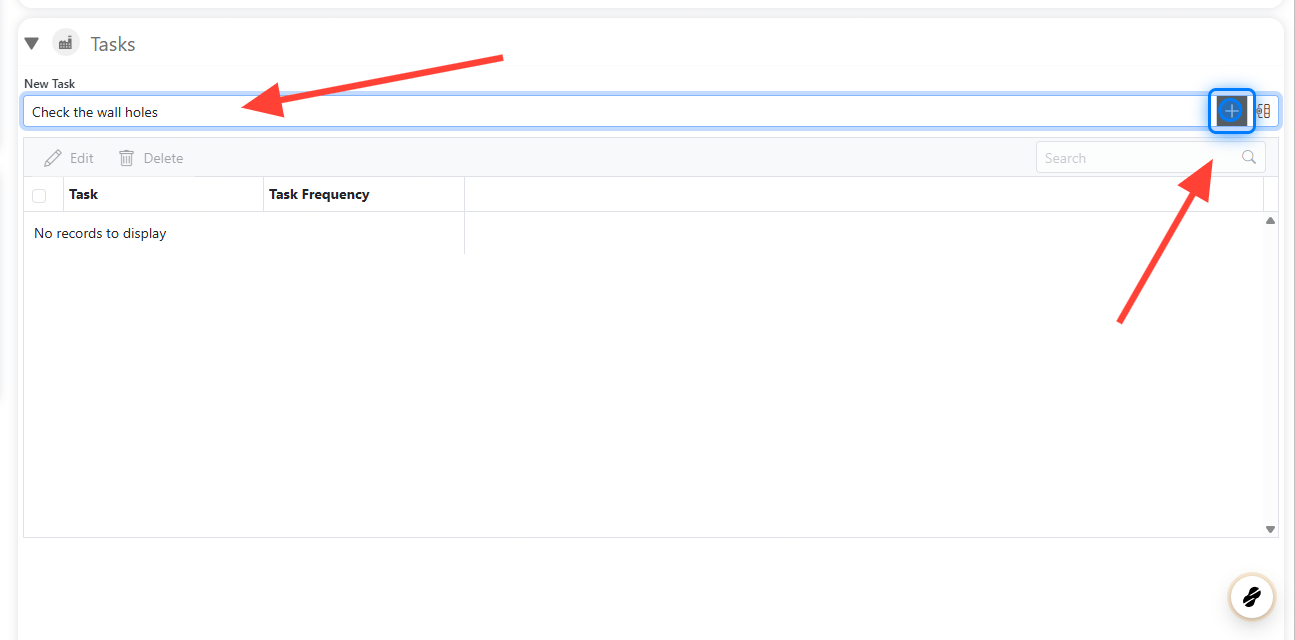
 ### 8. Tasks
To add a new task, enter the task name in the input field and click the **“+”** button. This will add the task to the list under the current scope.
### 8. Tasks
To add a new task, enter the task name in the input field and click the **“+”** button. This will add the task to the list under the current scope.
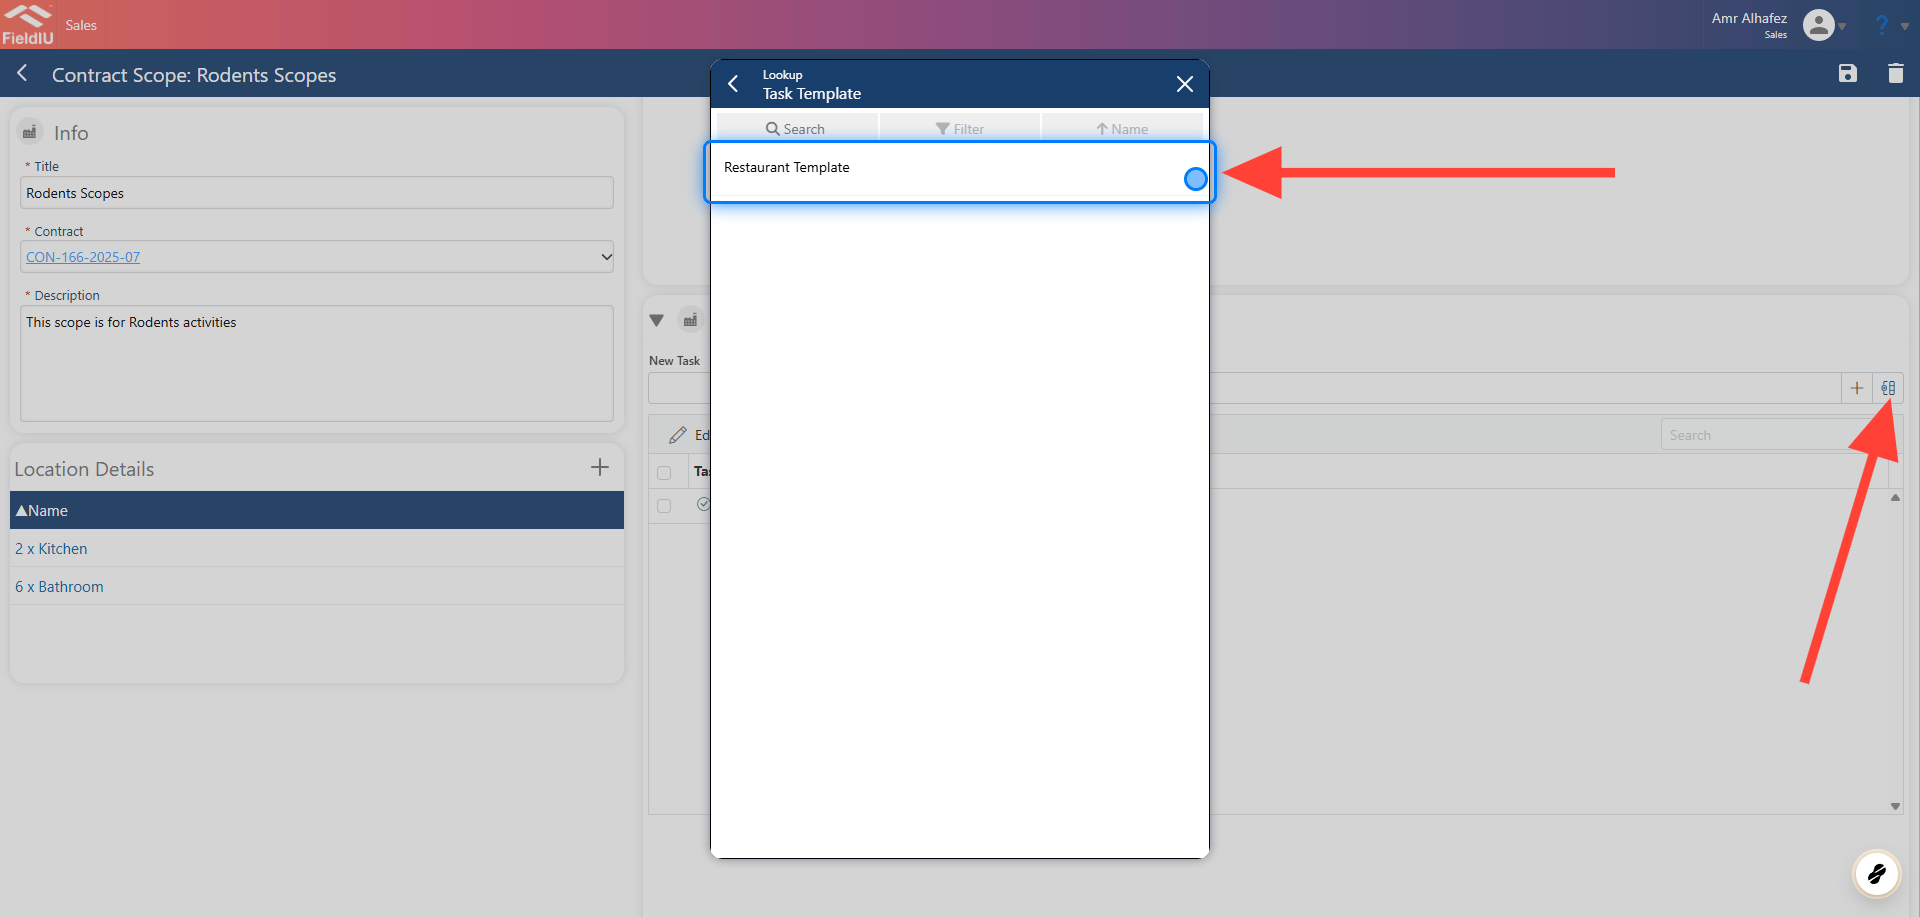
 ### 9. Task Template
You can also select a **predefined task template** to quickly add tasks to the scope. This helps save time and ensures consistency across similar work orders.
### 9. Task Template
You can also select a **predefined task template** to quickly add tasks to the scope. This helps save time and ensures consistency across similar work orders.
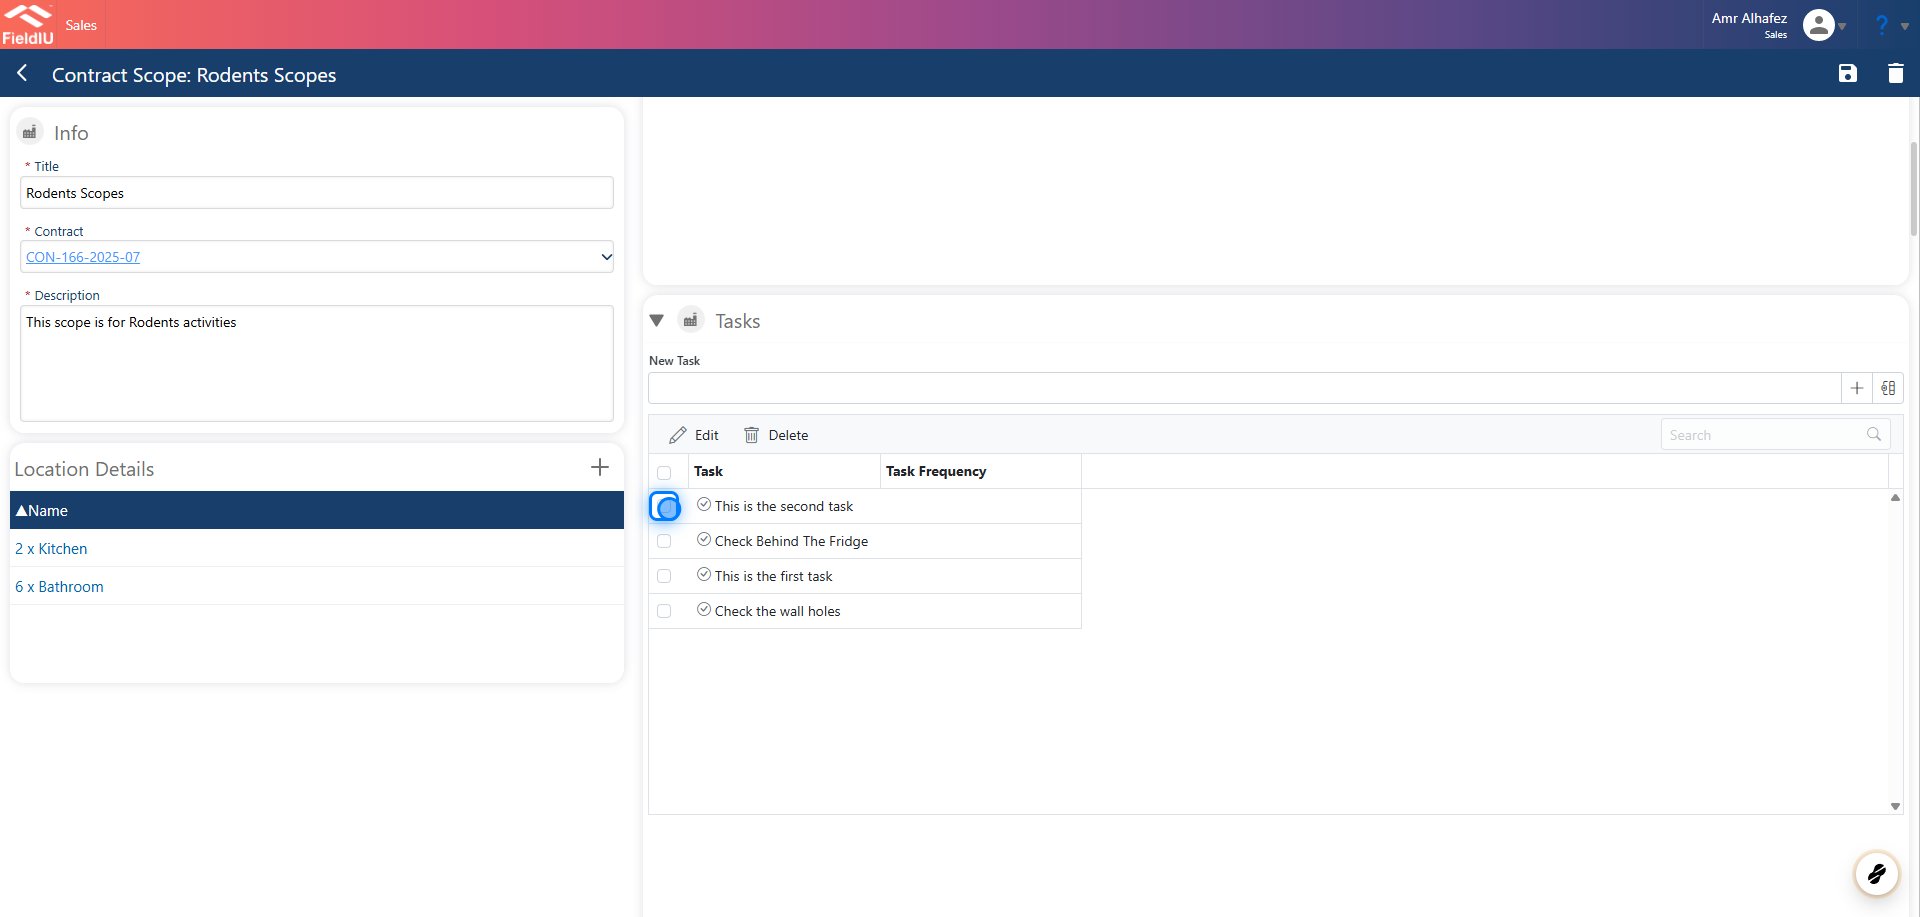
 ### 10. Adding frequency and Work Order Type
After creating the tasks, you can define the **frequency** for each task and select the **Work Order Type** to which the task should be assigned.
To do this, select one or more tasks from the list, then configure the desired frequency and Work Order Type settings.
### 10. Adding frequency and Work Order Type
After creating the tasks, you can define the **frequency** for each task and select the **Work Order Type** to which the task should be assigned.
To do this, select one or more tasks from the list, then configure the desired frequency and Work Order Type settings.
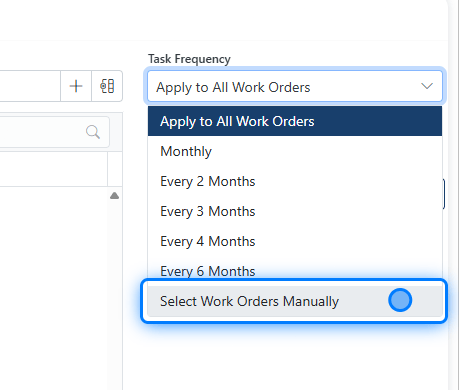
 ### 11. Task Frequency
When assigning frequency to a task, you can choose from the following options:
* **Apply to All Work Orders** – The task will be included in every work order under the contract.
* **Monthly** – The task will recur every month.
* **Every 2 Months**
* **Every 3 Months**
* **Every 4 Months**
* **Every 6 Months**
* **Select Work Orders Manually** – Allows you to manually choose one or more specific work orders to include this task in.
### 11. Task Frequency
When assigning frequency to a task, you can choose from the following options:
* **Apply to All Work Orders** – The task will be included in every work order under the contract.
* **Monthly** – The task will recur every month.
* **Every 2 Months**
* **Every 3 Months**
* **Every 4 Months**
* **Every 6 Months**
* **Select Work Orders Manually** – Allows you to manually choose one or more specific work orders to include this task in.
 ### 12.
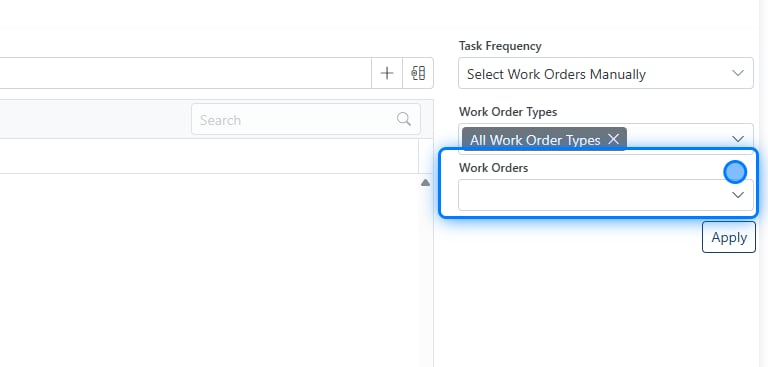 ### 13. Work Orders Type
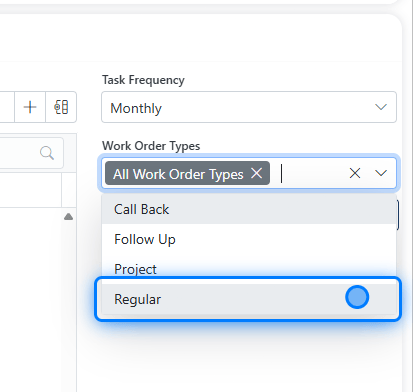
You can also assign a task to only a **specific Work Order Type** , ensuring that the task appears **only** in work orders of the selected type. This allows for greater control and customization of task execution based on the nature of the work.
### 13. Work Orders Type
You can also assign a task to only a **specific Work Order Type** , ensuring that the task appears **only** in work orders of the selected type. This allows for greater control and customization of task execution based on the nature of the work.
 ### 14. Apply
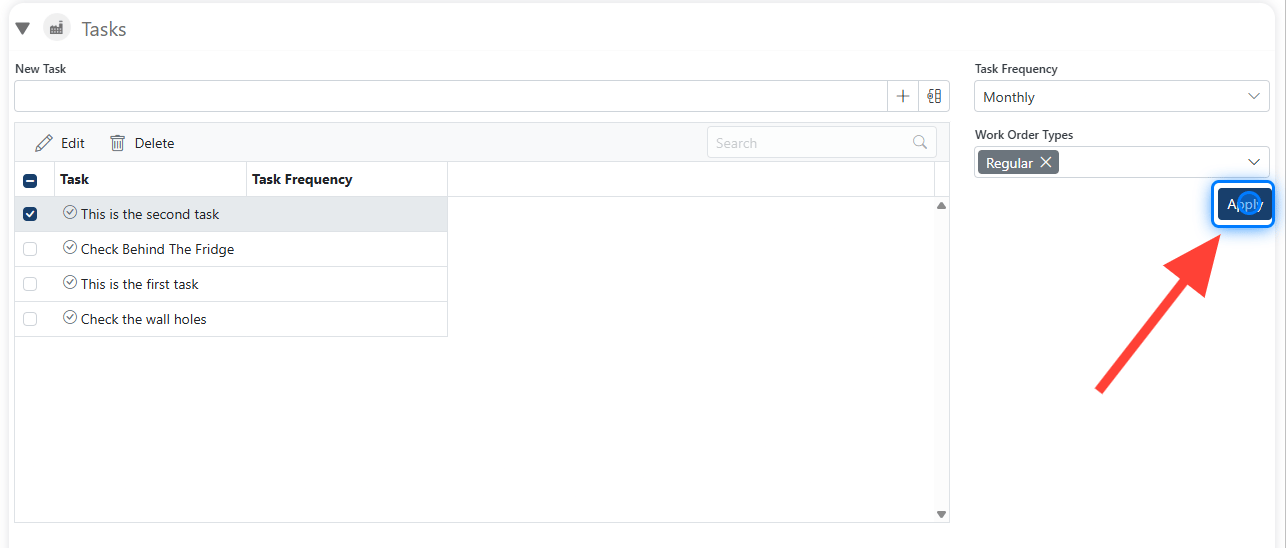
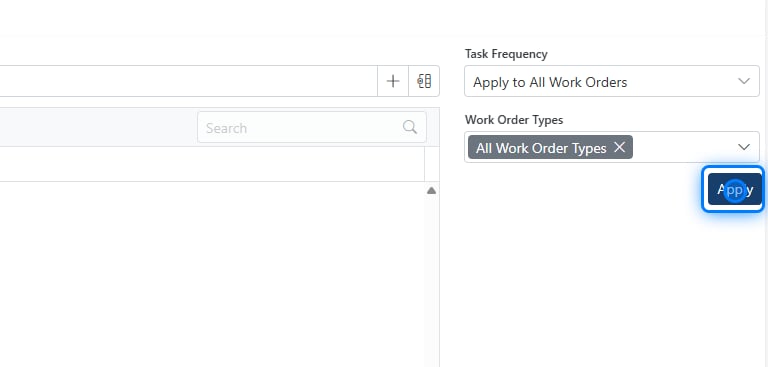
**Don’t forget to click “Apply”** to save your changes and ensure that the task settings are properly assigned to the selected work orders.
### 14. Apply
**Don’t forget to click “Apply”** to save your changes and ensure that the task settings are properly assigned to the selected work orders.
 ### 15. Click on Apply
 ### 16. Save The Scope
 > ### 💡 Scope Template
>
> You can predefine a list of scopes to reuse later, so you don't have to create the same scopes each time.
### 17. Scope Templates
In the Manager app, under Operations Management, you will find Scope Templates, where you can define templates for scopes to use later.
> ### 💡 Scope Template
>
> You can predefine a list of scopes to reuse later, so you don't have to create the same scopes each time.
### 17. Scope Templates
In the Manager app, under Operations Management, you will find Scope Templates, where you can define templates for scopes to use later.
 �����������������������