> ## Documentation Index
> Fetch the complete documentation index at: https://docs.fieldiu.com/llms.txt
> Use this file to discover all available pages before exploring further.
# Project Invoicing
### 1. Invoicing
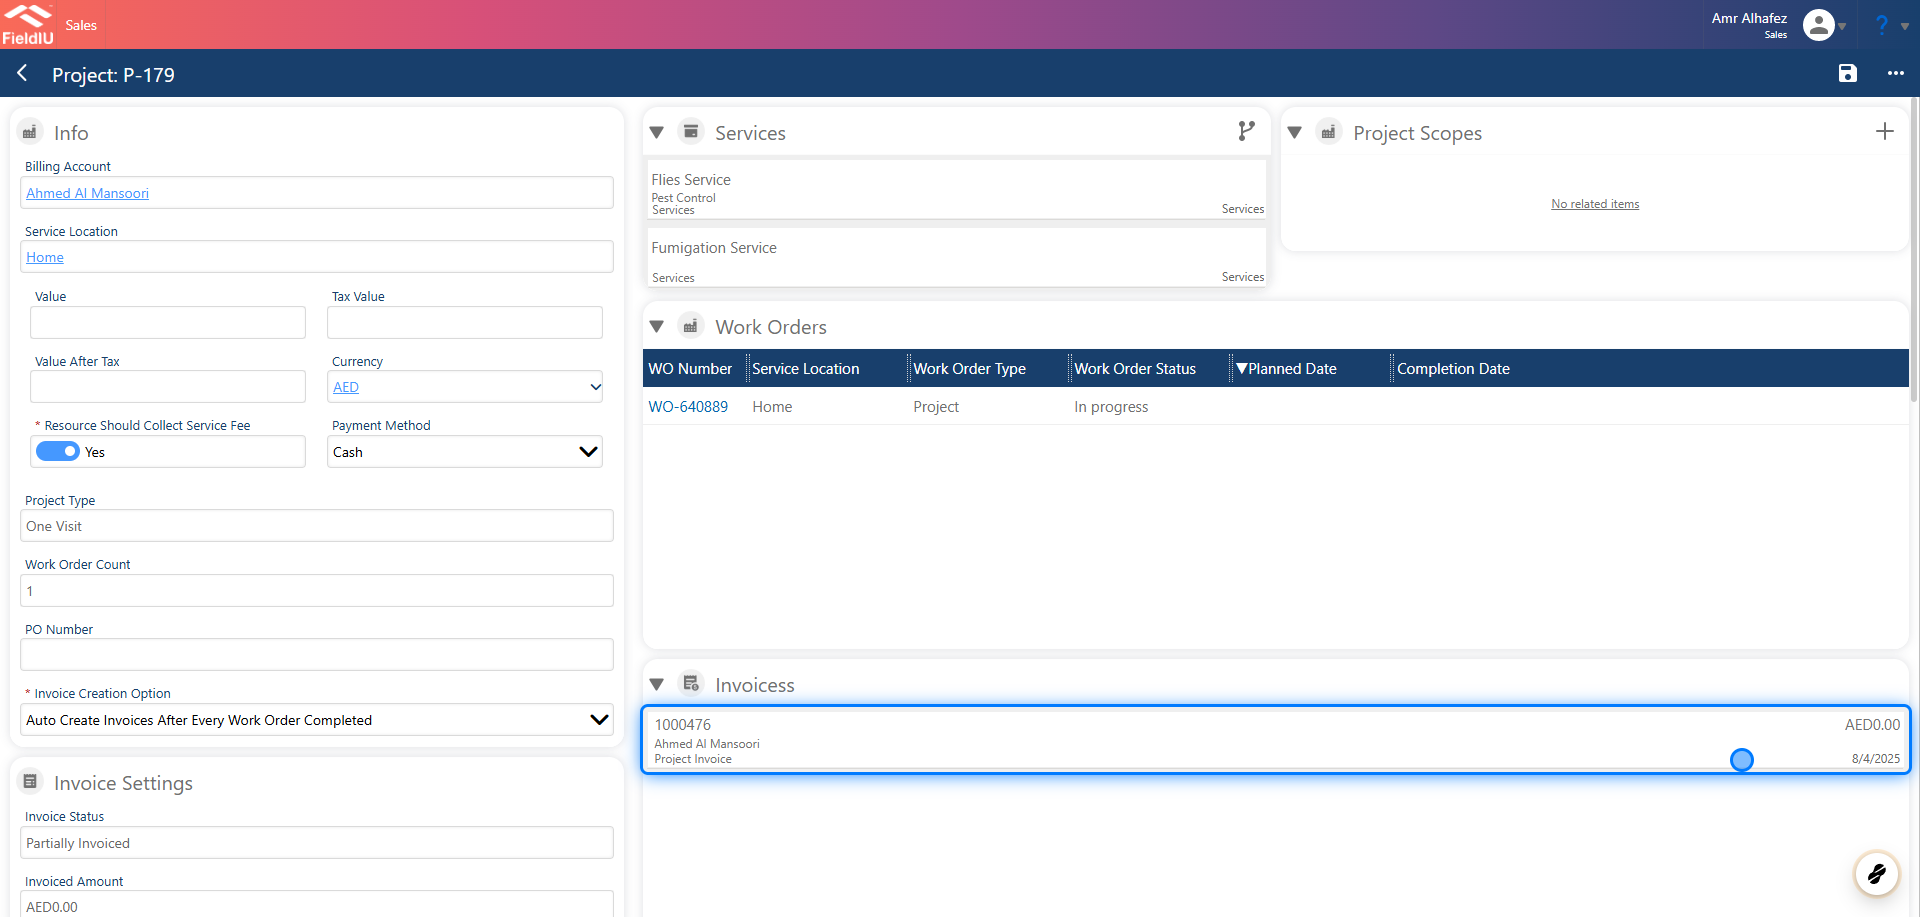
To generate invoices for a project, go to the **Invoicing Settings** within the project.\
There, you'll find **Invoice Creation Options** , where you can define how invoices should be created and managed.
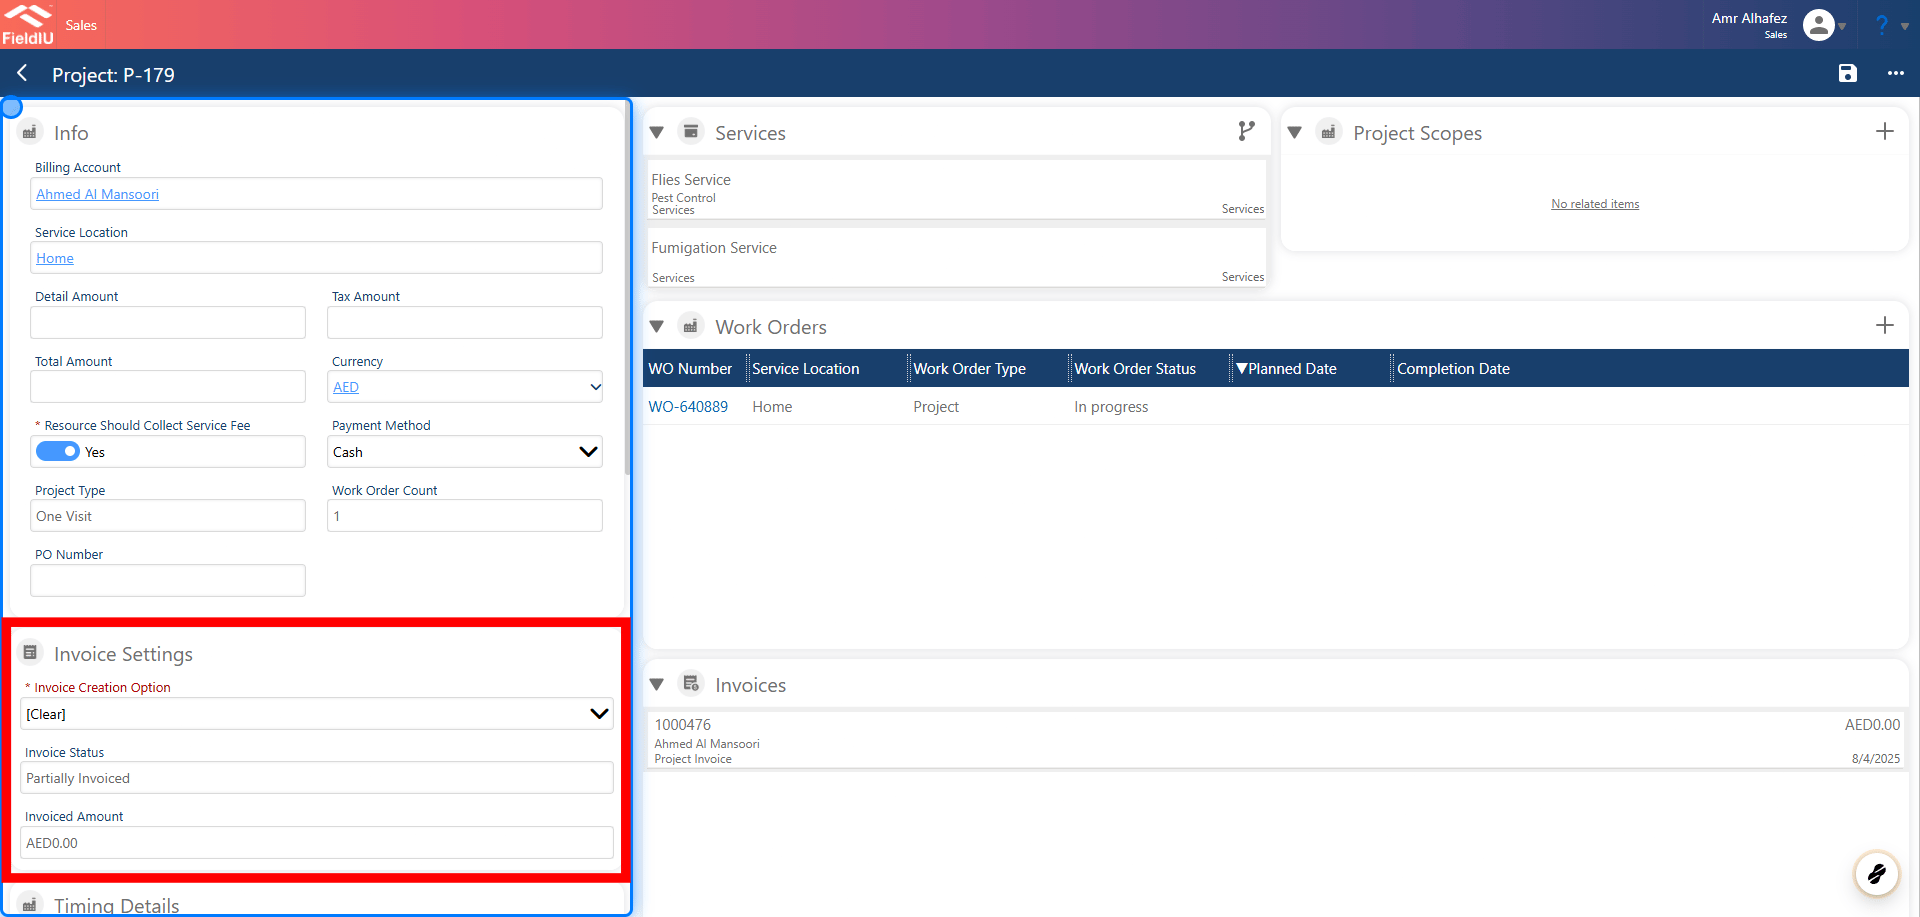 ### 2. Select the Creation option
**Invoice Creation Options**
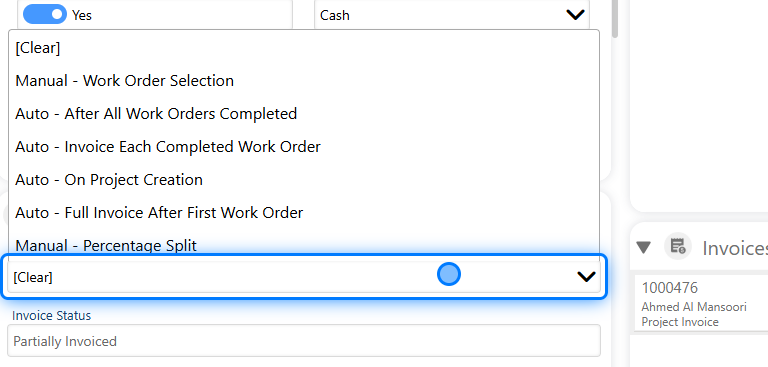
There are six available options for creating invoices:
1. **Manual - Work Order Selection**\
Invoices are created manually by selecting specific work orders.
2. **Auto - After All Work Orders are Completed**\
An invoice is automatically created once all work orders are completed.
3. **Auto - Invoice Each Completed Work Order**\
An invoice is automatically generated for each completed work order.
4. **Auto - Upon Project Creation**\
An invoice is automatically generated when the project is created.
5. **Auto - Full Invoice After First Work Order**\
A full invoice is created automatically after the first work order is completed.
6. **Manual - Percentage Split**\
Invoices are manually created with a percentage split based on predefined criteria.
### 2. Select the Creation option
**Invoice Creation Options**
There are six available options for creating invoices:
1. **Manual - Work Order Selection**\
Invoices are created manually by selecting specific work orders.
2. **Auto - After All Work Orders are Completed**\
An invoice is automatically created once all work orders are completed.
3. **Auto - Invoice Each Completed Work Order**\
An invoice is automatically generated for each completed work order.
4. **Auto - Upon Project Creation**\
An invoice is automatically generated when the project is created.
5. **Auto - Full Invoice After First Work Order**\
A full invoice is created automatically after the first work order is completed.
6. **Manual - Percentage Split**\
Invoices are manually created with a percentage split based on predefined criteria.
 ## Creating Invoices
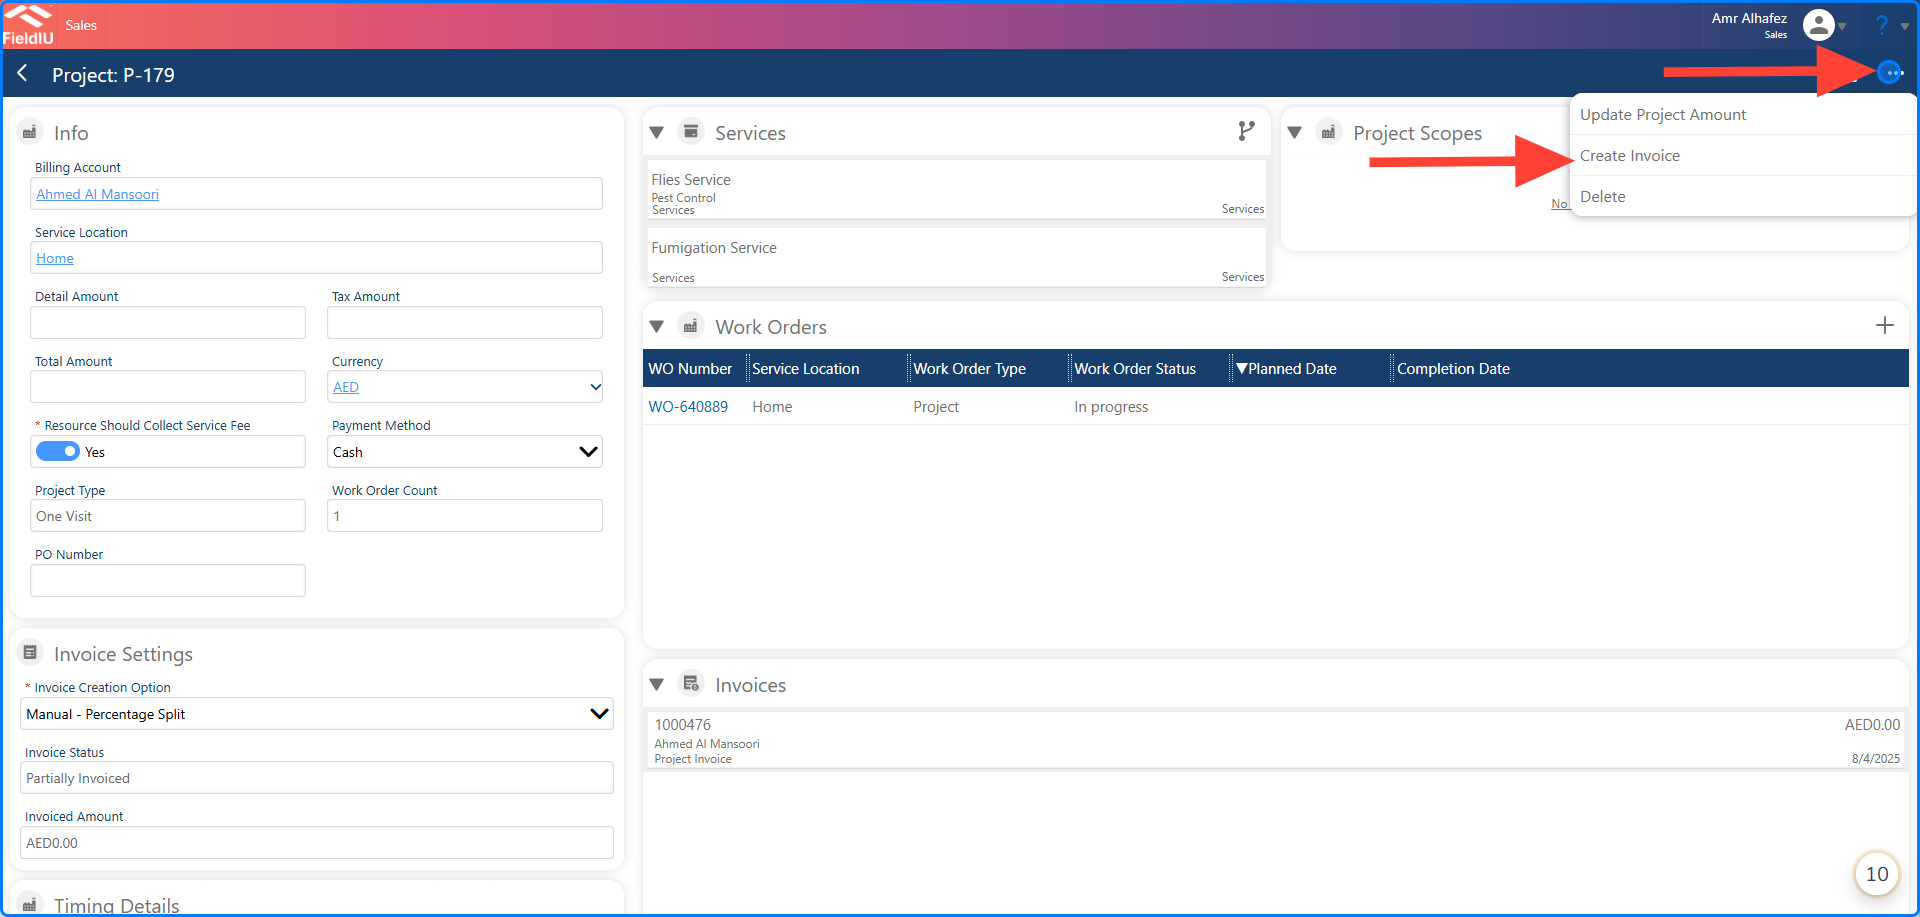
### 3. Click on Create Invoice
## Creating Invoices
### 3. Click on Create Invoice
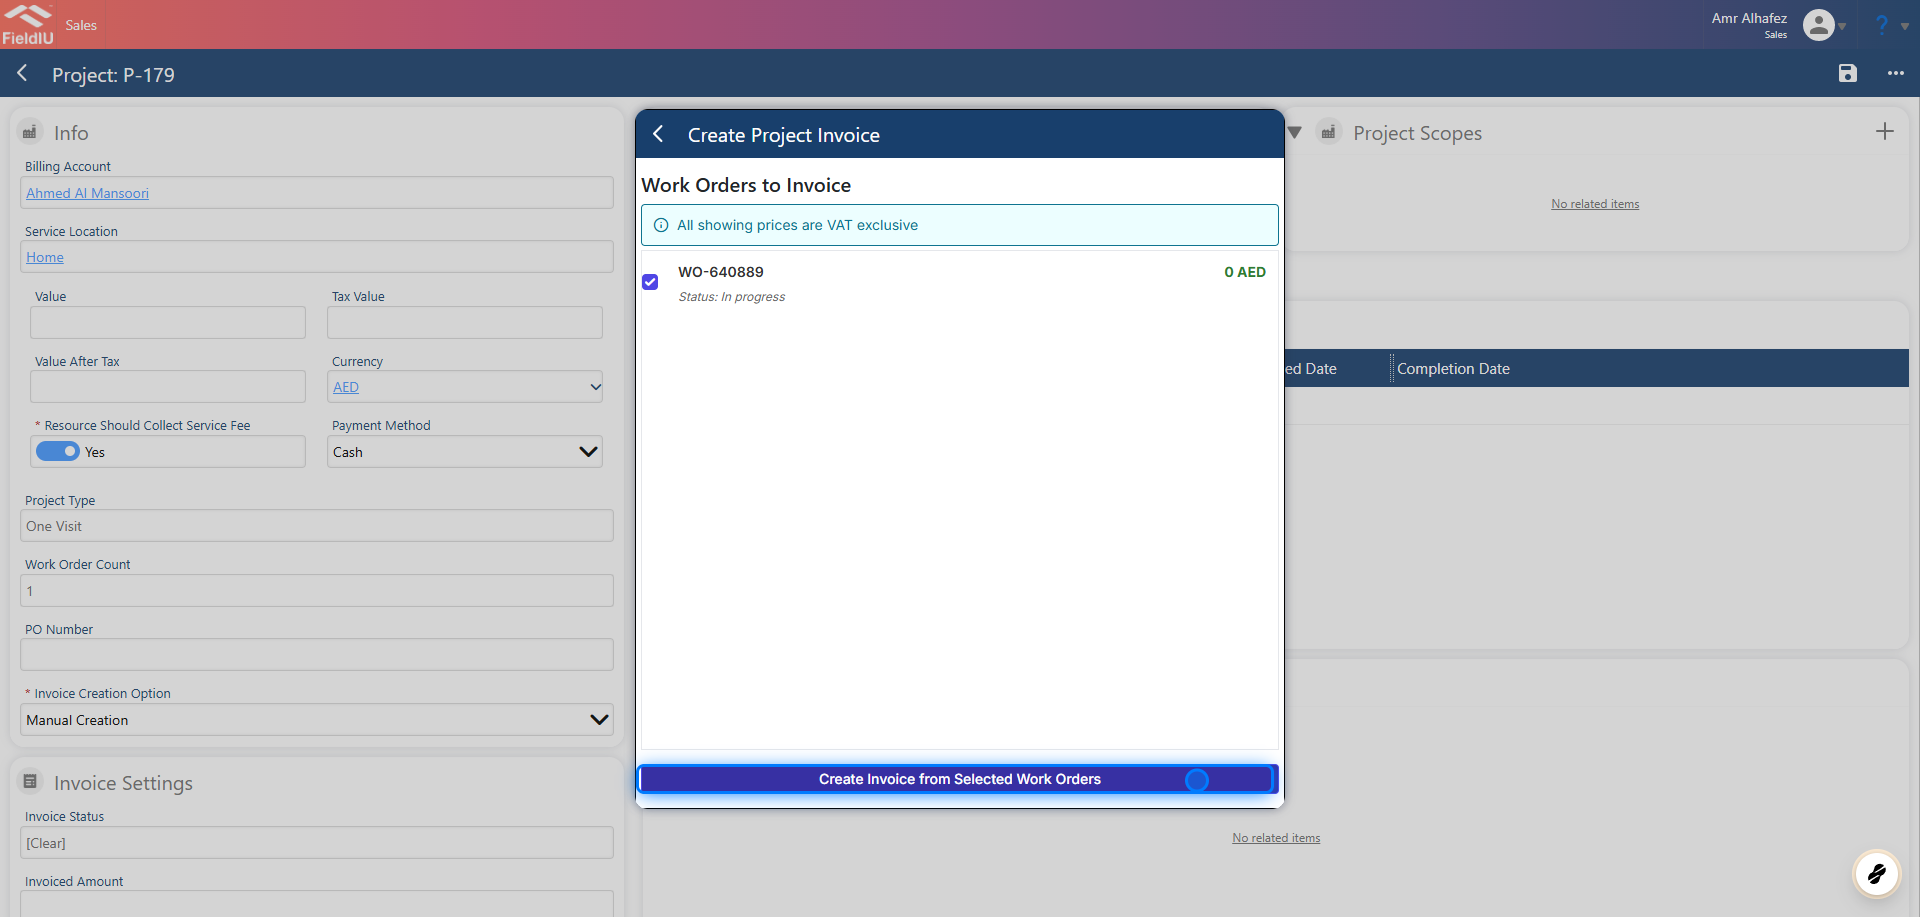
 ### 4. Work Order Selection
For manual creation, simply select the desired work order to be invoiced.
### 4. Work Order Selection
For manual creation, simply select the desired work order to be invoiced.
 ### 5. Invoice Created
As we can see, the invoice has been created successfully.
### 5. Invoice Created
As we can see, the invoice has been created successfully.
 ### 6. Percentage Split
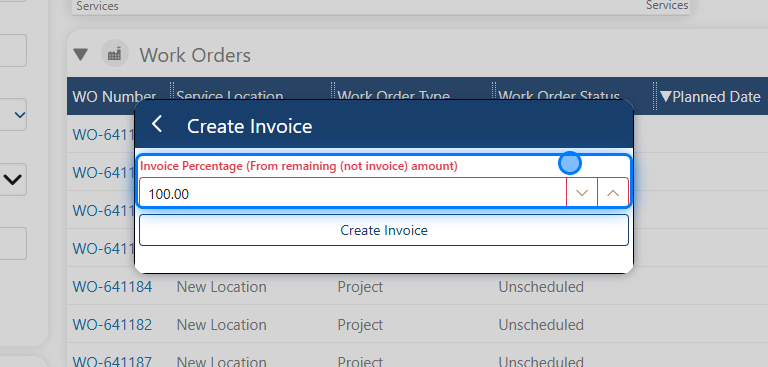 > ### ⚠️ Invoice Percentage
>
> From remaining (not invoice) amount
### 7. Insert the value
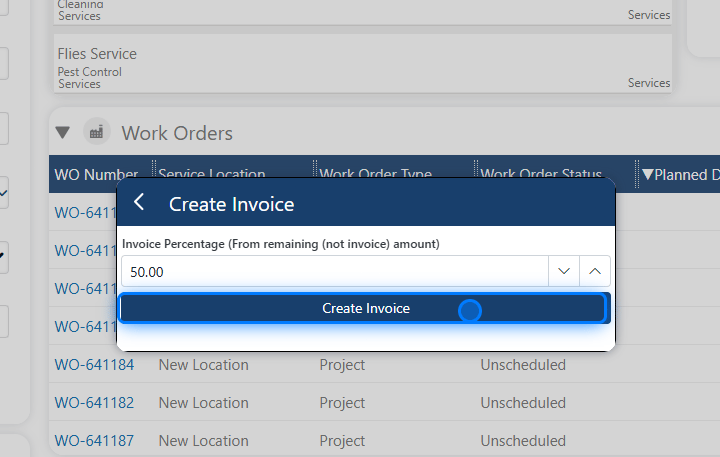
Insert the values from the remaining (not invoiced) amount and click **Create Invoice** .
> ### ⚠️ Invoice Percentage
>
> From remaining (not invoice) amount
### 7. Insert the value
Insert the values from the remaining (not invoiced) amount and click **Create Invoice** .
 > ### 💡 Updating the project amount
>
> You can also update the project amount as needed.
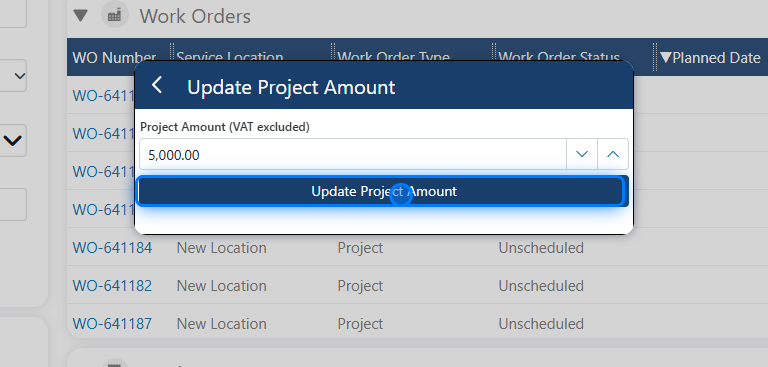
### 8. Update
> ### 💡 Updating the project amount
>
> You can also update the project amount as needed.
### 8. Update
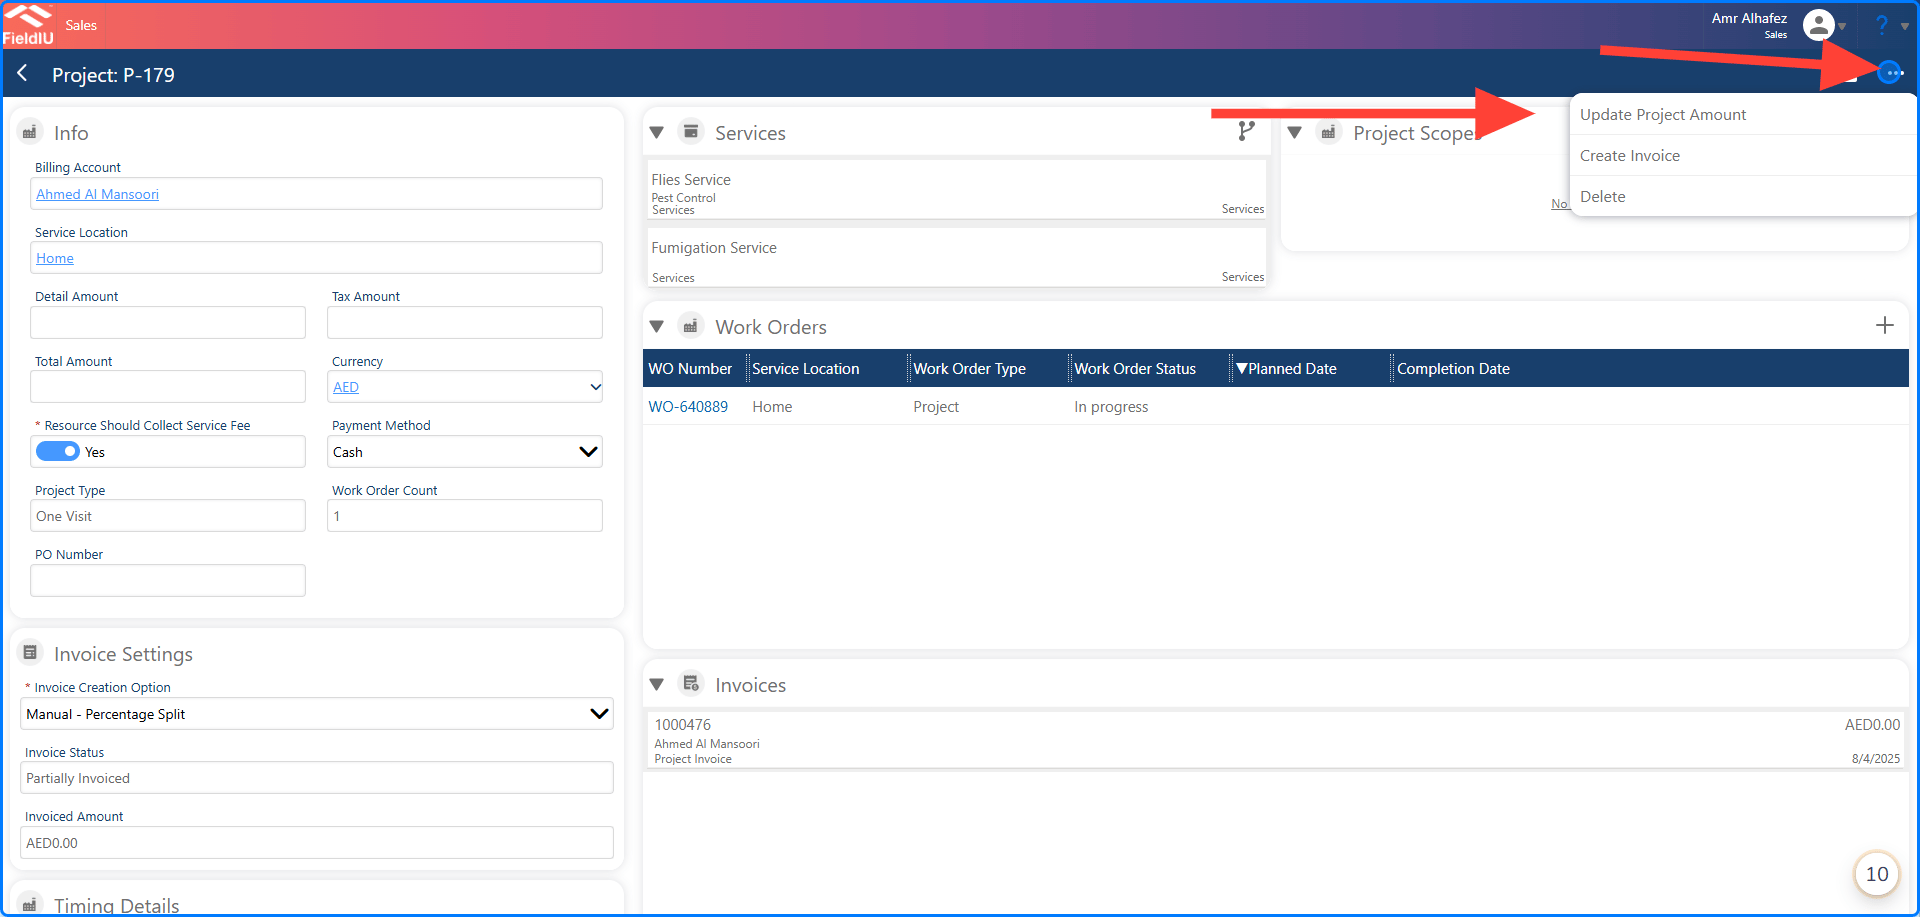 ### 9. Enter the amount (VAT Excluded)
 > ### 💡 Select the Default Option
>
> To select the default invoice option, open the Manager app and navigate to: Tools → Organization Settings. Then, search for 'PROJECT\_INVOICE\_DEFAULT\_SETTING'.
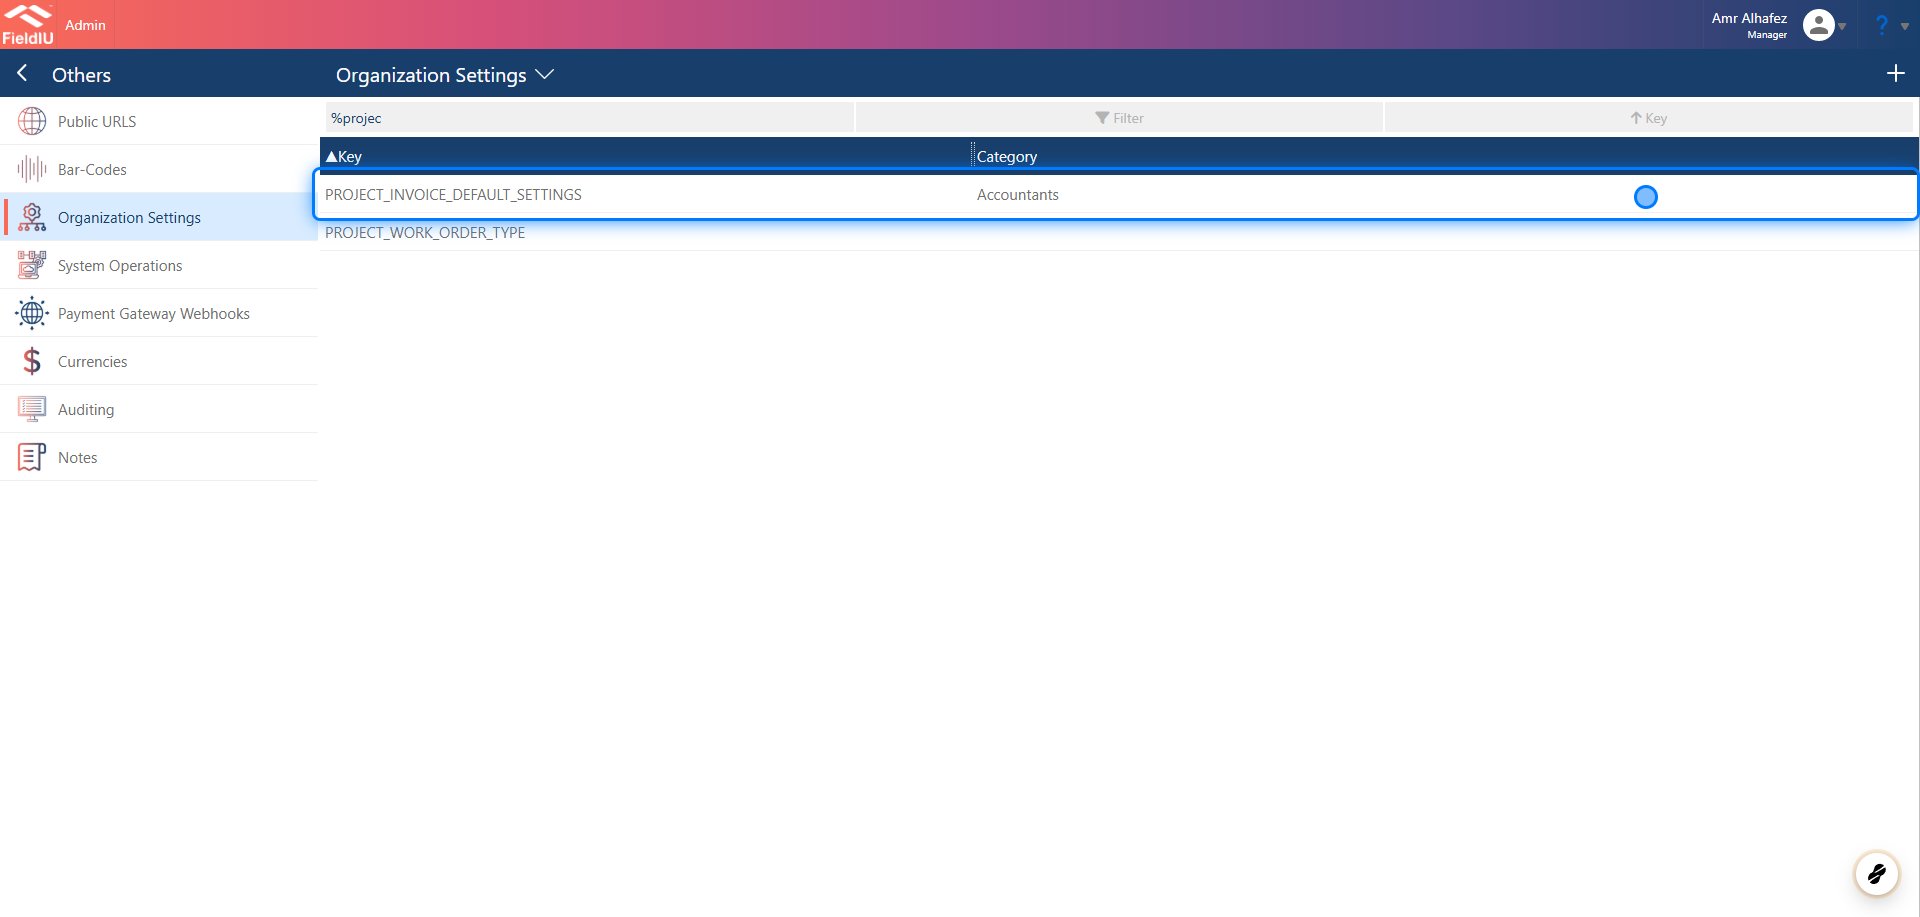
### 10. Search for the key
Search for the key: PROJECT\_INVOICE\_DEFAULT\_SETTINGS
> ### 💡 Select the Default Option
>
> To select the default invoice option, open the Manager app and navigate to: Tools → Organization Settings. Then, search for 'PROJECT\_INVOICE\_DEFAULT\_SETTING'.
### 10. Search for the key
Search for the key: PROJECT\_INVOICE\_DEFAULT\_SETTINGS
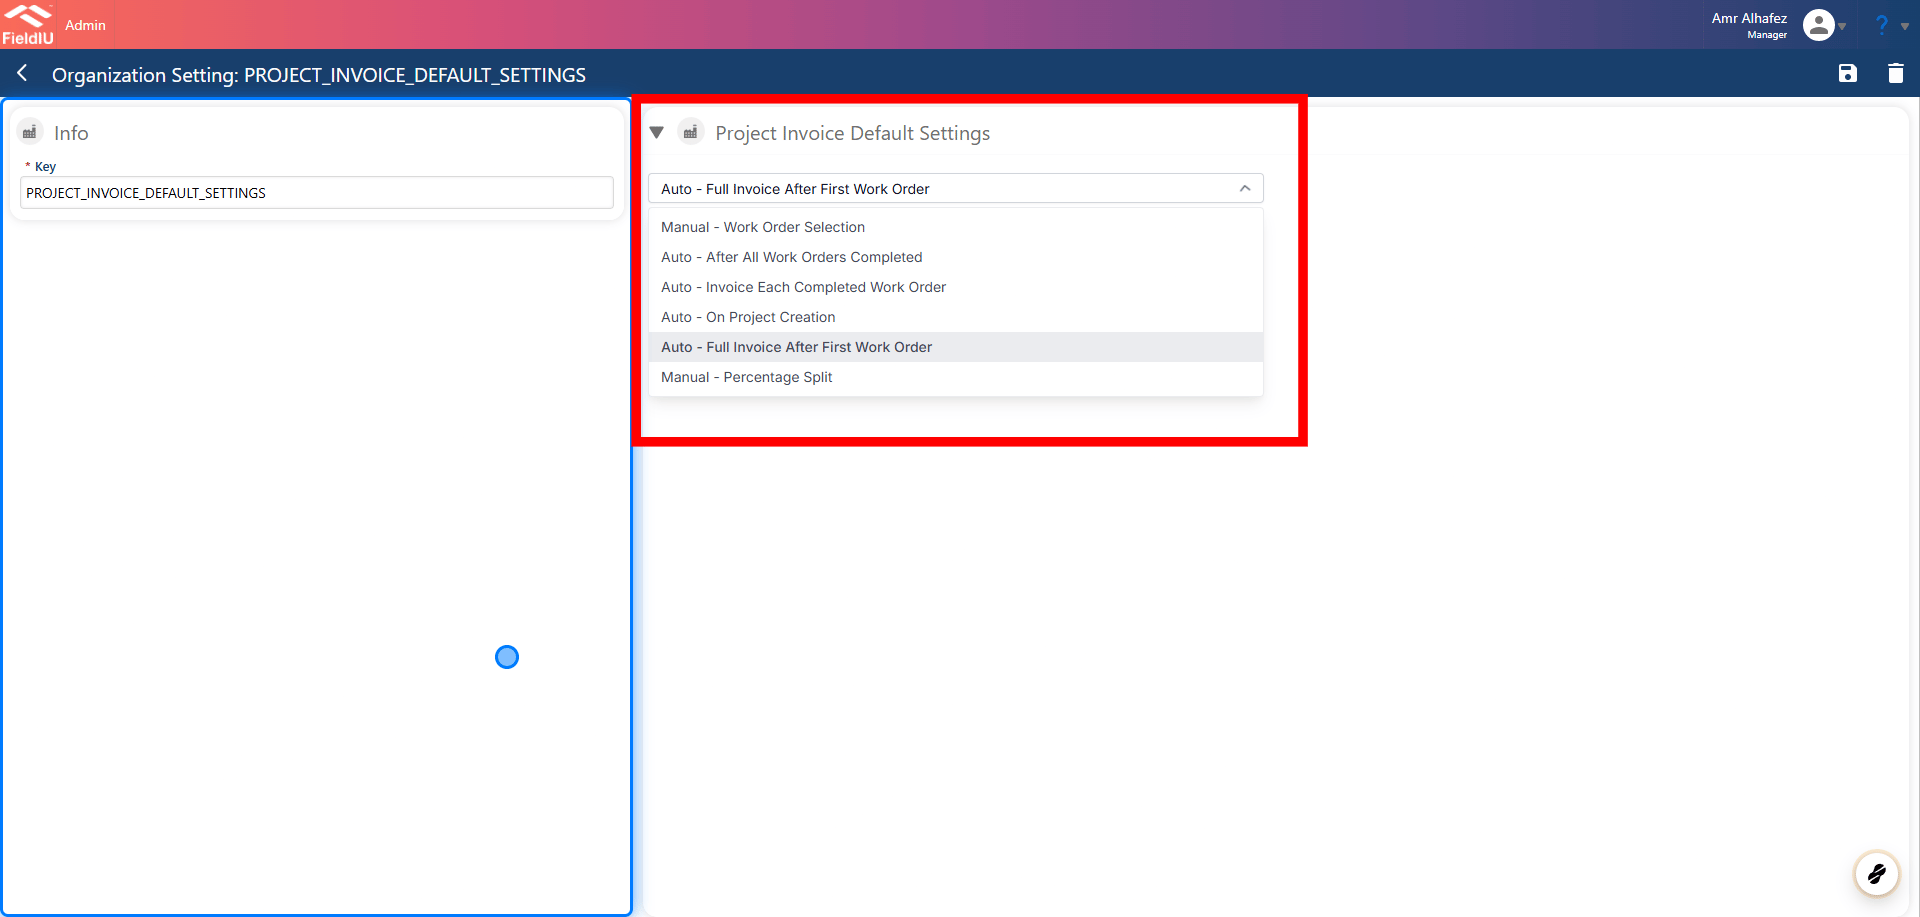
 ### 11. Select your default option
Simply select your preferred option and click Save.
### 11. Select your default option
Simply select your preferred option and click Save.
 > ### ⚠️ Do not change the key name.�����������������������