> ## Documentation Index
> Fetch the complete documentation index at: https://docs.fieldiu.com/llms.txt
> Use this file to discover all available pages before exploring further.
# Project
> ### 💡 What is Project
>
> The **Project** feature is for visits with non-committed customers. You can create a single visit or multiple visits.
### 1. Access Project
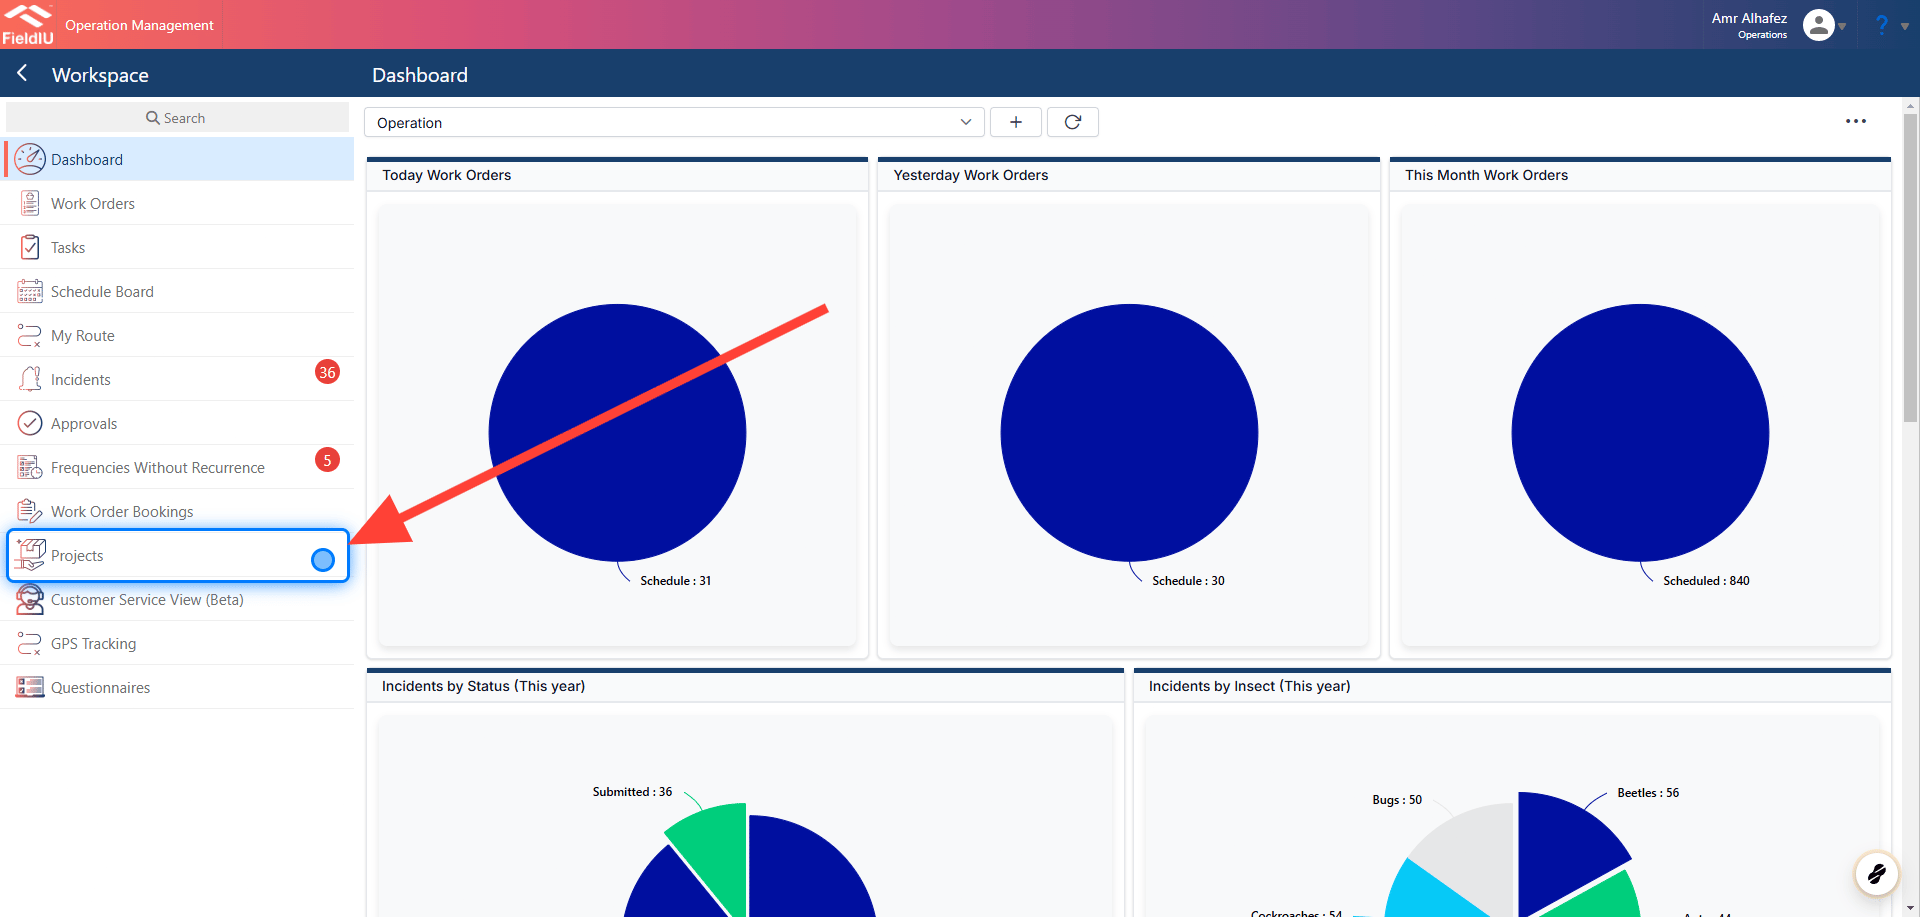
You can locate the **Projects** tab in the Workspace section of the sidebar menu.
 > ### 💡 Create New
>
> To create a new project, you need to insert certain details. Let's go through them.
### 2. Main Information
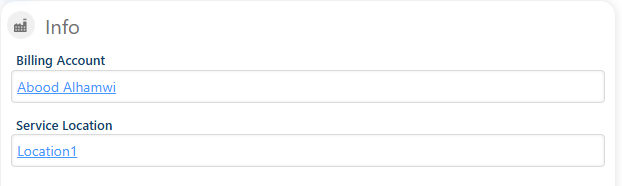
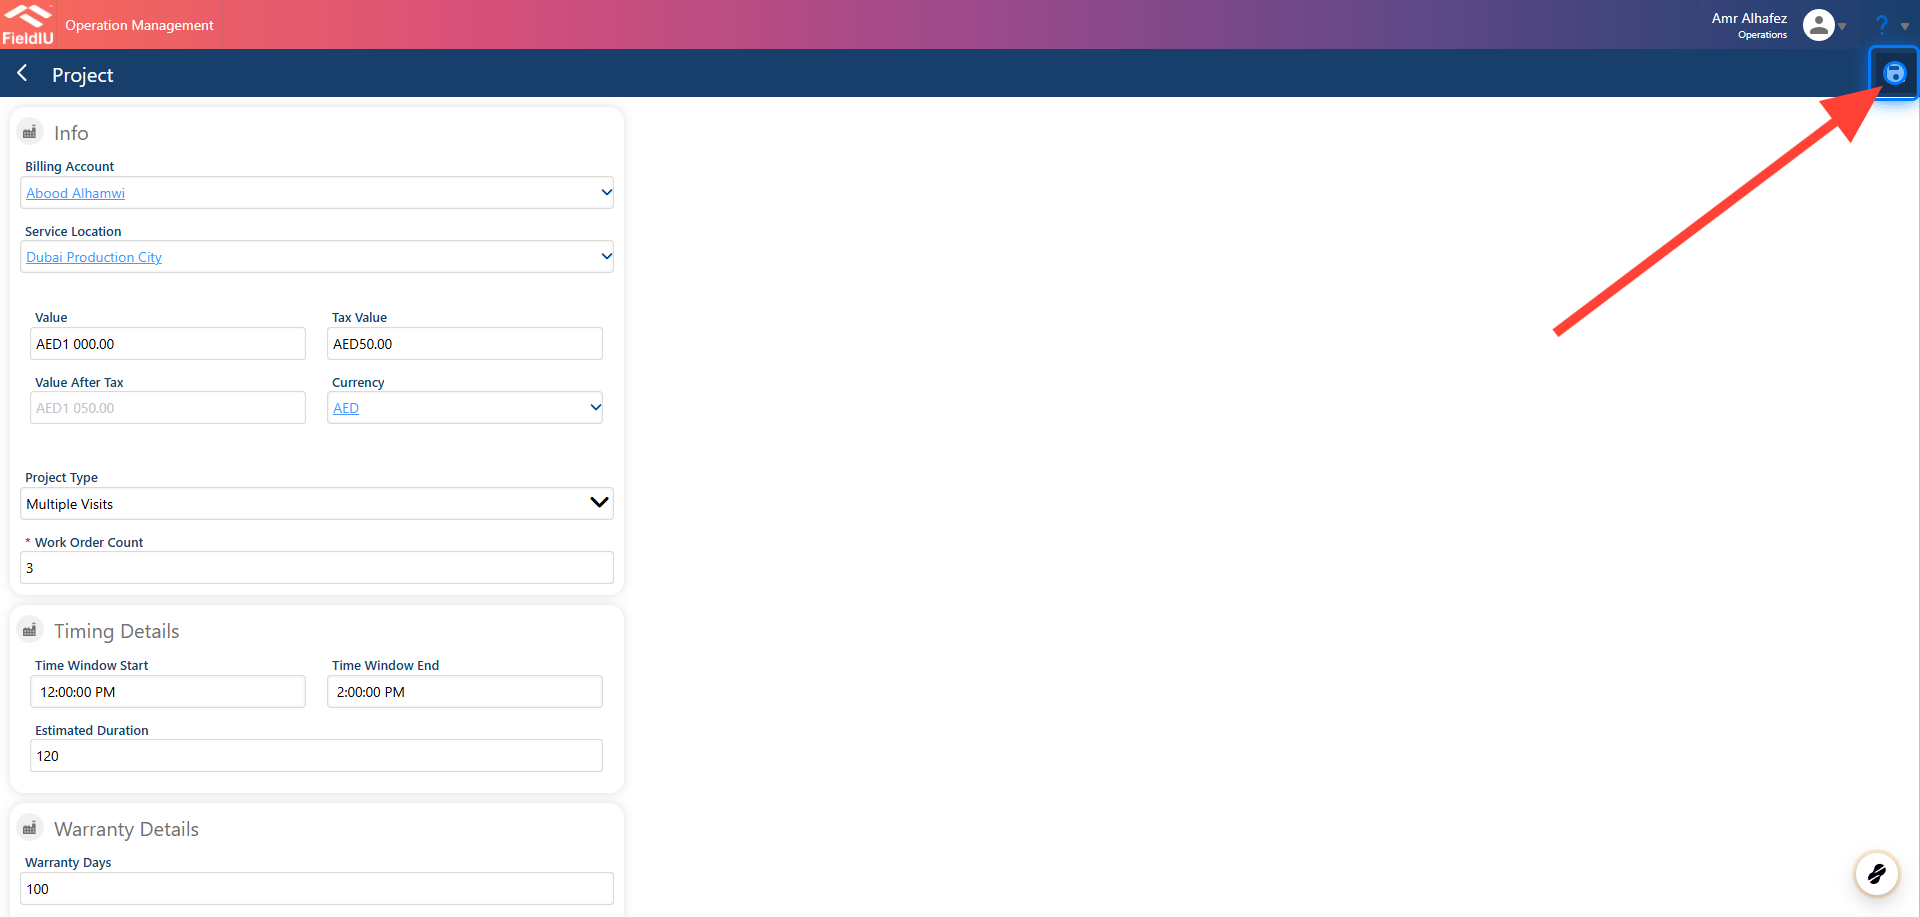
**Billing Account** : Select the customer who wants the service.\
**Service Location** : Select the location for this customer.
> ### 💡 Create New
>
> To create a new project, you need to insert certain details. Let's go through them.
### 2. Main Information
**Billing Account** : Select the customer who wants the service.\
**Service Location** : Select the location for this customer.
 ### 3. Values
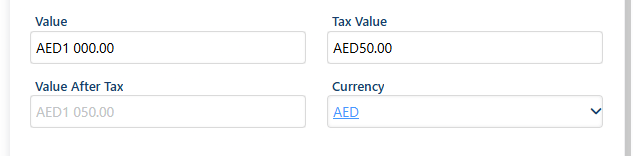
**I** n the **Values** section, you need to insert the value of the visit(s), select the currency, and if you have defined the tax in your environment, it will be automatically calculated for you.
### 3. Values
**I** n the **Values** section, you need to insert the value of the visit(s), select the currency, and if you have defined the tax in your environment, it will be automatically calculated for you.
 ### 4. Project Type
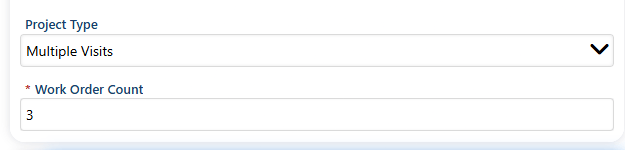
As we mentioned, you can select a one-visit project or a multiple-visit project.\
Once you select multiple visits, you need to insert the count of the visits.
### 4. Project Type
As we mentioned, you can select a one-visit project or a multiple-visit project.\
Once you select multiple visits, you need to insert the count of the visits.
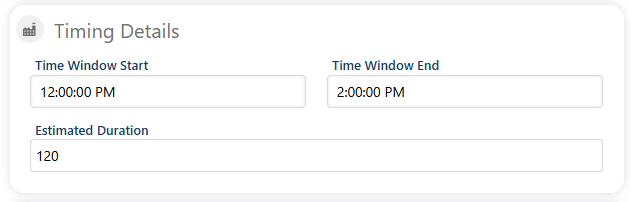
 ### 5. Timing
You need to insert the timing for the visits and the duration for each one.
### 5. Timing
You need to insert the timing for the visits and the duration for each one.
 ### 6. Invoicing
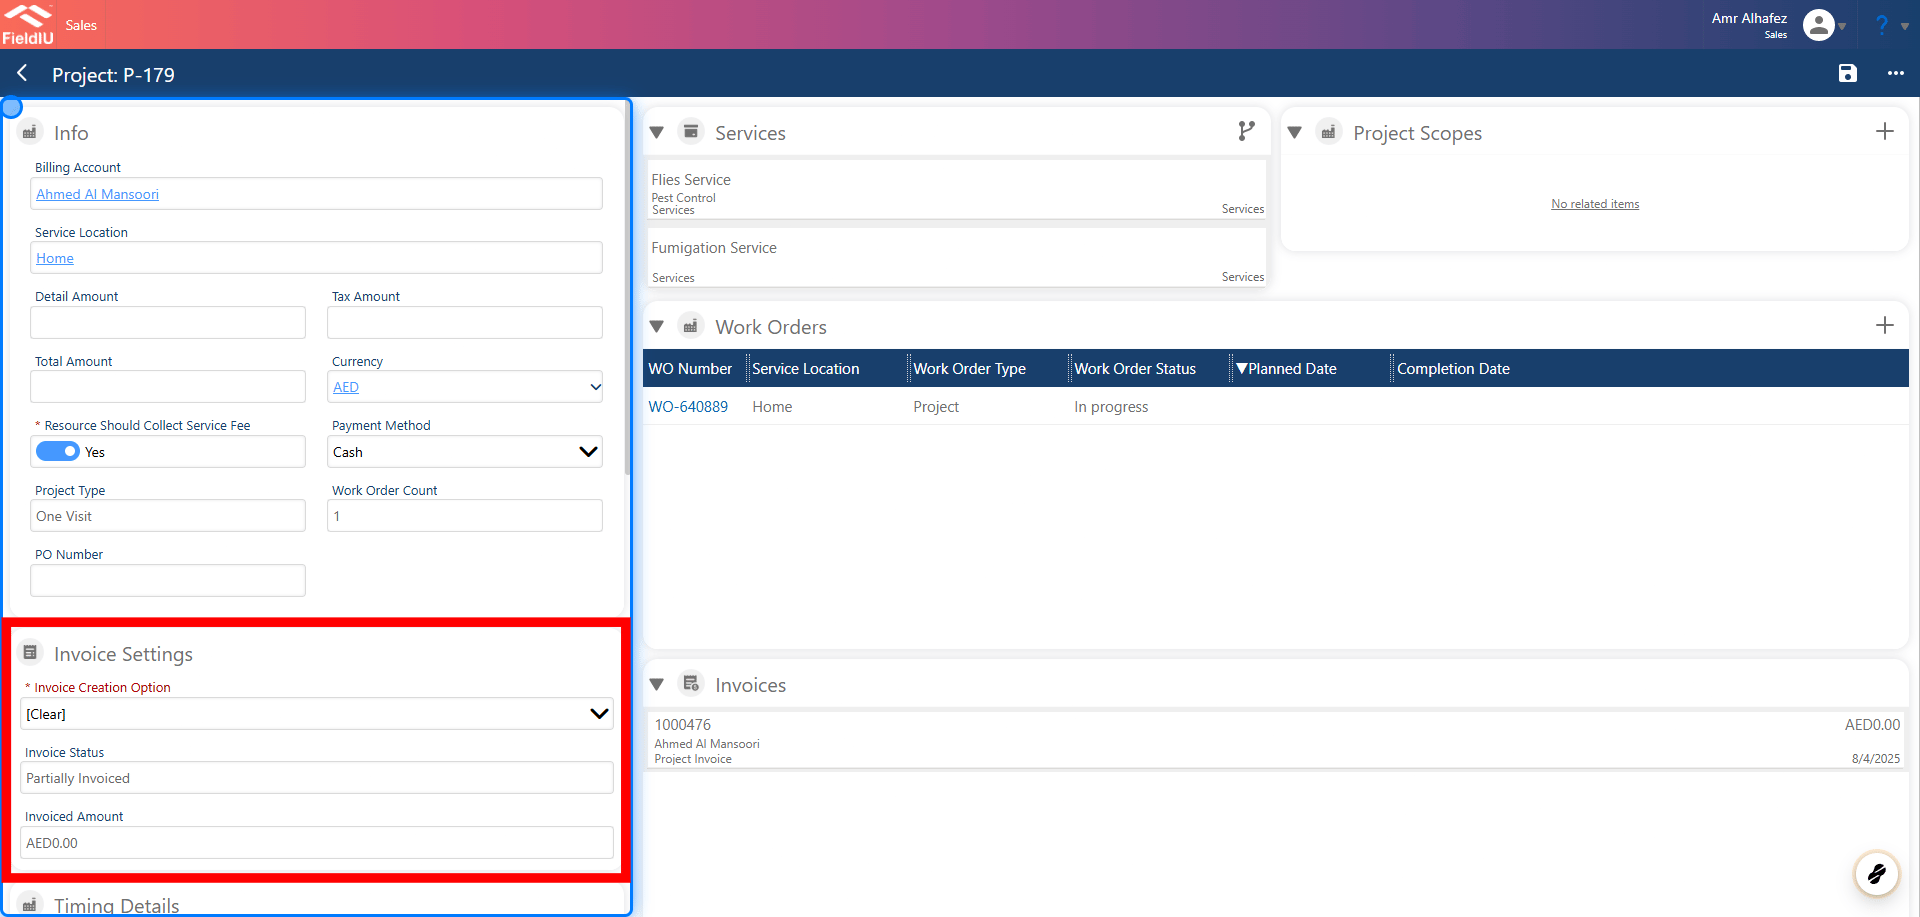
To generate invoices for a project, go to the **Invoicing Settings** within the project.\
There, you'll find **Invoice Creation Options** , where you can define how invoices should be created and managed.
### 6. Invoicing
To generate invoices for a project, go to the **Invoicing Settings** within the project.\
There, you'll find **Invoice Creation Options** , where you can define how invoices should be created and managed.
 ### 7. Select the Creation option
**Invoice Creation Options**
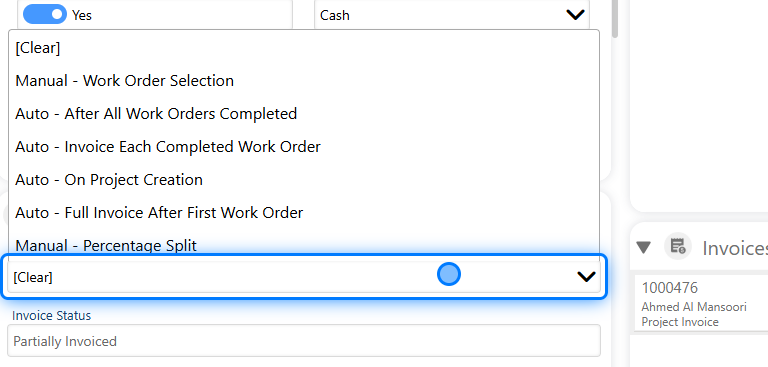
There are six available options for creating invoices:
1. **Manual - Work Order Selection**\
Invoices are created manually by selecting specific work orders.
2. **Auto - After All Work Orders are Completed**\
An invoice is automatically created once all work orders are completed.
3. **Auto - Invoice Each Completed Work Order**\
An invoice is automatically generated for each completed work order.
4. **Auto - Upon Project Creation**\
An invoice is automatically generated when the project is created.
5. **Auto - Full Invoice After First Work Order**\
A full invoice is created automatically after the first work order is completed.
6. **Manual - Percentage Split**\
Invoices are manually created with a percentage split based on predefined criteria.
### 7. Select the Creation option
**Invoice Creation Options**
There are six available options for creating invoices:
1. **Manual - Work Order Selection**\
Invoices are created manually by selecting specific work orders.
2. **Auto - After All Work Orders are Completed**\
An invoice is automatically created once all work orders are completed.
3. **Auto - Invoice Each Completed Work Order**\
An invoice is automatically generated for each completed work order.
4. **Auto - Upon Project Creation**\
An invoice is automatically generated when the project is created.
5. **Auto - Full Invoice After First Work Order**\
A full invoice is created automatically after the first work order is completed.
6. **Manual - Percentage Split**\
Invoices are manually created with a percentage split based on predefined criteria.
 > ### 💡 Learn more about project invoicing
>
> [Click to learn more about Project Invoicing](https://docs.fieldiu.com/knowledgebase/project-invoicing/)
### 8. Warranty
If you want to provide warranty days, you can insert them in the **Warranty Days** field.
> ### 💡 Learn more about project invoicing
>
> [Click to learn more about Project Invoicing](https://docs.fieldiu.com/knowledgebase/project-invoicing/)
### 8. Warranty
If you want to provide warranty days, you can insert them in the **Warranty Days** field.
 ### 9. Details
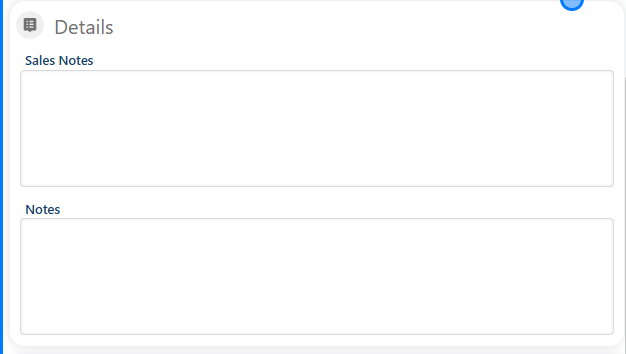
In the **Details** section, you can add any further notes, whether they are sales notes or general notes.
### 9. Details
In the **Details** section, you can add any further notes, whether they are sales notes or general notes.
 ### 10. Save
 ### 11. Work Orders
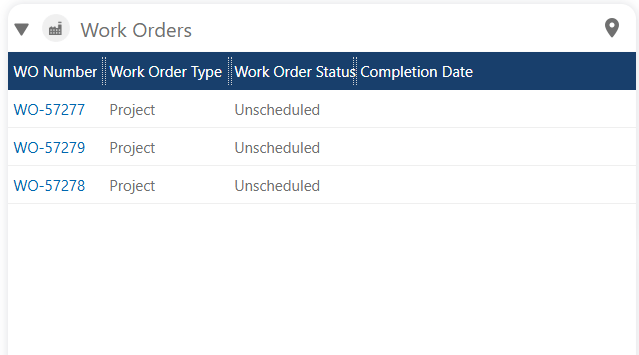
Once you save the project, the system will automatically create work orders for the visits and assign them as unscheduled work orders.
### 11. Work Orders
Once you save the project, the system will automatically create work orders for the visits and assign them as unscheduled work orders.
 ### 12. Adding Extra Work Orders
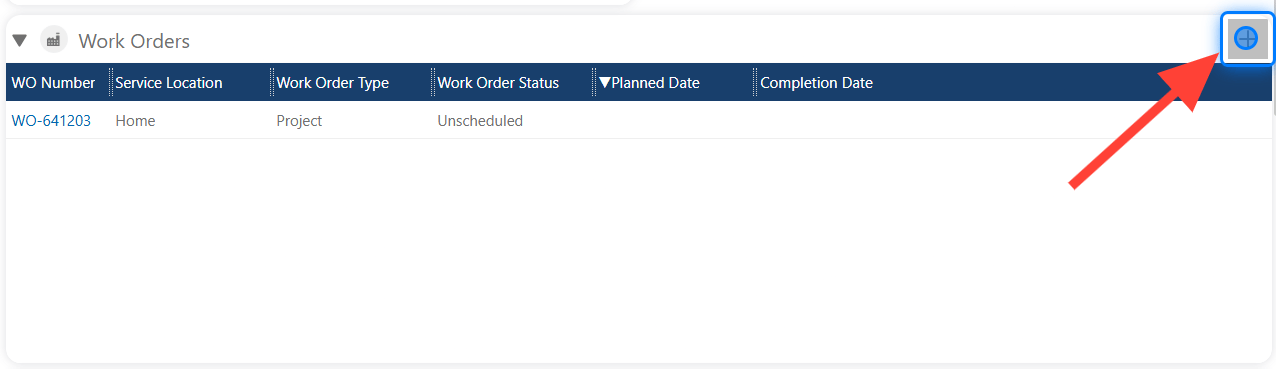
This option allows you to add work orders directly to an existing project, giving you more flexibility and control
### 12. Adding Extra Work Orders
This option allows you to add work orders directly to an existing project, giving you more flexibility and control
 ### 13. New Work Orders
Simply add the work order count, and the value of each work order
### 13. New Work Orders
Simply add the work order count, and the value of each work order
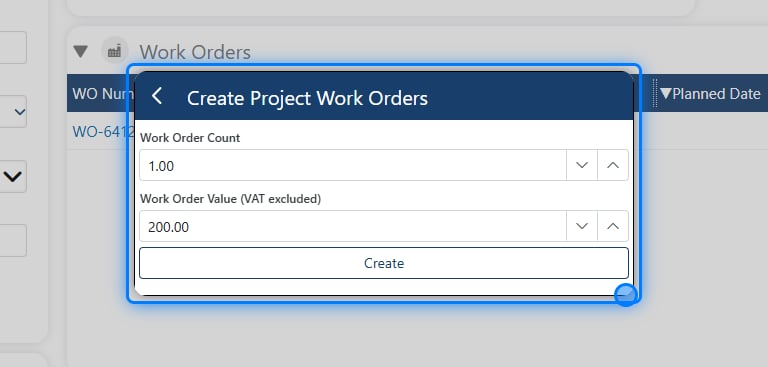 > ### ⚠️ Value is for each Work Order
>
> the price is for one work order only, for example if the user wants to add 10 WO, the amount entered should be for one only�����������������������
> ### ⚠️ Value is for each Work Order
>
> the price is for one work order only, for example if the user wants to add 10 WO, the amount entered should be for one only�����������������������