> ## Documentation Index
> Fetch the complete documentation index at: https://docs.fieldiu.com/llms.txt
> Use this file to discover all available pages before exploring further.
# Floor Plan "Mobile App"
### 1. Where do you find it ?
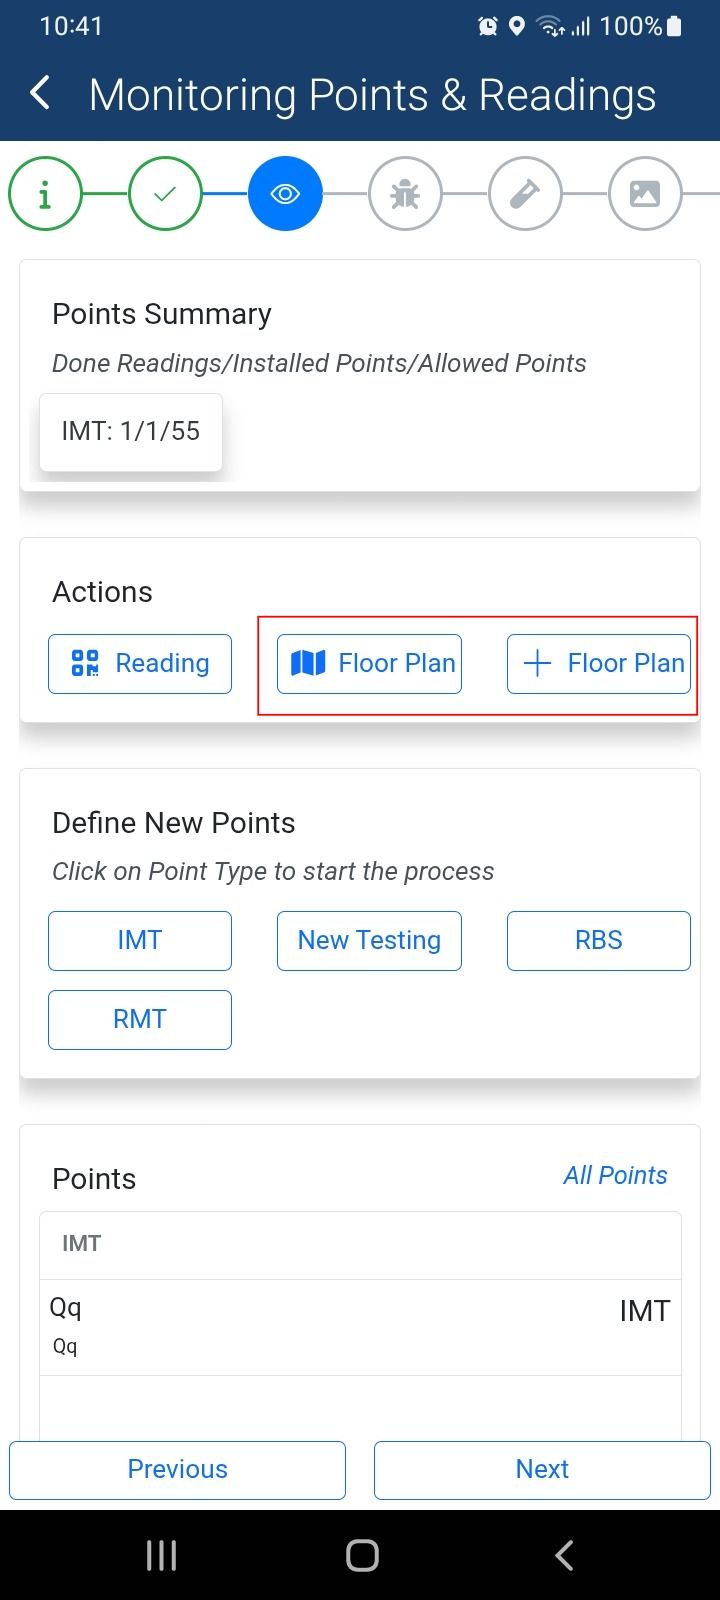
The floor plan is available in the Monitoring Points & Readings window.
 > ### 💡 Creating New Floor Plan
>
> **here are three ways to create a floor plan:**
>
> 1. **Import exported image from AutoCAD drawing**
>
> 2. **Sketch manually within the app**
>
> 3. **Sketch using the Map View**
### 2. Creating New Floor Plan
Clicking the 'Floor Plan +' button opens a new window with tools for drawing the floor plan.
> ### 💡 Creating New Floor Plan
>
> **here are three ways to create a floor plan:**
>
> 1. **Import exported image from AutoCAD drawing**
>
> 2. **Sketch manually within the app**
>
> 3. **Sketch using the Map View**
### 2. Creating New Floor Plan
Clicking the 'Floor Plan +' button opens a new window with tools for drawing the floor plan.
 ### 3. Sketch your Floor plan
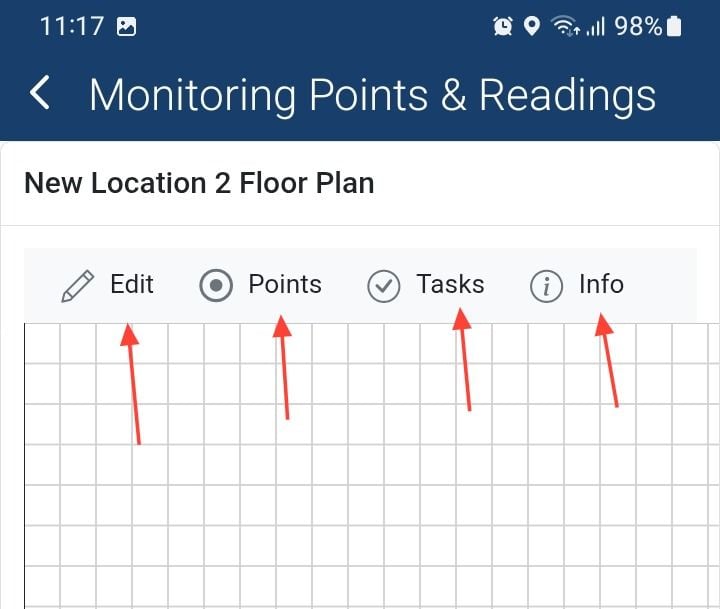
When you click the Edit button, new tools will appear to help you sketch the floor plan,
### 3. Sketch your Floor plan
When you click the Edit button, new tools will appear to help you sketch the floor plan,
 ### 4.
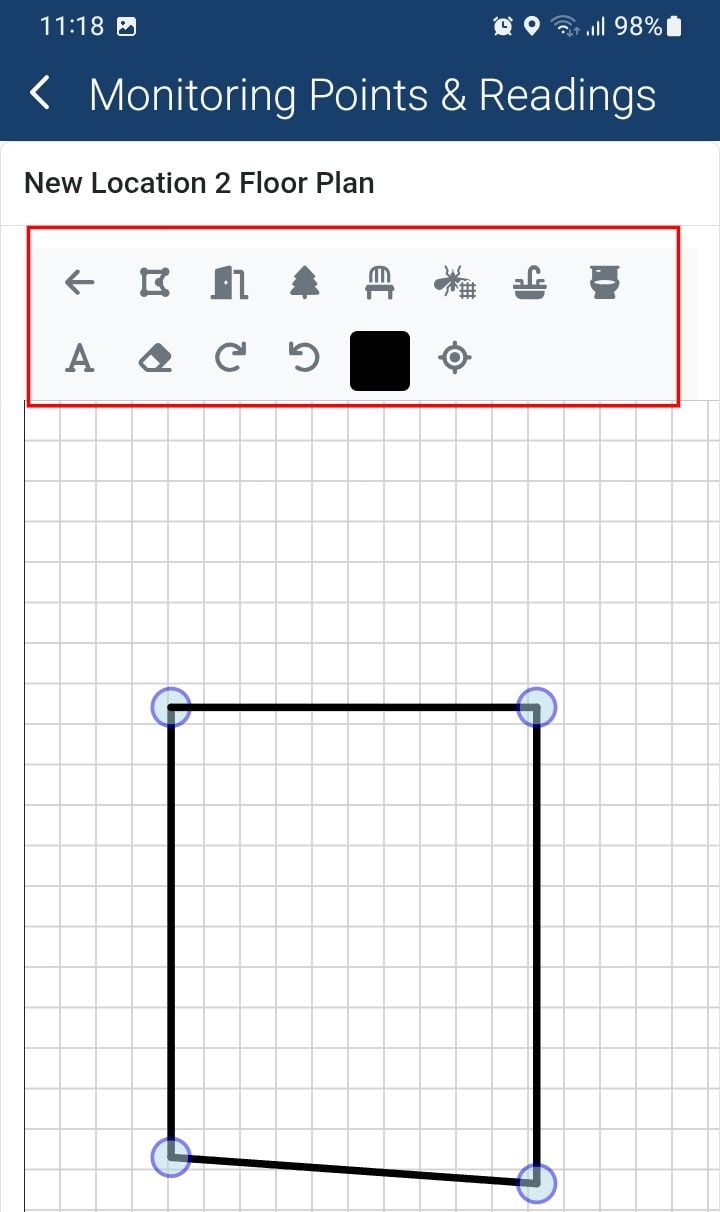
**We offer a variety of sketch tools to help you create the perfect floor plan. Below is an explanation of each tool, starting from the top right:**
* **Drawing Lines:** Use this tool to draw lines (e.g., walls). Select the tool and click on the blank area—each click adds a point and draws a line to the next clicked point.
* **Door:** Click on the drawing area to insert a door icon.
* **Tree:** Click on the drawing area to insert a tree icon.
* **Chair:** Click on the drawing area to insert a chair icon.
* **Fly Trap:** Click on the drawing area to insert a fly trap icon.
* **Sink:** Click on the drawing area to insert a sink icon.
* **Toilet:** Click on the drawing area to insert a toilet icon.
* **Text:** Select the text tool, click where you want to place the text, and type in your desired label.
* **Eraser:** Use this tool to delete any unwanted icons or lines.
* **Right Rotation:** Rotates selected objects clockwise.
* **Left Rotation:** Rotates selected objects counterclockwise.
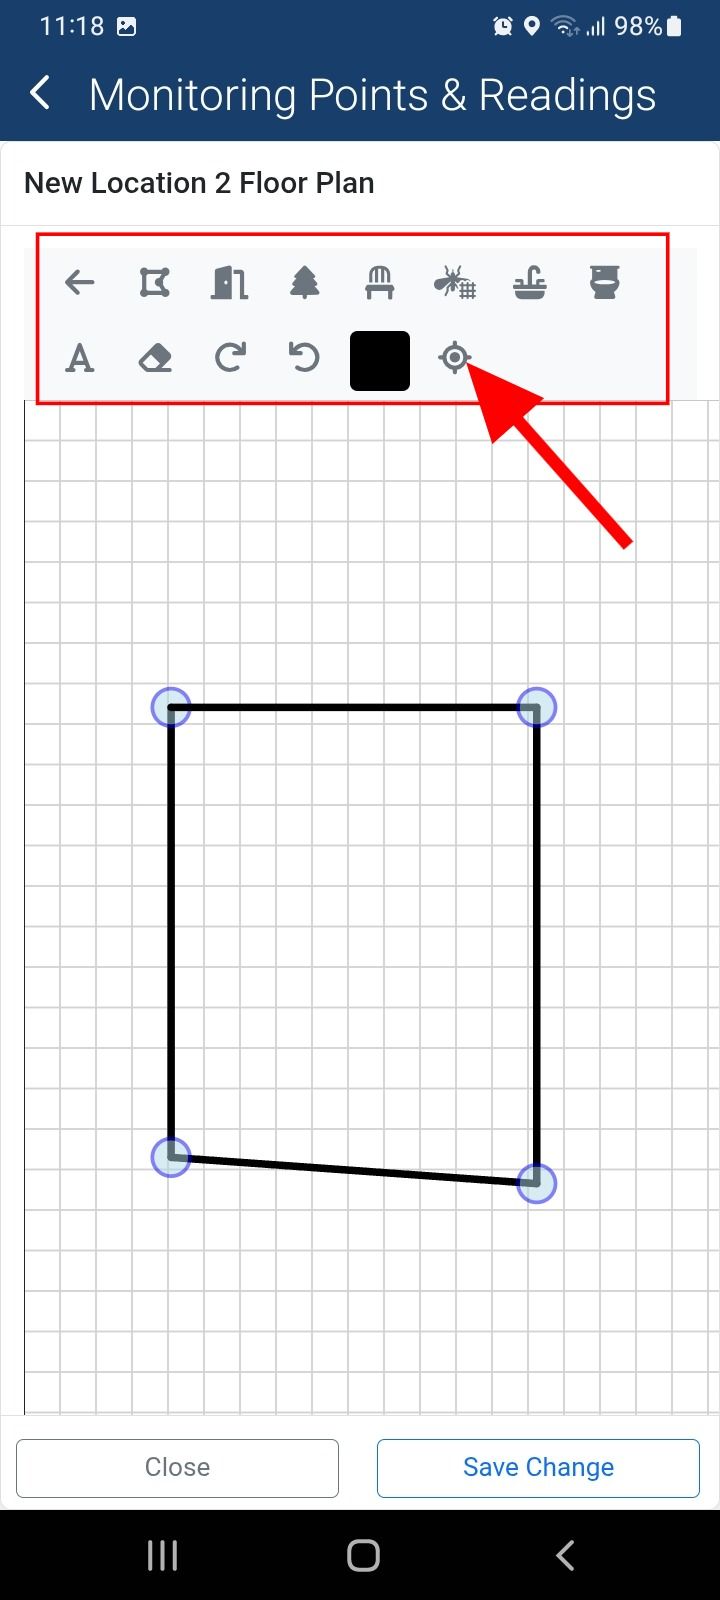
* **GPS:** Opens the map interface so you can sketch directly on it.
### 4.
**We offer a variety of sketch tools to help you create the perfect floor plan. Below is an explanation of each tool, starting from the top right:**
* **Drawing Lines:** Use this tool to draw lines (e.g., walls). Select the tool and click on the blank area—each click adds a point and draws a line to the next clicked point.
* **Door:** Click on the drawing area to insert a door icon.
* **Tree:** Click on the drawing area to insert a tree icon.
* **Chair:** Click on the drawing area to insert a chair icon.
* **Fly Trap:** Click on the drawing area to insert a fly trap icon.
* **Sink:** Click on the drawing area to insert a sink icon.
* **Toilet:** Click on the drawing area to insert a toilet icon.
* **Text:** Select the text tool, click where you want to place the text, and type in your desired label.
* **Eraser:** Use this tool to delete any unwanted icons or lines.
* **Right Rotation:** Rotates selected objects clockwise.
* **Left Rotation:** Rotates selected objects counterclockwise.
* **GPS:** Opens the map interface so you can sketch directly on it.
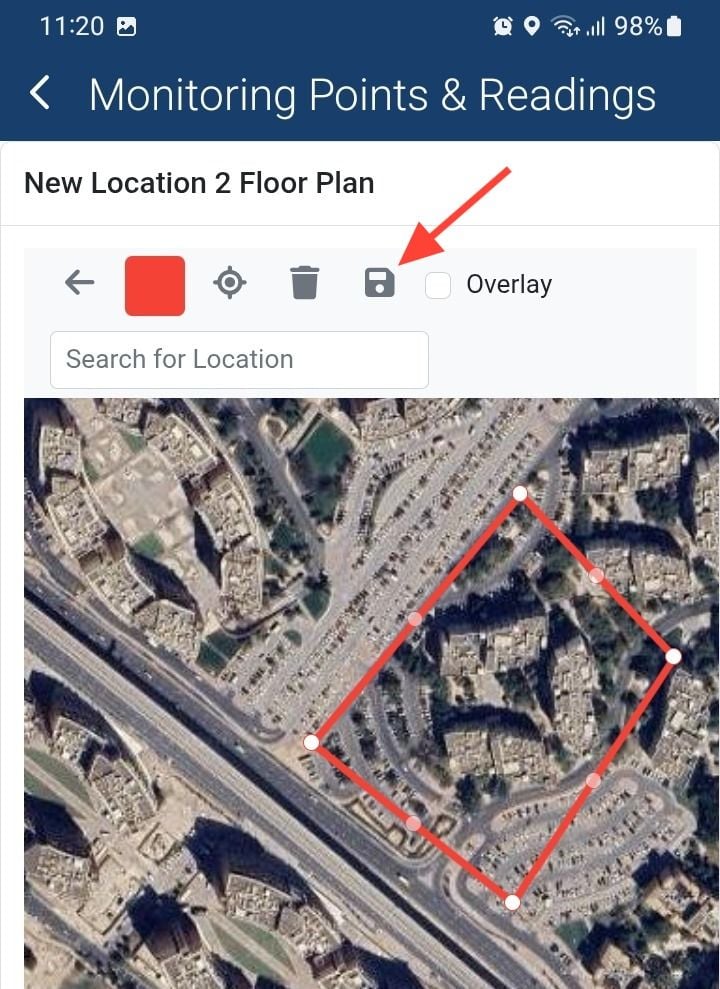
 ### 5. Drawing on the map
**Once you click the Map icon, the map will open on the screen. You can draw on the map and add points.**\
**Note: After finishing the drawing, don't forget to save.**
### 5. Drawing on the map
**Once you click the Map icon, the map will open on the screen. You can draw on the map and add points.**\
**Note: After finishing the drawing, don't forget to save.**
 ## View the Floor Plans & Adding Point
### 6. Click on the floor plan button
## View the Floor Plans & Adding Point
### 6. Click on the floor plan button
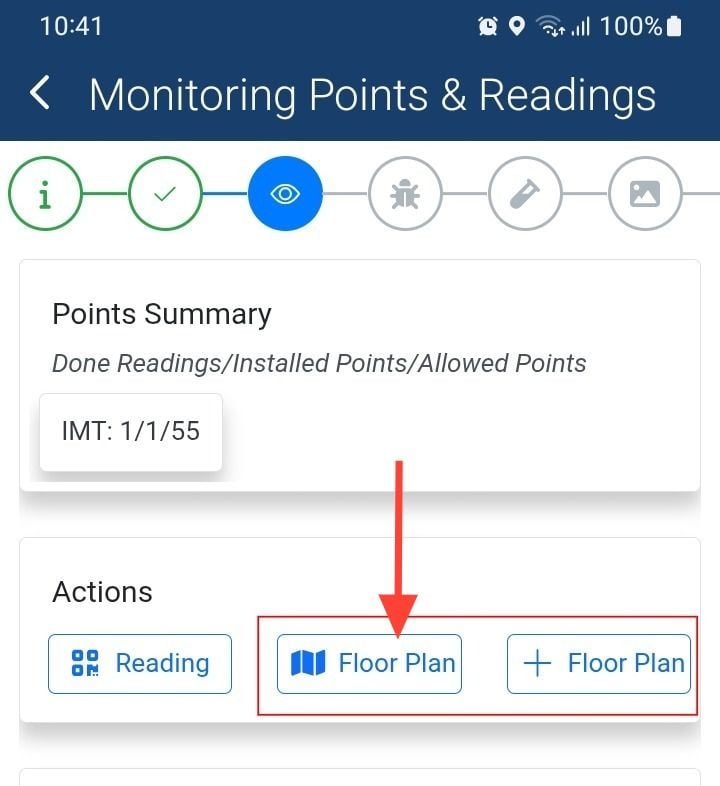 > ### ⚠️ The location can have multiple floor plan
### 7. Insert or Add
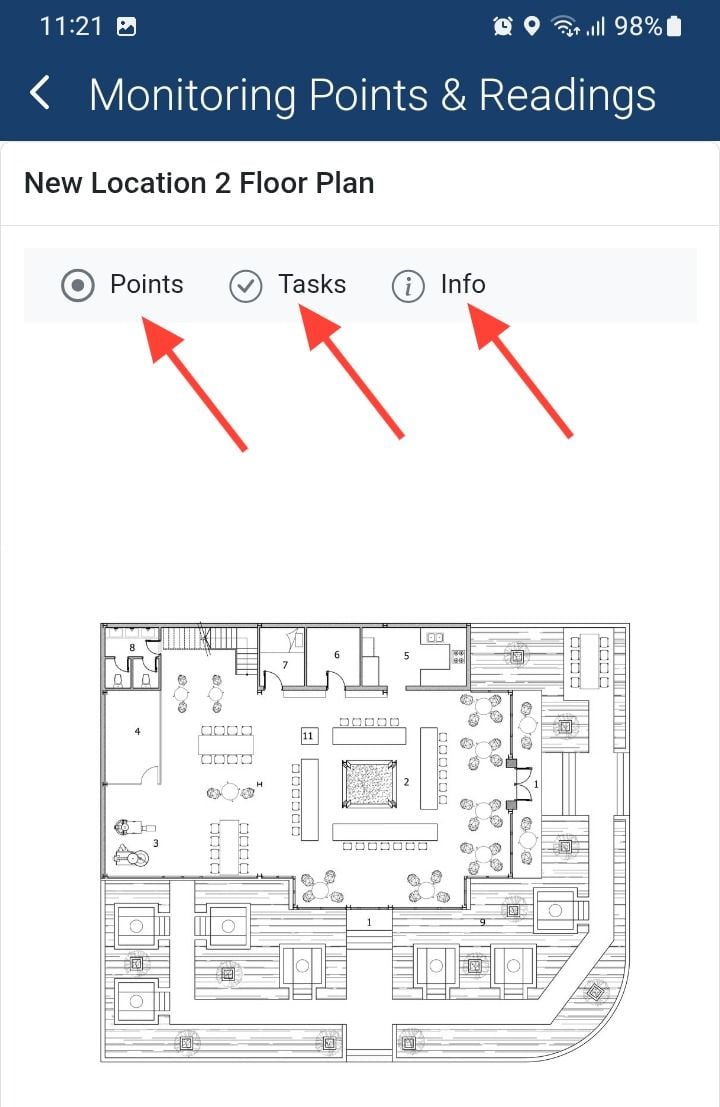
You can select 'Points', 'Task', or 'Info' to insert or add one of them. Let's select 'Points'.
> ### ⚠️ The location can have multiple floor plan
### 7. Insert or Add
You can select 'Points', 'Task', or 'Info' to insert or add one of them. Let's select 'Points'.
 ### 8. Adding Point
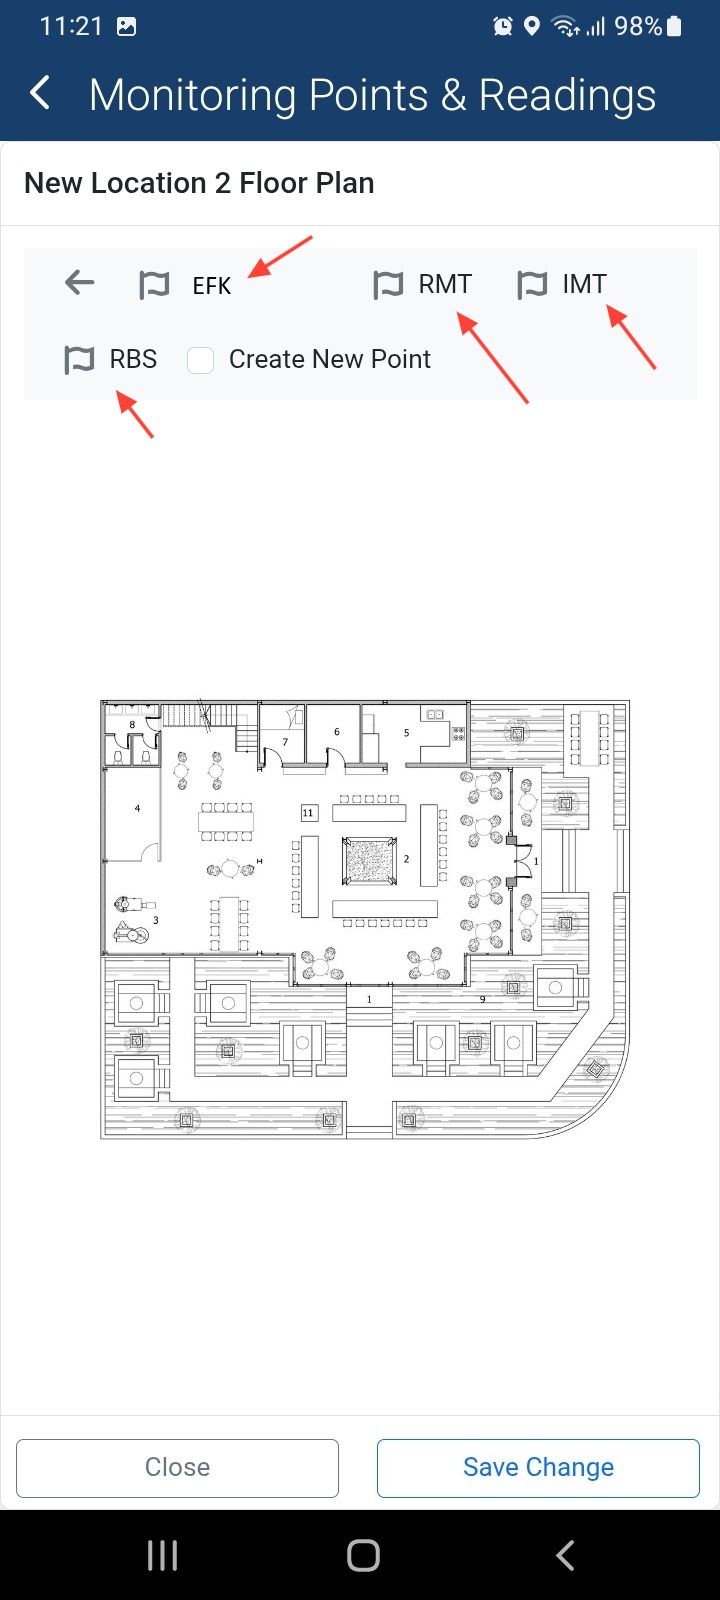
Select the point you want to insert, then drag and drop it onto the floor plan.
Note: You can check 'Create New Point' to create a new point directly from this window.
### 8. Adding Point
Select the point you want to insert, then drag and drop it onto the floor plan.
Note: You can check 'Create New Point' to create a new point directly from this window.
 ### 9.
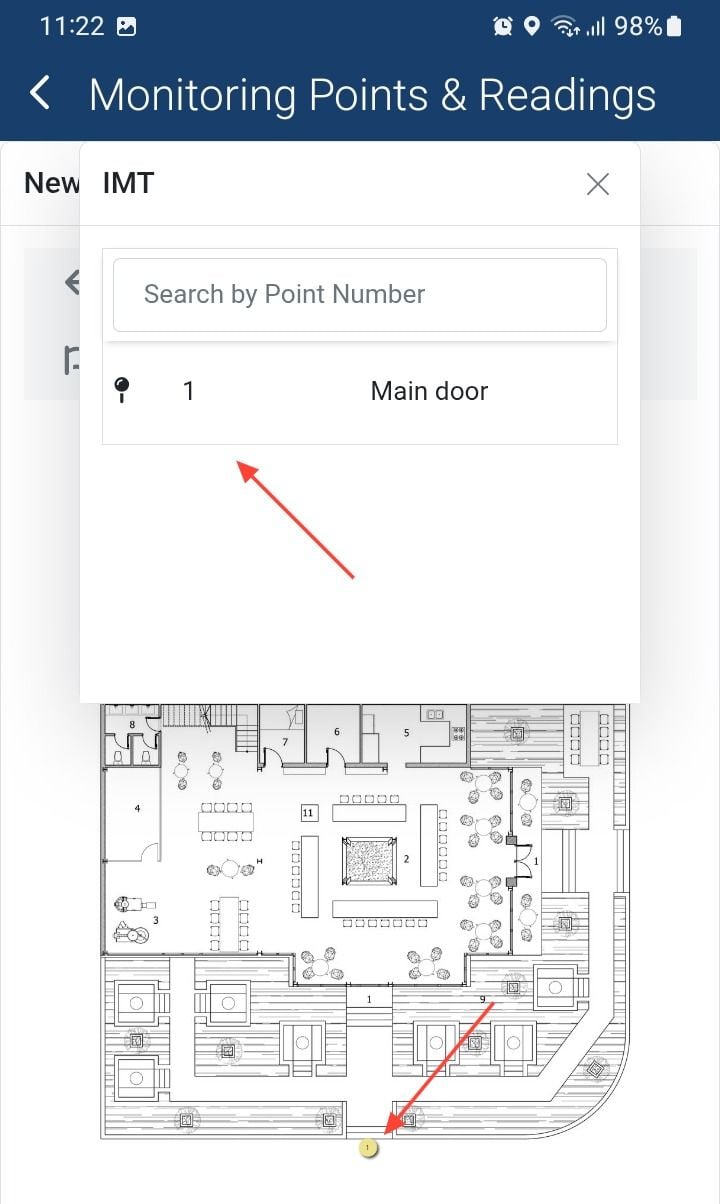 > ### 💡 Note
>
> You can check 'Create New Point' to create a new point directly from this window.
>
> make it with it's own slide
### 10. Adding New Point
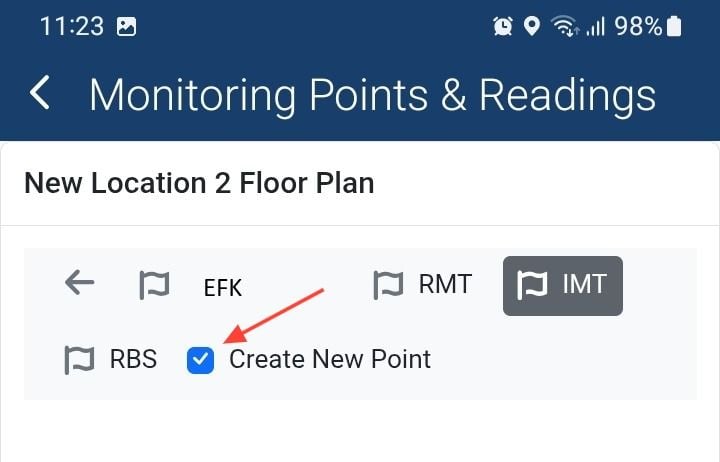
To add a new point, first check the box, select the point then click on the location where you want to define the new point.
> ### 💡 Note
>
> You can check 'Create New Point' to create a new point directly from this window.
>
> make it with it's own slide
### 10. Adding New Point
To add a new point, first check the box, select the point then click on the location where you want to define the new point.
 ### 11.
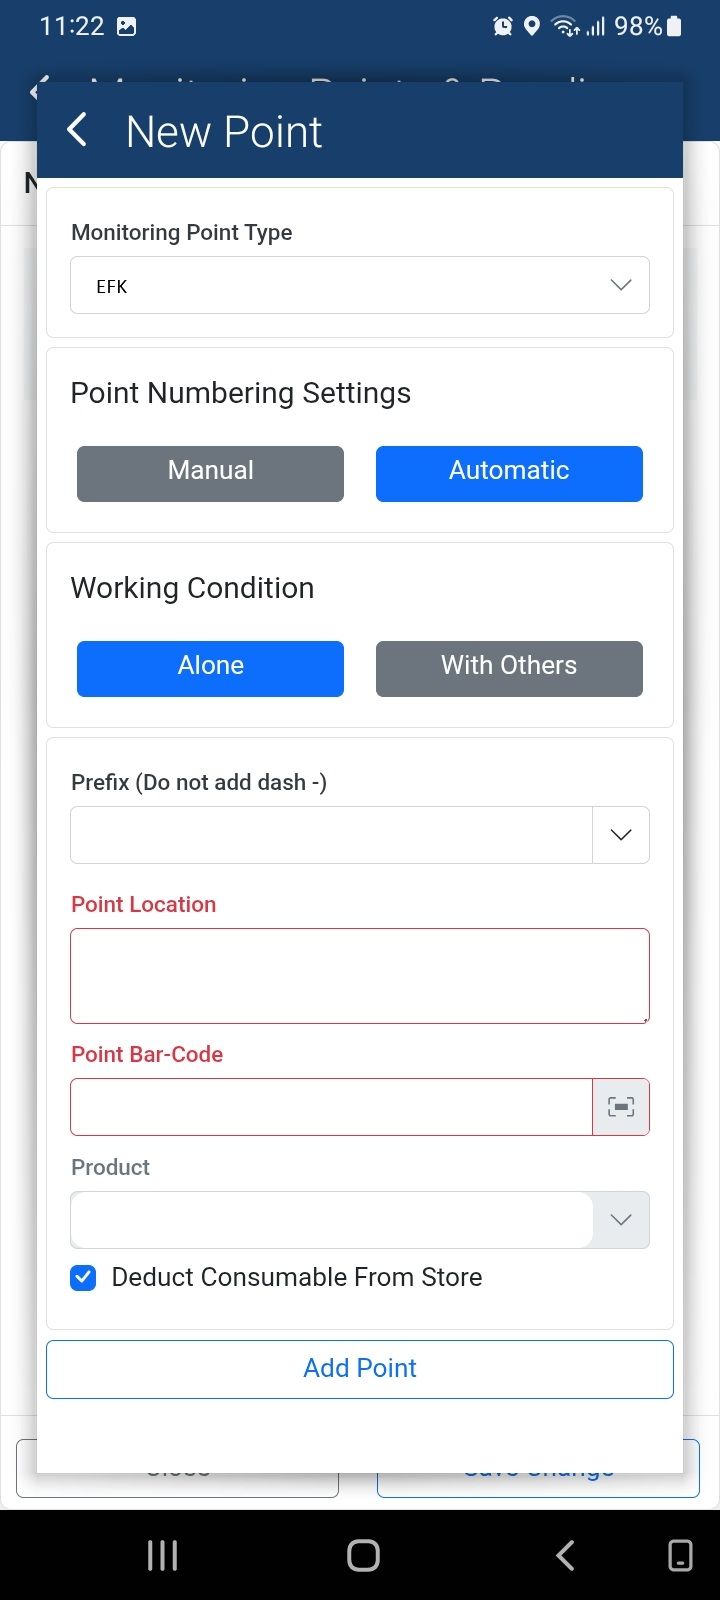
Once all the details are entered, the point will be automatically created on the floor plan.
### 11.
Once all the details are entered, the point will be automatically created on the floor plan.
 ### 12. Save
Once you finish, don’t forget to save.
### 12. Save
Once you finish, don’t forget to save.
 �����������������������