> ## Documentation Index
> Fetch the complete documentation index at: https://docs.fieldiu.com/llms.txt
> Use this file to discover all available pages before exploring further.
# User Managment
> ### ⚠️ This Feature Is for System Admin Only!
>
> Here You Can Add & Edit :
>
> * User Information
>
> * User Passwords
>
> * User Roles
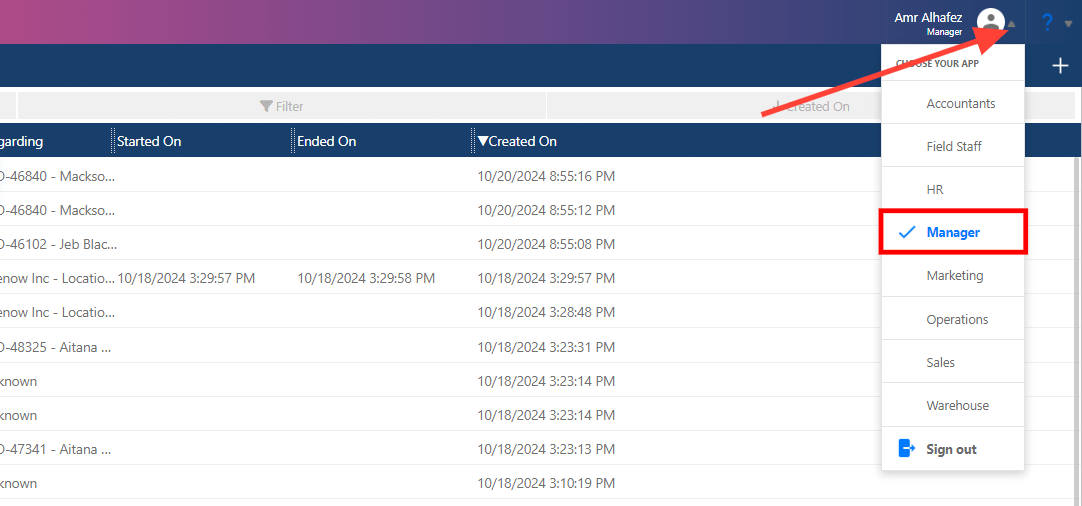
### 1. Manager App
To access the Administrator Console, select the Manager App by clicking the arrow next to your username, then choose "Manager App."
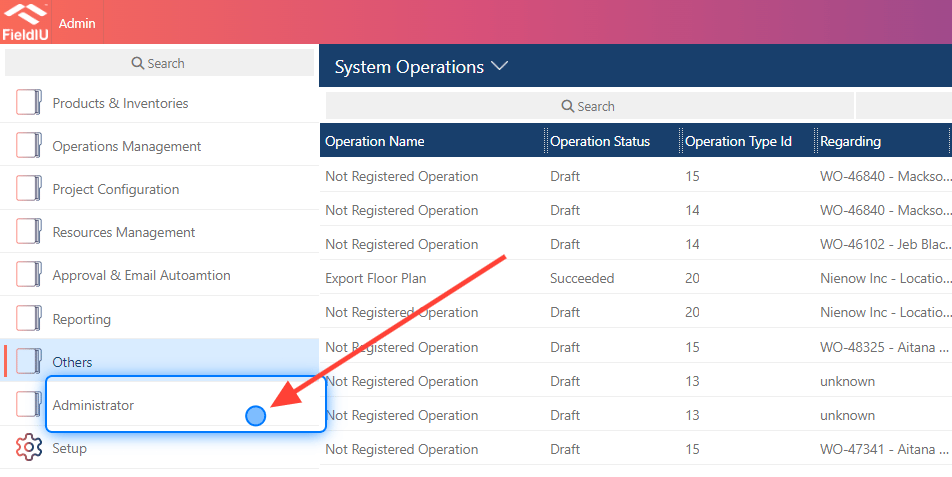
 ### 2. Click on Administrator
From The Side Bar Click on Administrator
### 2. Click on Administrator
From The Side Bar Click on Administrator
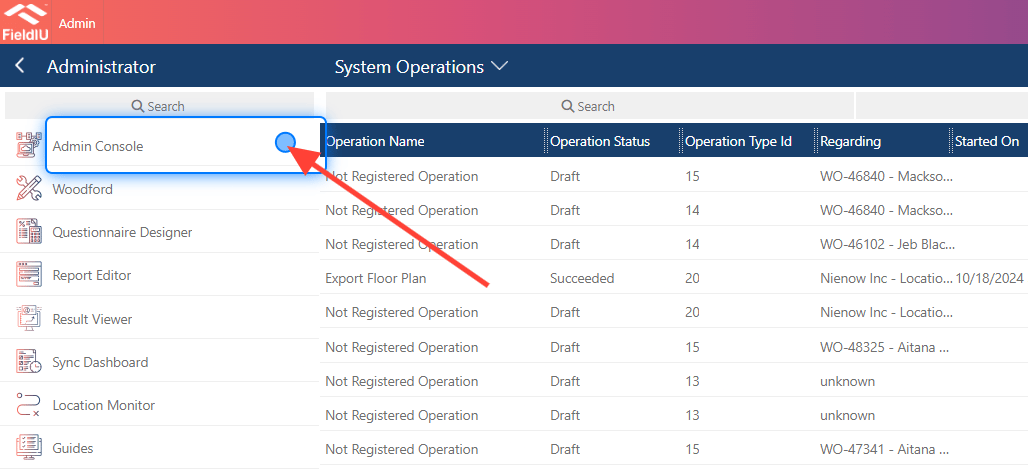
 ### 3. Click on Admin Console
 ### 4. Click on Users
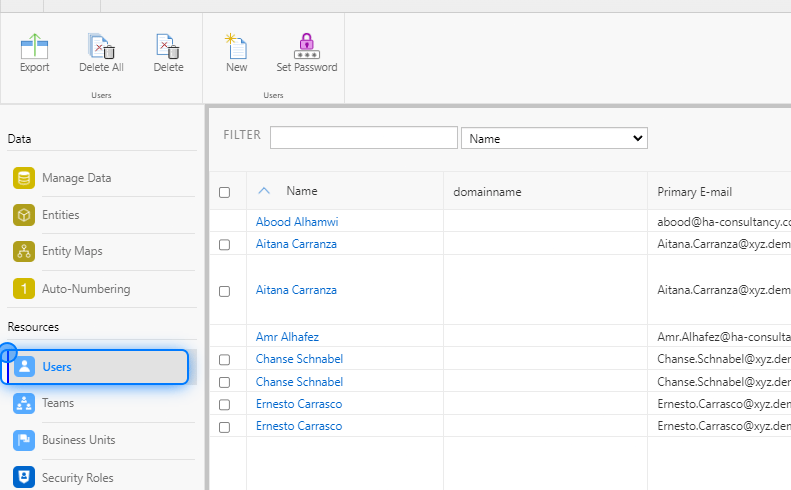 ### 5. Users Console
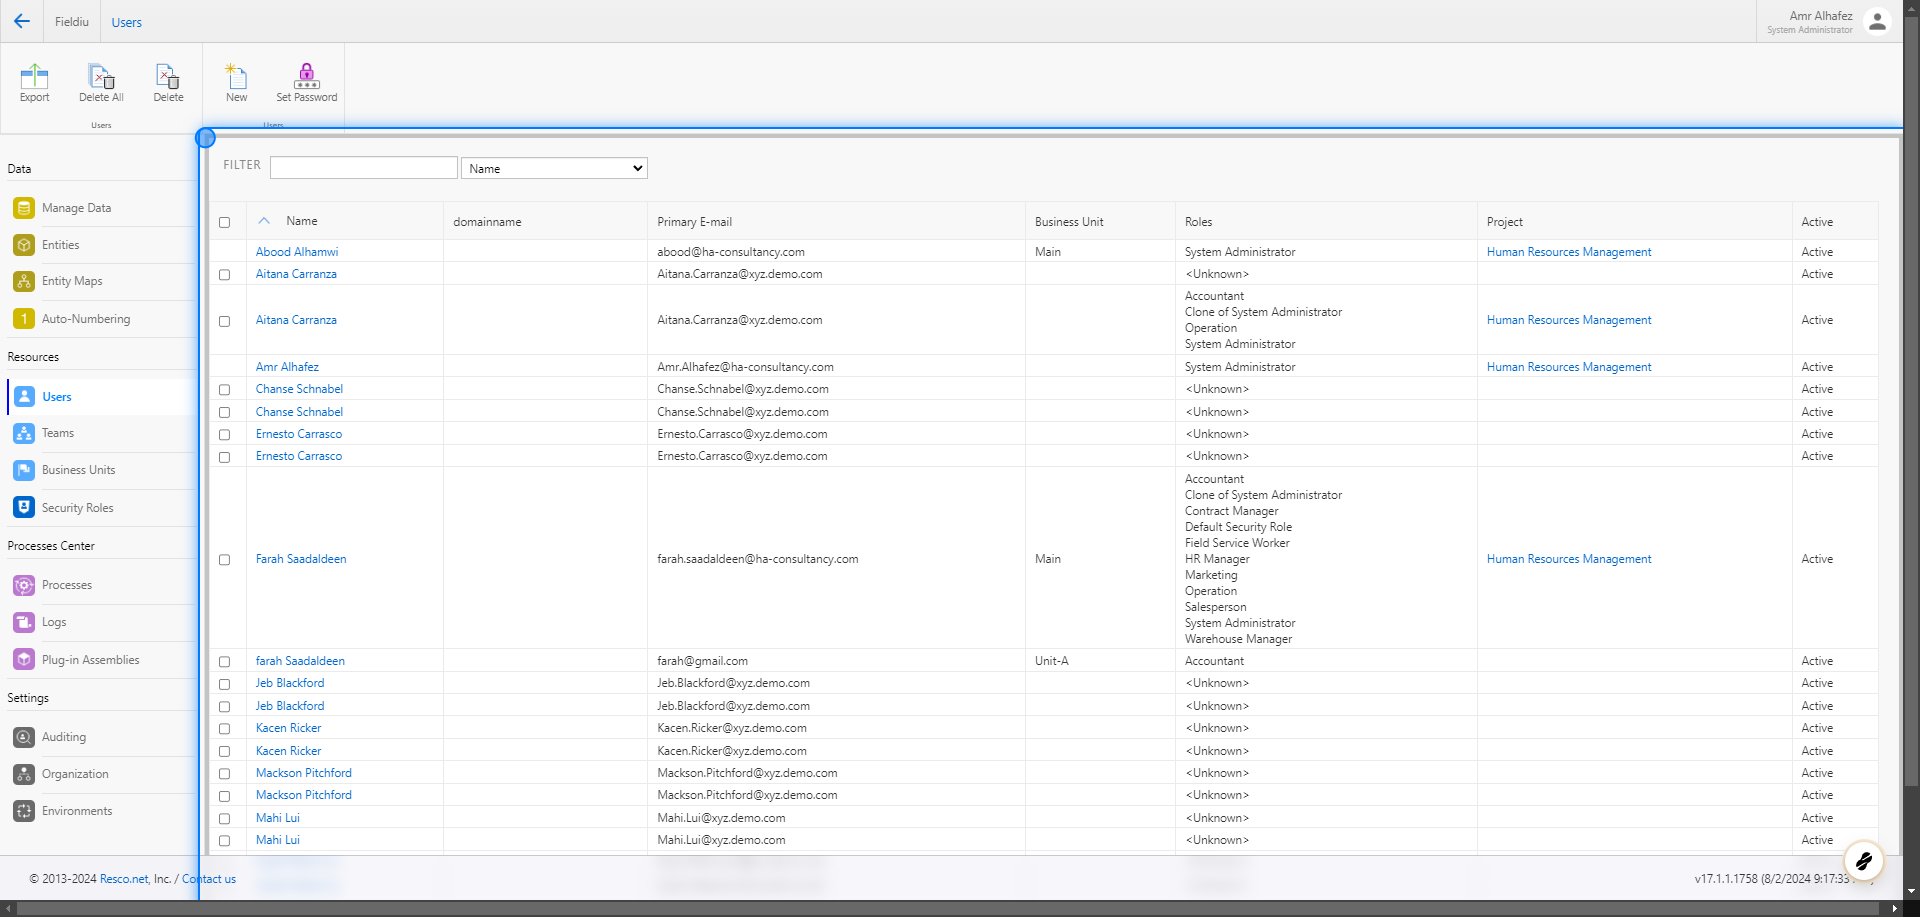
The User Console contains all user details, including names, email addresses, passwords, and roles. From here, you can edit, add, or remove users.
### 5. Users Console
The User Console contains all user details, including names, email addresses, passwords, and roles. From here, you can edit, add, or remove users.
 > ### 💡 Creating Users
>
> In this documentation, we will show you how to create and edit new users. When you click on a user, you will find the same details available for editing.
### 6. New User
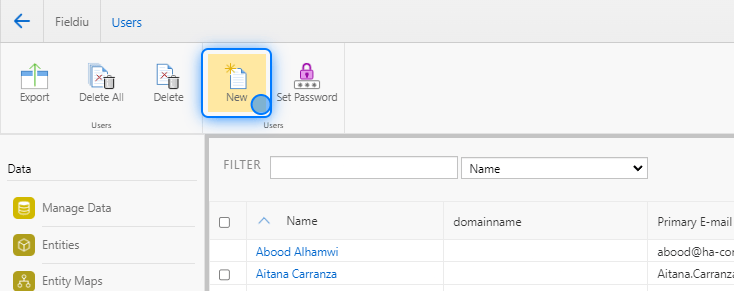
Click On New
> ### 💡 Creating Users
>
> In this documentation, we will show you how to create and edit new users. When you click on a user, you will find the same details available for editing.
### 6. New User
Click On New
 ### 7.
 ### 8. Main Details
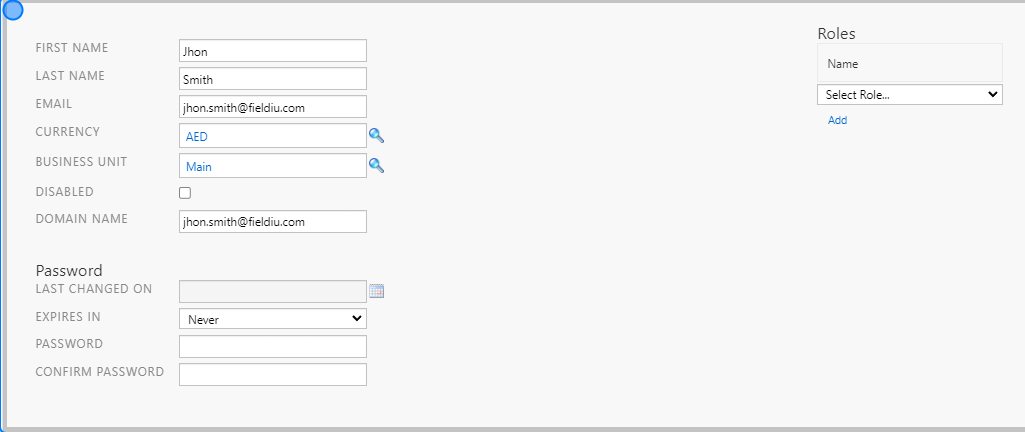
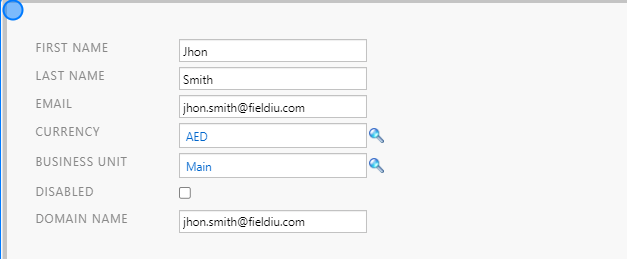
The main details for users are simple. You only need to input the following information:
* **First Name**
* **Last Name**
* **Email**
* **Currency** : The system allows for multiple currencies, so you can select the currency used for the user.
* **Business Unit** : If your company has multiple branches, you can assign the user to the appropriate branch or business unit.
* **Disable** : You can disable users by selecting this option.
* **Domain Name** : This should be a duplicate of the email field.
### 8. Main Details
The main details for users are simple. You only need to input the following information:
* **First Name**
* **Last Name**
* **Email**
* **Currency** : The system allows for multiple currencies, so you can select the currency used for the user.
* **Business Unit** : If your company has multiple branches, you can assign the user to the appropriate branch or business unit.
* **Disable** : You can disable users by selecting this option.
* **Domain Name** : This should be a duplicate of the email field.
 ### 9. Password Section
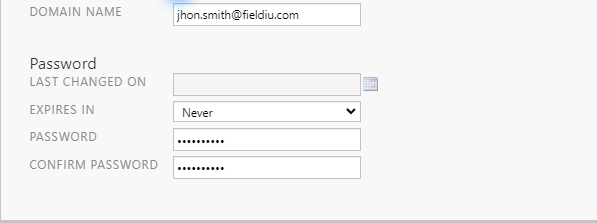
In the Password section, you can view the last time the user changed their password. You can also add a password for new users or change it for existing users. Additionally, you can set a password expiration date, prompting the user to change their password for enhanced security.
### 9. Password Section
In the Password section, you can view the last time the user changed their password. You can also add a password for new users or change it for existing users. Additionally, you can set a password expiration date, prompting the user to change their password for enhanced security.
 > ### ⚠️ Password must contain
>
> * At least one upper case letter (A-Z)
>
> * At least one number (0-9)
>
> * At least one special character
>
> * At least 8 characters
>
> For Example ( ABC123abc@ )\
> !! Use Strong Password Only !!
### 10. Password Expiry
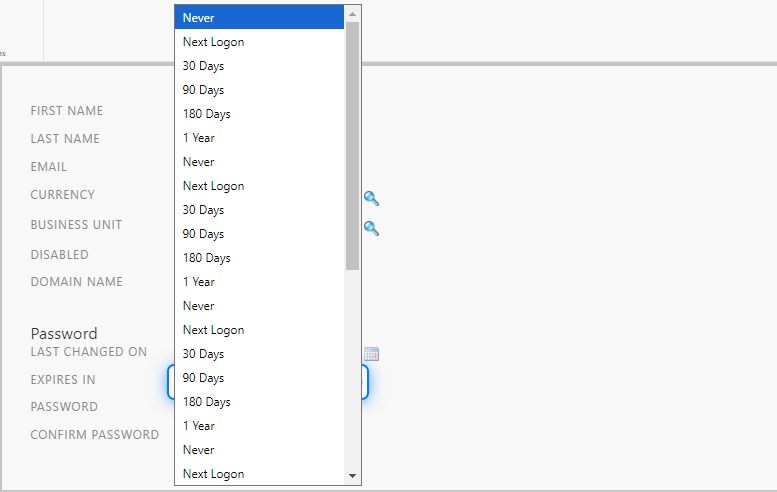
As mentioned, the system allows you to set password expiration for enhanced security. You can choose from the following options:
* **Never**
* **Next login**
* **30 days**
* **90 days**
* **Etc.**
> ### ⚠️ Password must contain
>
> * At least one upper case letter (A-Z)
>
> * At least one number (0-9)
>
> * At least one special character
>
> * At least 8 characters
>
> For Example ( ABC123abc@ )\
> !! Use Strong Password Only !!
### 10. Password Expiry
As mentioned, the system allows you to set password expiration for enhanced security. You can choose from the following options:
* **Never**
* **Next login**
* **30 days**
* **90 days**
* **Etc.**
 ## User Roles
> ### 💡 What Is Roles
>
> Roles define a set of permissions and responsibilities assigned to users or entities, controlling their access to resources and tasks. Roles streamline security by granting specific privileges based on the user’s function
### 11. Select Roles
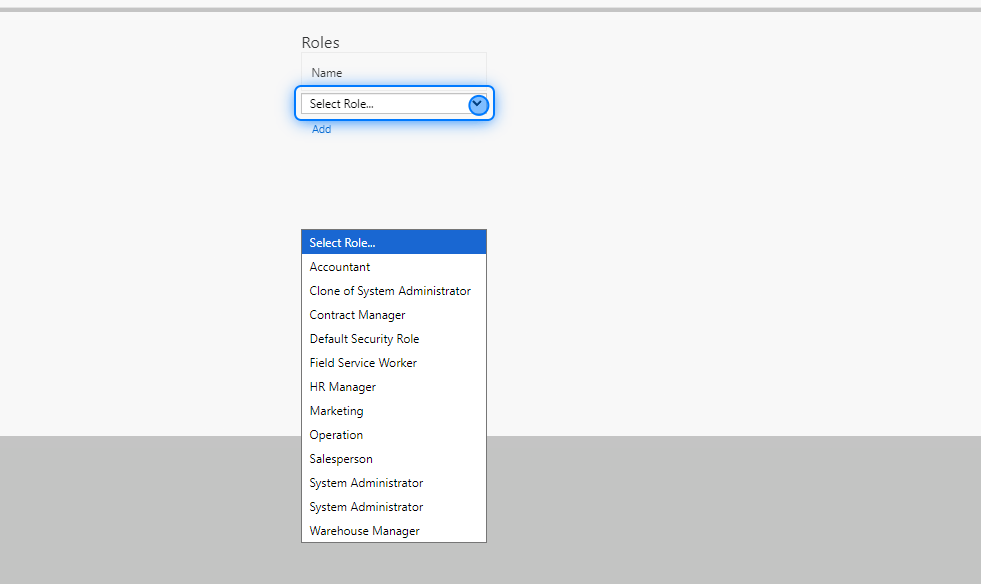
By clicking on the roles list, you will see all the available roles in the system. Click on the desired role to add it.
## User Roles
> ### 💡 What Is Roles
>
> Roles define a set of permissions and responsibilities assigned to users or entities, controlling their access to resources and tasks. Roles streamline security by granting specific privileges based on the user’s function
### 11. Select Roles
By clicking on the roles list, you will see all the available roles in the system. Click on the desired role to add it.
 ### 12. Click on Add
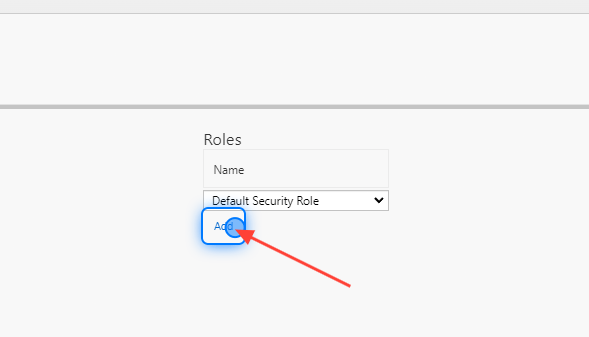
Click on add to confirm.
### 12. Click on Add
Click on add to confirm.
 > ### ⚠️ Default Security Role
>
> All new users must be assigned the "Default Security Role."
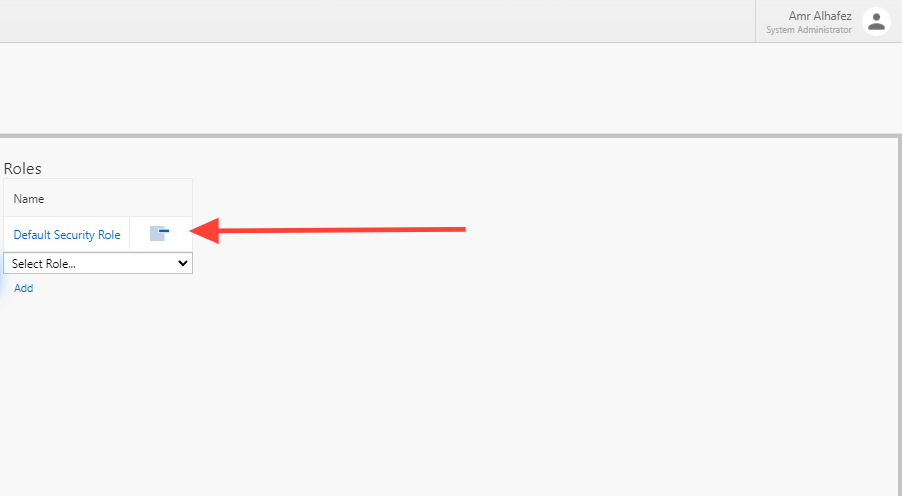
### 13. Delete The Role
Once you add a role, a delete button will appear beside it. You can use this button to remove the role if needed.
> ### ⚠️ Default Security Role
>
> All new users must be assigned the "Default Security Role."
### 13. Delete The Role
Once you add a role, a delete button will appear beside it. You can use this button to remove the role if needed.
 ### 14. Save & Close
Once you finish, don’t forget to save your changes.
### 14. Save & Close
Once you finish, don’t forget to save your changes.
 �����������������������