> ## Documentation Index
> Fetch the complete documentation index at: https://docs.fieldiu.com/llms.txt
> Use this file to discover all available pages before exploring further.
# Approvals
> ### 💡 What is Approvals
>
> In the system, the approval process is a workflow that requires authorized users to review and approve actions, such as canceling work orders or transferring dangerous chemicals from the inventory, before they are finalized. Approvers are notified when needed, and approvals can be set in sequence or parallel. The process is customizable with criteria, conditions, and roles to ensure proper authorization and compliance.
## Access Approval Configurations
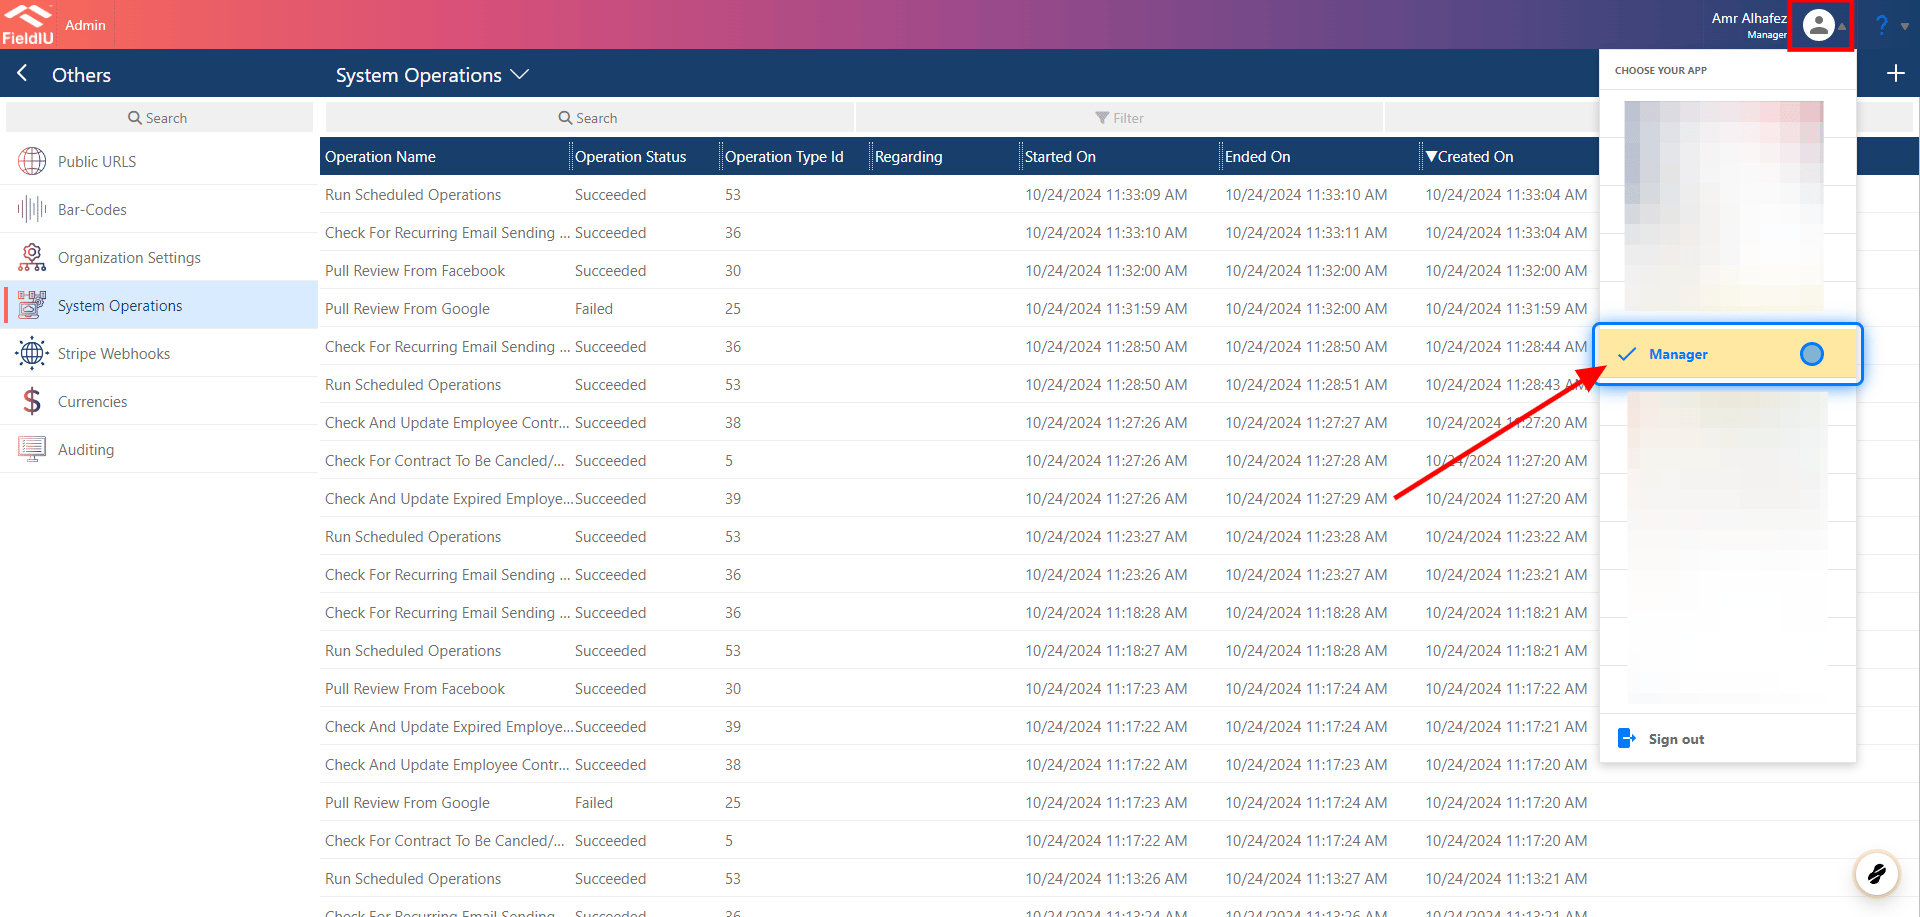
### 1. Manager App
To access the Approval Configurations, you need to open the Manager App.
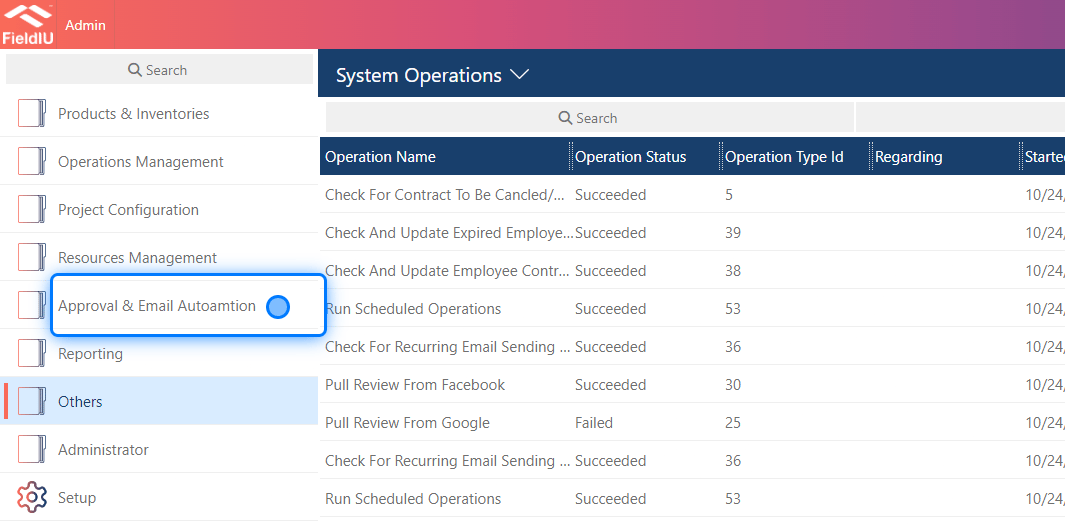
 ### 2. Click on Approval & Email Autoamtion
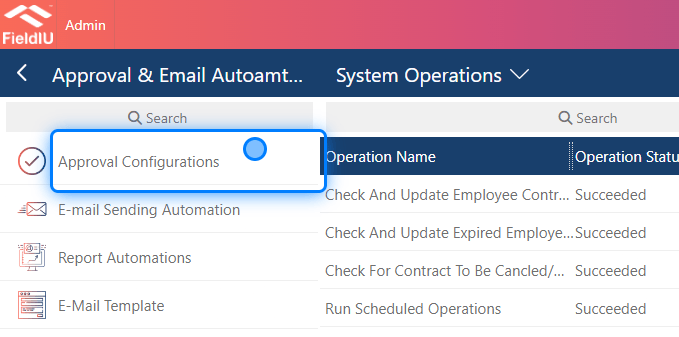
 ### 3. Click on Approval Configurations
 ## Creating Approval
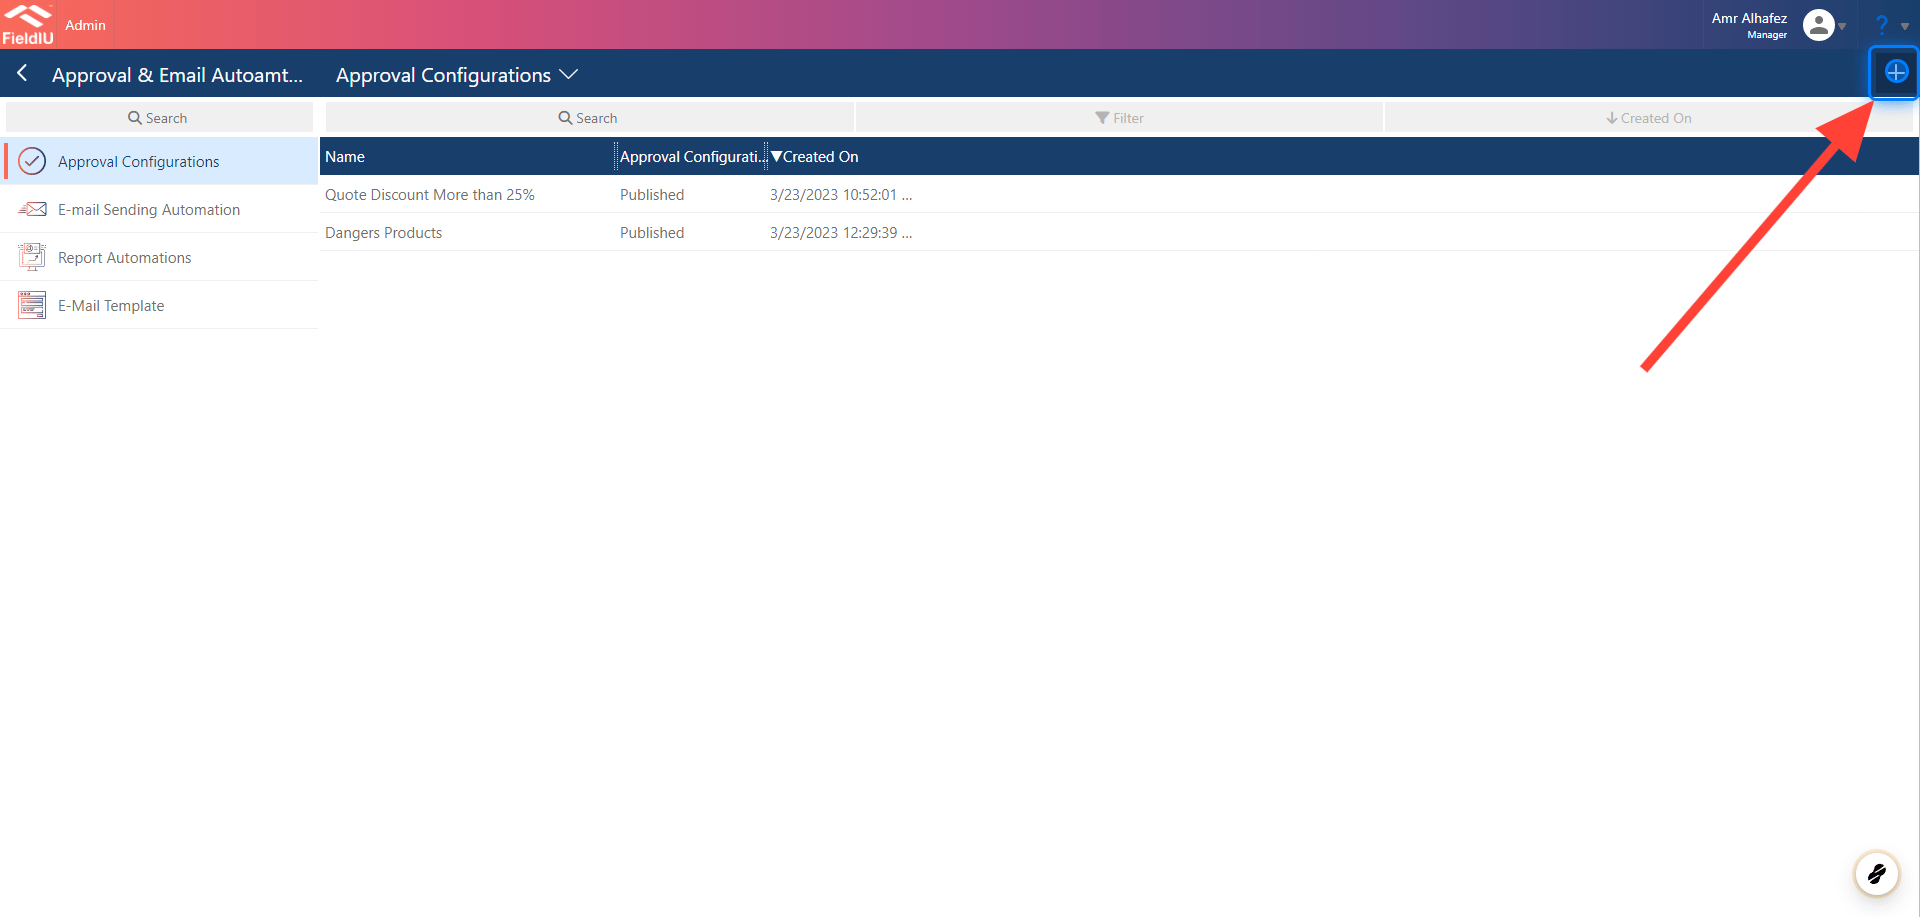
### 4. Click on highlight
## Creating Approval
### 4. Click on highlight
 > ### 💡 Approval Main Window
>
> The approval window consists of two sections:
>
> 1. Main Information
>
> 2. Configuration
### 5. Info
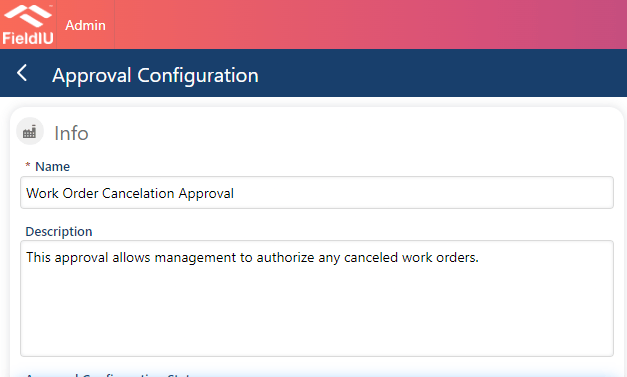
In the 'Main Information' section, you need to provide a name for the approval. Optionally, you can also add a description if necessary.
> ### 💡 Approval Main Window
>
> The approval window consists of two sections:
>
> 1. Main Information
>
> 2. Configuration
### 5. Info
In the 'Main Information' section, you need to provide a name for the approval. Optionally, you can also add a description if necessary.
 ### 6. Approval Configuration Status
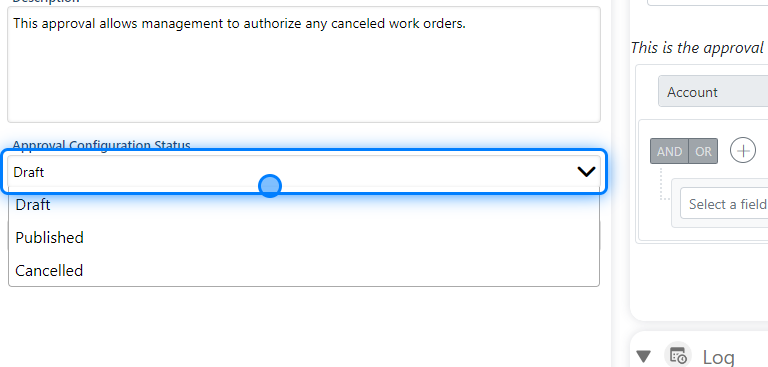
In the 'Main Information' section, you must also set the status for the approval:
* **Draft** : The approval will not be active, and you can edit it later.
* **Published** : The approval is active and functional.
* **Canceled** : The approval is completely stopped and no longer in effect.
### 6. Approval Configuration Status
In the 'Main Information' section, you must also set the status for the approval:
* **Draft** : The approval will not be active, and you can edit it later.
* **Published** : The approval is active and functional.
* **Canceled** : The approval is completely stopped and no longer in effect.
 ### 7. The Error Message
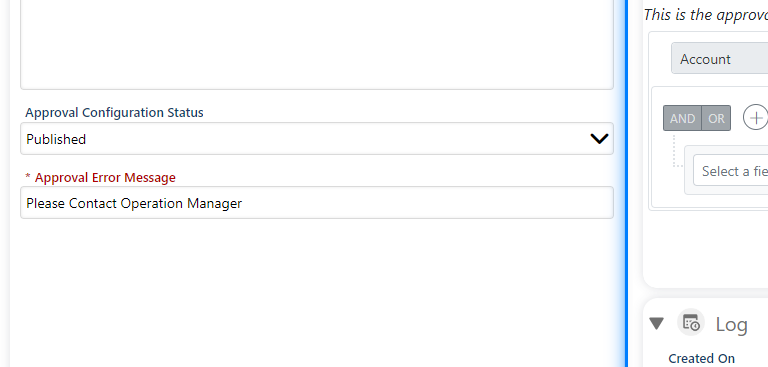
Finally, in the 'Error Message' section, you need to specify the message that will be displayed to the user when the approval is triggered.
### 7. The Error Message
Finally, in the 'Error Message' section, you need to specify the message that will be displayed to the user when the approval is triggered.
 ### 8. Configuration Section
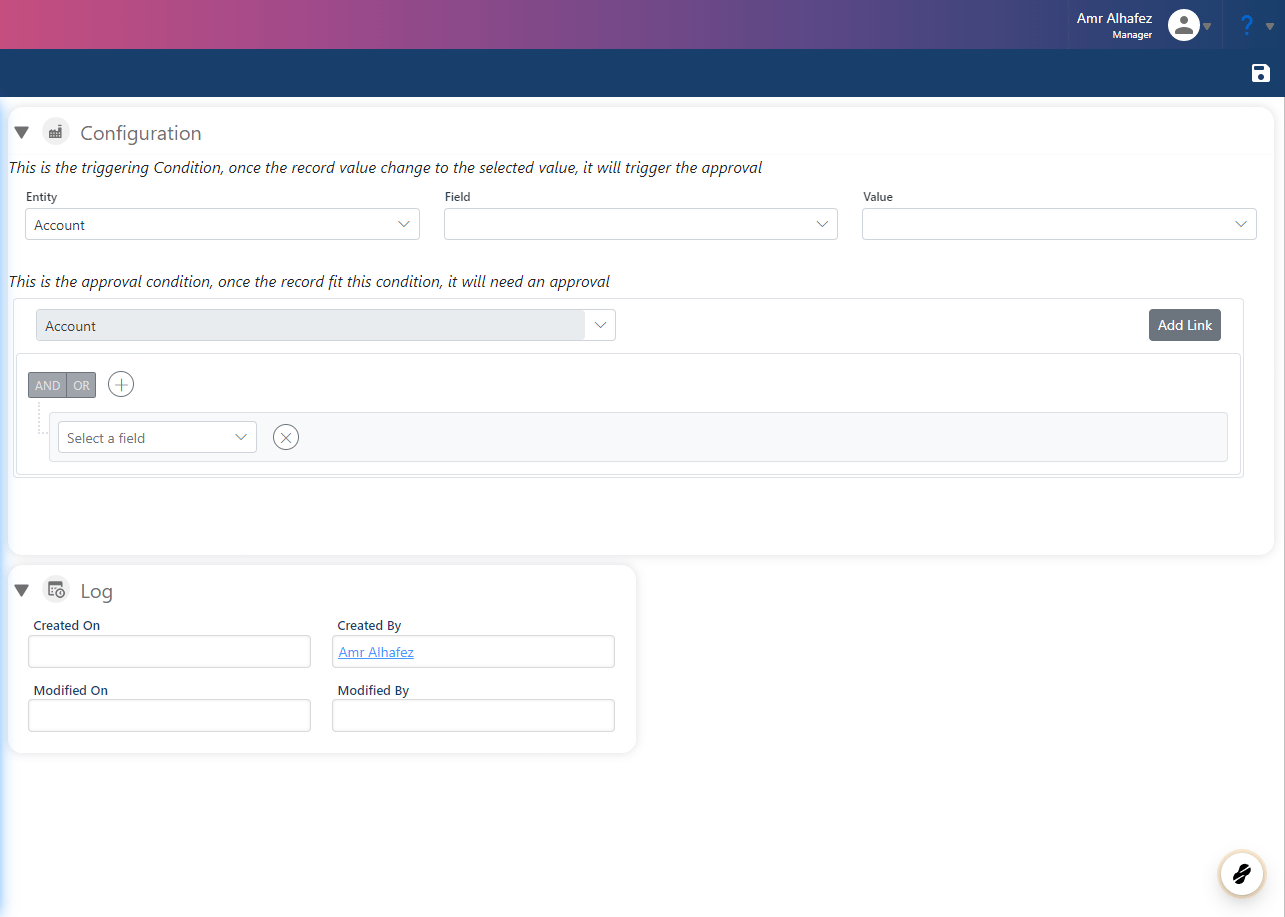
In the 'Configuration' section, there are three main configurations:
1. **Entity Select** : This option is visible by default.
2. **Criteria** : This option is also visible by default.
3. **Approver Assignment** : This option will become visible after saving and is used to specify who will be responsible for approving
### 8. Configuration Section
In the 'Configuration' section, there are three main configurations:
1. **Entity Select** : This option is visible by default.
2. **Criteria** : This option is also visible by default.
3. **Approver Assignment** : This option will become visible after saving and is used to specify who will be responsible for approving
 > ### 💡 Example
>
> Let's create an example where we want to set up an approval process for when users cancel a work order.
### 9. Entity Select
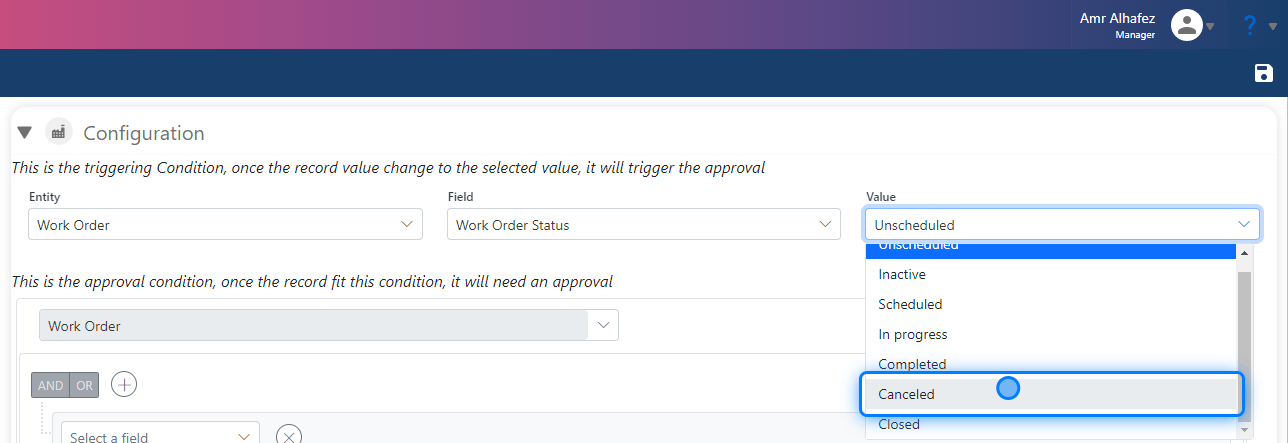
First, select the 'Work Order' entity.\
Next, choose the field that will trigger the function when its value changes ( *in our example, we'll select 'Work Order Status.'* ).\
Lastly, set the condition so that the function is triggered when the status is changed to 'Canceled.'
> ### 💡 Example
>
> Let's create an example where we want to set up an approval process for when users cancel a work order.
### 9. Entity Select
First, select the 'Work Order' entity.\
Next, choose the field that will trigger the function when its value changes ( *in our example, we'll select 'Work Order Status.'* ).\
Lastly, set the condition so that the function is triggered when the status is changed to 'Canceled.'
 ### 10. Function
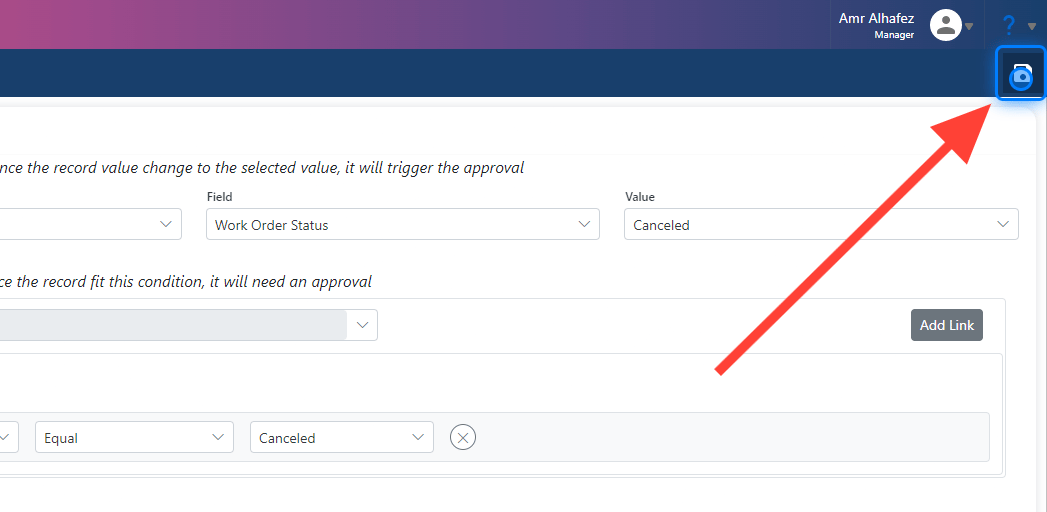
Now, let's create the function:
* The system will automatically select 'Work Order' as the entity since we chose it earlier.
* Select the field we want to check—in this case, 'Work Order Status.'
* Choose the operator 'Equal.'
* Select the status we want to trigger the function, which in our case is 'Canceled.'
### 10. Function
Now, let's create the function:
* The system will automatically select 'Work Order' as the entity since we chose it earlier.
* Select the field we want to check—in this case, 'Work Order Status.'
* Choose the operator 'Equal.'
* Select the status we want to trigger the function, which in our case is 'Canceled.'
 ### 11. Save
 ### 12. Approval Users
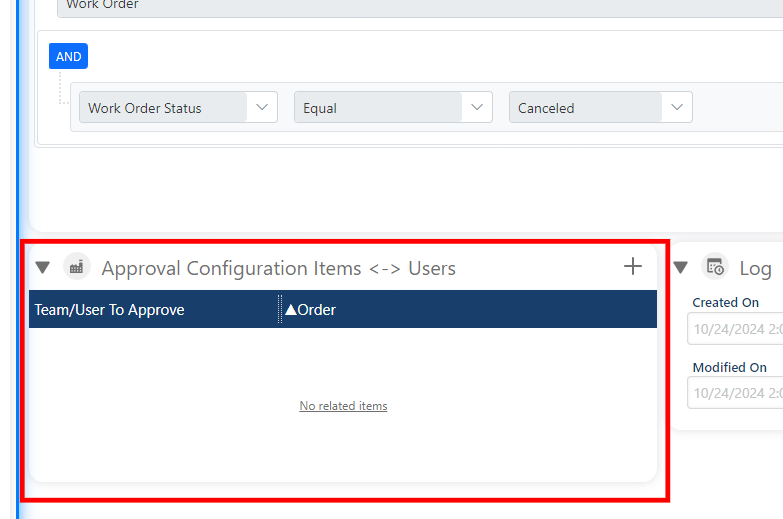
After saving, as we mentioned earlier, a new section will appear. This is where you will select who is responsible for approving the action.
### 12. Approval Users
After saving, as we mentioned earlier, a new section will appear. This is where you will select who is responsible for approving the action.
 ### 13. Selecting Approval Users
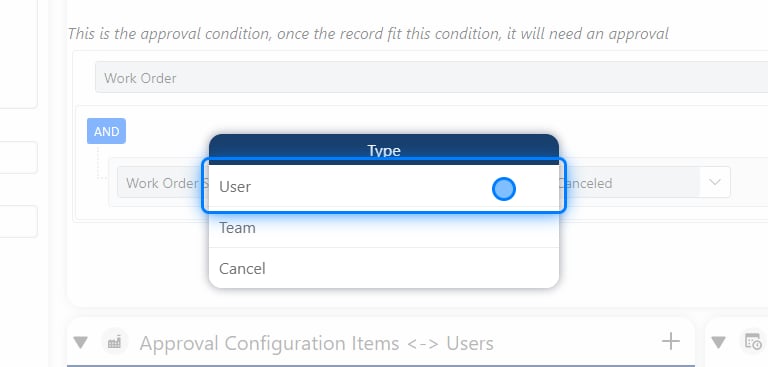
Click on the '+' button to select the users who will be responsible for approving. Once you click the '+' button, a small window will appear asking whether you want the approver to be an individual user or a team
### 13. Selecting Approval Users
Click on the '+' button to select the users who will be responsible for approving. Once you click the '+' button, a small window will appear asking whether you want the approver to be an individual user or a team
 ### 14. Selecting Users
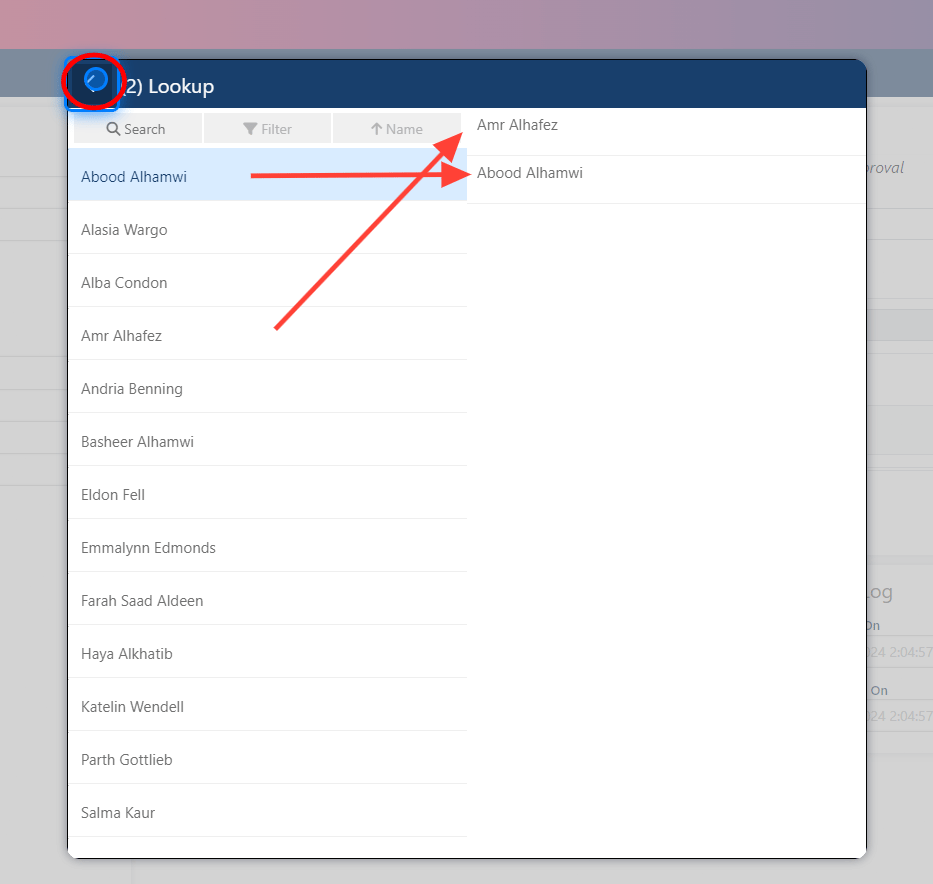
Now, all you need to do is click on the user's name on the left side, and it will automatically be selected. The selected users will appear on the right side. After selecting the approvers, simply press 'Back,' and they will be saved.
### 14. Selecting Users
Now, all you need to do is click on the user's name on the left side, and it will automatically be selected. The selected users will appear on the right side. After selecting the approvers, simply press 'Back,' and they will be saved.
 ### 15. Click on Abood Alhamwi
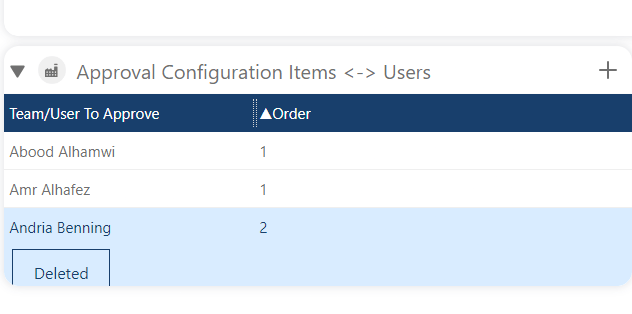
 ### 16. Order
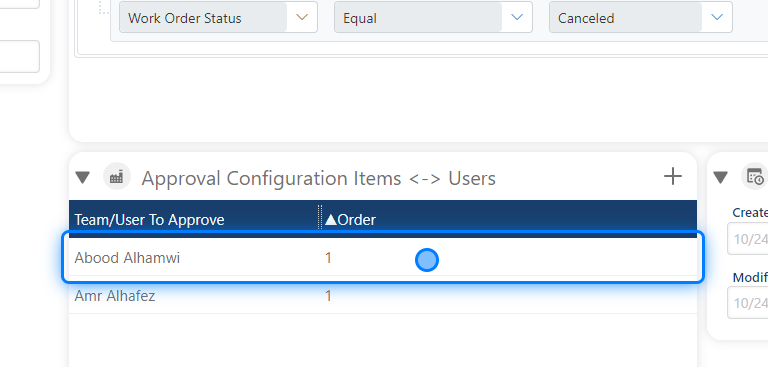
Once you select the users, an order number will appear beside each user. The order is used to sequence the approvals. For example, if the cancellation requires approval first by the team leader and then by the manager, you will need two approvals.
* First, select the team leader as the approver and set their order number to **1** .
* Next, add the manager and set their order number to **2** .
If you have two users with the order number **1** , only one of them needs to approve for the process to continue.
**Example** :
1. **Team Leader** (Order 1)
2. **Manager** (Order 2)
In this setup, the cancellation must first be approved by the team leader, and then by the manager.
### 16. Order
Once you select the users, an order number will appear beside each user. The order is used to sequence the approvals. For example, if the cancellation requires approval first by the team leader and then by the manager, you will need two approvals.
* First, select the team leader as the approver and set their order number to **1** .
* Next, add the manager and set their order number to **2** .
If you have two users with the order number **1** , only one of them needs to approve for the process to continue.
**Example** :
1. **Team Leader** (Order 1)
2. **Manager** (Order 2)
In this setup, the cancellation must first be approved by the team leader, and then by the manager.
 > ### 💡 Orders
>
> Add Another user to so you can see the orders
### 17. Order Selection
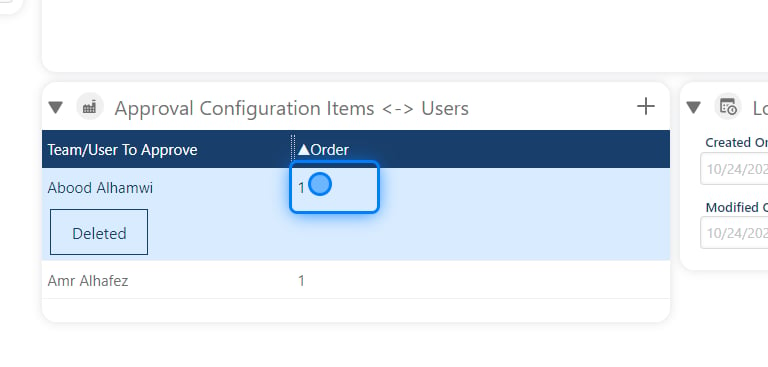
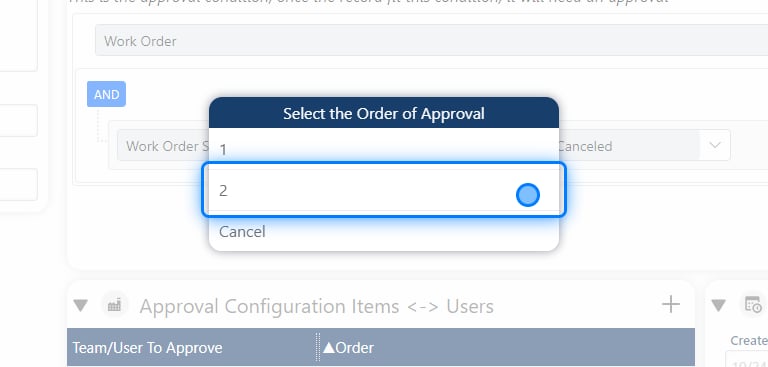
As we mentioned before, when you add another user, the system will ask you to specify the order for that user. After selecting the user, you can easily choose the order number to determine when their approval is required in the process.
> ### 💡 Orders
>
> Add Another user to so you can see the orders
### 17. Order Selection
As we mentioned before, when you add another user, the system will ask you to specify the order for that user. After selecting the user, you can easily choose the order number to determine when their approval is required in the process.
 ### 18.
 ### 19. Publish & Save
 �����������������������